


Deploy Machine Learning Models Using the Power of Streamlit!
Last Updated on February 20, 2024 by Editorial Team
Author(s): Eashan Mahajan
Originally published on Towards AI.
With machine learning continuing to dominate the technology landscape, people have eagerly jumped on the hype train and dived deep into the vast realm. As datasets have popped over the internet, people use them to create various models, fine-tuning their skills. Now, people may be able to showcase their projects on GitHub and show them to their friends and family. A common question has surfaced multiple times — how do I deploy my model onto the web?
Now you think the answer may be obvious. Learn a web development program. There, the problem was solved. Well, it’s not as simple as that. Beginners in machine learning may not show any interest in learning a web development language such as JavaScript or PHP. Some people may not have time, either.
Several people have recognized this dilemma, and a few have decided to solve the issue. Streamlit is an open-source app framework for Python. Its primary purpose is to create spectacular web applications for machine learning. The best part — it’s compatible with several well-known and liked Python libraries. Numpy, Pandas, Pytorch, Matplotlib, Sci-kit, etc.
Installing Streamlit
Now to download Streamlit, you’re going to make sure you have the following things prepped. Those are:
- Have an IDE (VS Code or Pycharm, for example)
- Have Python downloaded (3.7–3.10)
- Have your virtual environment ready
Once you have everything set, open up your terminal (either in the IDE or the Command Prompt) and type:
pip install streamlit
There you go! You’re now ready to test out the power of Streamlit.
Setting Up the App
For the purpose of this article, I’m going to be using a dataset that tells you the difference between red and white wine. If you want to use it, you can find the dataset here: https://www.kaggle.com/datasets/ruthgn/wine-quality-data-set-red-white-wine.
Once you’ve created your model, create a separate Python file. You’re going to want to have the following imports:
import pickle
import streamlit as st
The pickle module allows for a user to serialize their data and convert the structure into a linear form that can stored and transported over a network. In this instance, you’ll be able to take the model you created and save it in order to utilize it in your web application. To do so, add the following line of code at the bottom of your model program:
import pickle
pickle_out = open("classifier.pkl", "wb")
pickle.dump(rf_model, pickle_out)
pickle_out.close()
Now “rf_model” was the name for the model I created, so yours will be different. But that command will take your creation and serialize it, saving it in the same folder and allowing you to use it again.
Go back to the file you created, and below the imports, you’re going to want to load in the file using:
pickle_in = open('classifier.pkl', 'rb')
classifier = pickle.load(pickle_in)
Before we go any further, let me introduce some functions Streamlit possesses.
- title() — This will appear at the top of your web application. It gives a title to your web app, almost like in an essay.
- markdown() — Allows you to put text onto your webpage.
- header() — Allows you to put a header. The text will be slightly larger than the text from the markdown function but remain smaller than the title function.
- text_input() — Allows you to put in text that can tell your viewer what values they need to enter into the textbox that appears right below it.
- button() — Displays a button widget. The method allows for actions to happen when a user clicks it.
- success() — Displays a message only when an action is successful.
These methods are the ones that we’re going to be using now to develop our web app. Firstly, you want to give your creation a title for people to know. Type:
st.title("Wine Type Prediction")
From here, you’re going to want to add a little description of what your program will do. Use the markdown method to accomplish this goal:
st.markdown("This application allows a user to input in 13 qualities typically found within wine."
 "The app will then predict whether the wine is either a white wine or red wine."
 "The qualities that will be used to judge the type are as follows:"
 "Fixed acidity, volatile acidity, citric acid,"
 "residual value, sugar chlorides, free sulfur dioxide,"
 "total sulfur dioxide, density, ph,"
 "sulphates, alcohol, quality")
You can put whatever you want into the description, or you can follow what I put into it. Now before we move on, lets test the progress so far. Open your terminal, and run the command:
streamlit run app.py
This is what it should look like:

From here, you could explore changing colors or adding sliders to your web app. For this article, I am going to go straight into how you can add text inputs.
Before we go any further, you want to check what parameters your model takes in. Look at what inputs you kept for your model, and make a list of them. In my case, I have 13 inputs that are required for the model to accurately predict between a red and white wine.
Once you’ve established what inputs are needed from the user, it’s time for the most arduous part. You’re going to have to create text boxes for each parameter. Use the text_input function as such:
fixed_acidity = st.text_input("Enter the fixed acidity")
That's just one. The full code is as follows:
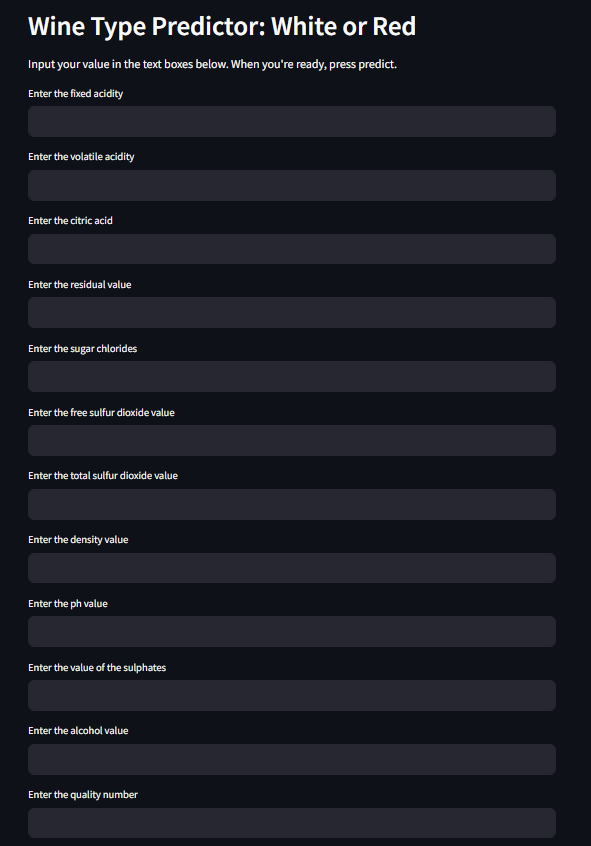
st.header("Wine Type Predictor: White or Red")

st.markdown("Input your value in the text boxes below. When you're ready, press predict.")
fixed_acidity = st.text_input("Enter the fixed acidity")
volatile_acidity = st.text_input('Enter the volatile acidity')
citric_acid = st.text_input("Enter the citric acid")
residual = st.text_input("Enter the residual value")
chlorides = st.text_input("Enter the sugar chlorides")
free_sulfur_dioxide = st.text_input("Enter the free sulfur dioxide value")
total_sulfur_dioxide = st.text_input("Enter the total sulfur dioxide value")
density = st.text_input("Enter the density value")
pH = st.text_input("Enter the ph value")
sulphates = st.text_input("Enter the value of the sulphates")
alcohol = st.text_input("Enter the alcohol value")
quality = st.text_input("Enter the quality number")
This is what it looks like now:
Alright, now that we’ve got user input covered, you’re probably wondering: How do I utilize the model now? We’re about to cover that right now.
Implementing the Model
Right right below all the code, create a variable called result that currently stores an empty string. This variable will be the output returned by our model. From there, create a function called “prediction”. Within that function, you’re going to want its parameters to be the parameters you chose for your model, like the following:
def prediction(fixed_acidity, volatile_acidity, citric_acid, residual, chlorides, free_sulfur_dioxide, total_sulfur_dioxide, density, pH, sulphates, alcohol, quality):
 prediction = classifier.predict([[fixed_acidity, volatile_acidity, citric_acid, residual, chlorides, free_sulfur_dioxide, total_sulfur_dioxide, density, pH, sulphates, alcohol, quality]])
 return prediction
In case you don’t remember, “classifier” is the name of the variable we created in the beginning to load in the serialized model. It takes all the inputs the user provides, inserts them into a 2D array for our classifier, and finally returns the prediction. The function also returns an array, with the first element in the array being its prediction.
Now the last step is to create a button using the button method that Streamlit provides. Using this, you want to take your result variable and set it equal to a call to the prediction function. The prediction function will take in the inputs that the user provides, as such:
if st.button("Predict"):
 result = prediction(fixed_acidity, volatile_acidity, citric_acid, residual, chlorides, free_sulfur_dioxide, total_sulfur_dioxide, density, pH, sulphates, alcohol, quality)
Now the final step: Utilize the “success” method to display the model’s accomplishment!
st.success("The output is " + result[0])
There you go! Use “streamlit run app.py” in your terminal to test it out. Once you input your parameters and hit the predict button, you will receive your prediction.

Deploying the App
Now that you’ve finished coding the application, what you’re going to want to do is head over to Github and push your files to a newly created repository. Make sure to build a requirements.txt file that contains the Python packages Streamlit needs to download for the app to run smoothly. The included files should be:
- Your app.py, which contains the code for the web app
- Your file containing the code for the model
- Your .pkl file
- The requirements.txt file contains all of your dependencies.
If you want an example requirements.txt, look at mine below:
scikit-learn==1.1.2
numpy==1.23.4
streamlit==1.25.0
pandas==1.5.1
Once you’ve finished with your repo, head over to https://share.streamlit.io/ and make an account. Once you’ve done that, click “New app”.

Fill in your repo, branch, and file path information. If you want a shortcut, you can click “Paste GitHub URL” instead. Paste the link that directly connects to your repo.
Now the final step: Wait. Normally it only takes a couple of minutes to get the app up and running, but in case you have a lot of dependencies, Streamlit will take some time in getting everything set up. But once it's all loaded in, you’re all done. Congrats, you’ve deployed your model to the web!
Closing Thoughts
Streamlit is a powerful tool that anyone can utilize to deploy their own web applications. Being able to quickly develop a web app and publish it is a strong tool. For beginners, this can be an easy way to get an introduction to how you can deploy your model.
One thing to remember is that Streamlit isn’t built for production. While it may be good for projects of your own, you won’t be able to deploy this to production. It’s a good idea that once you’ve got the hang of Streamlit and explored more of its functionality, start learning web development. It’ll allow you to create more flexible applications and to express yourself in ways you didn’t think were possible.
Streamlit is a valuable resource for anyone who wants to deploy a web application fast and efficiently. This article covered some basic functionality, but I highly recommend visiting their documentation and looking at their more advanced functions. I’ve linked my Streamlit app below, and you may notice I added extra functionality to it. Their documentation is a valuable source of information. For now, that’s all I’ve got for you and thanks for reading!
Links
Join thousands of data leaders on the AI newsletter. Join over 80,000 subscribers and keep up to date with the latest developments in AI. From research to projects and ideas. If you are building an AI startup, an AI-related product, or a service, we invite you to consider becoming a sponsor.
Published via Towards AI
Towards AI Academy
We Build Enterprise-Grade AI. We'll Teach You to Master It Too.
15 engineers. 100,000+ students. Towards AI Academy teaches what actually survives production.
Start free — no commitment:
→ 6-Day Agentic AI Engineering Email Guide — one practical lesson per day
→ Agents Architecture Cheatsheet — 3 years of architecture decisions in 6 pages
Our courses:
→ AI Engineering Certification — 90+ lessons from project selection to deployed product. The most comprehensive practical LLM course out there.
→ Agent Engineering Course — Hands on with production agent architectures, memory, routing, and eval frameworks — built from real enterprise engagements.
→ AI for Work — Understand, evaluate, and apply AI for complex work tasks.
Note: Article content contains the views of the contributing authors and not Towards AI.
Related posts
Recent Posts
")


")


