


YOLOv8 Is Here and It Gets Better!
Last Updated on January 30, 2023 by Editorial Team
Author(s): Puneet Jindal
Originally published on Towards AI.
YOLOv8 Is Here, and It Gets Better!
YOLOv8 is the latest installment in the highly influential family of models used for object detection and image segmentation. It features a new architecture, new convolutional layers, and a new detection head.
It is also significantly faster and more accurate than previous versions of YOLO, making it an excellent choice for real-time object detection. Additionally, YOLOv8 supports the latest computer vision algorithms, including instance segmentation, which allows for the detection of multiple objects in an image.
How Yolov8 is better than previous popular versions of Yolo, such as Yolov5, Yolov7, etc?
- Firstly, YOLOv8 introduces a new backbone network, Darknet-53, which is significantly faster and more accurate than the previous backbone used in YOLOv7. DarkNet-53 is a convolutional neural network that is 53 layers deep and can classify images into 1000 object categories, such as keyboard, mouse, pencil, and many animals.
- Yolov8 makes bounding box predictions similar to image segmentation, i.e., pixel-wise. To achieve this, they have introduced anchor free detection head. To understand more about what is anchor free object detection, you can read here
- Additionally, YOLOv8 is more efficient than previous versions because it uses a larger feature map and a more efficient convolutional network. This allows the model to detect objects in a more accurate and faster way. With a larger feature map, the model can capture more complex relationships between different features and can better recognize patterns and objects in the data. Additionally, a larger feature map also helps to reduce the amount of time it takes to train the model and can help to reduce overfitting.
- Additionally, YOLOv8 also uses feature pyramid networks, which helps to better recognize objects of different sizes, which improves its overall accuracy. Feature Pyramid networks are a concept that uses different scales of feature maps(similar to making predictions on different sizes of images) coupled with skip connections to predict smaller and bigger objects more accurately. More can be read here
- Finally, YOLOv8 introduces a user-friendly API, allowing users to quickly and easily implement the model in their applications.
Let's understand this in a bit more detail with a quick to-try, hands-on explanation
You should visit https://github.com/ultralytics/ultralytics
Before moving further, it's important to understand the relationship between Ultralytics and Yolo.
Ultralytics is the developer of YOLO (You Only Look Once), a popular object detection model used in computer vision applications. YOLO is a deep learning algorithm that is used to detect objects in images and videos, and the Ultralytics package provides tools and libraries to help developers create and deploy YOLO models. The package includes a range of pre-built models and tutorials, as well as tools for training, validating and inferring models.
Scroll down to

As you can see above, click on “Open in Colab,” as pointed out here. Otherwise, I am sharing the same link here https://colab.research.google.com/github/ultralytics/ultralytics/blob/main/examples/tutorial.ipynb
Click on connect to start using the Google Colab. If you are new to Google Colab, then click on the “How to start using Google Colab tutorial?”
The moment you visit the link, it will open the tutorial as below, where the first line is about Setup
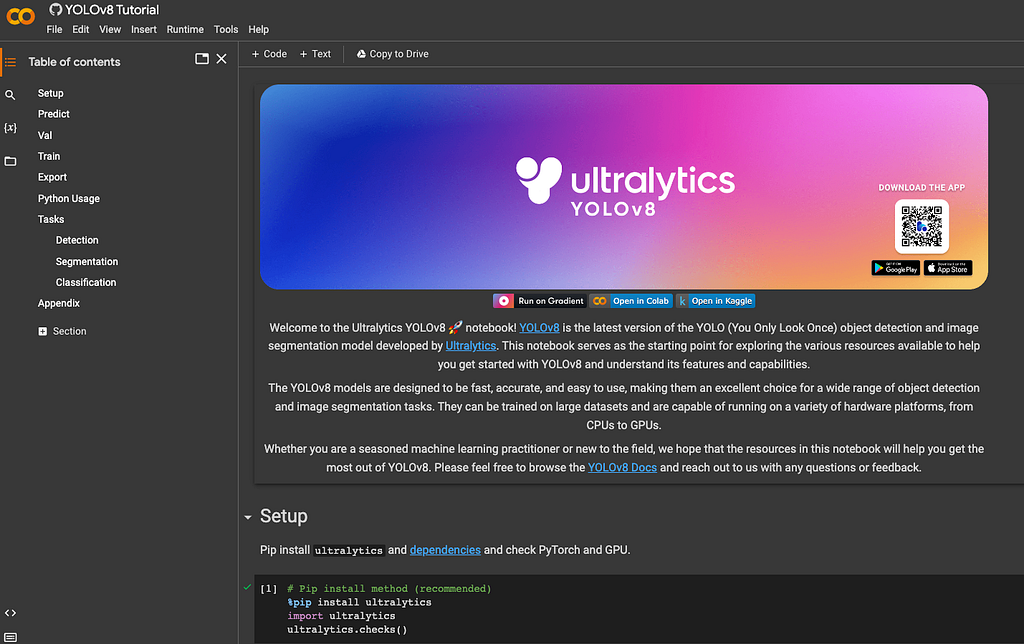
Let's dive deep into each cell of the code
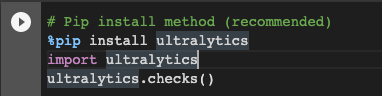
The above lines of code install the Ultralytics package so that we can use the YOLO algorithm. By default, it will install version 8 while I am writing this article. Alternatively, you can do
%pip install ultralytics==8.0.3
After installing the next line of code, importing the Ultralytics module and then we try to check whether all the required dependencies and compatible hardware are present or not.
E.g., the following is the output when I executed checks on my machine.
Ultralytics YOLOv8.0.3 🚀 Python-3.8.16 torch-1.13.0+cu116 CUDA:0 (Tesla T4, 15110MiB) Setup complete ✅ (2 CPUs, 12.7 GB RAM, 24.3/78.2 GB disk)
One thing to note here is the below code. Don’t run this code in case you find it. A few others and I reported the issue at https://github.com/ultralytics/ultralytics/issues/232

Let’s move on to the next step
# Run inference on an image with YOLOv8n

Inference means a prediction that we can run on an image to detect the label, whether classification or of a bounding box or a segmentation.
Above statement is
calling yolo(!yolo)
to predict(mode=predict)
for object detection task(task=detect)
using yolov8 model(model=yolov8n.pt)
to output labels only if confidence score is greater than 0.25(conf=0.25)
on an image on a publicly accessible link (source = ‘https://ultralytics.com/images/zidane.jpg’)
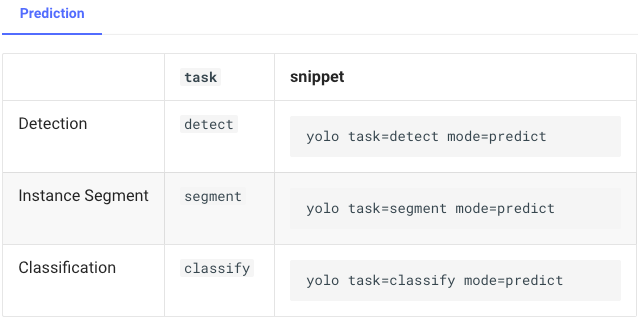
In case you want to try predictions on another type of task, the following options are available.
The above statement will first download the referenced image, and then download the referenced pre-trained model checkpoint if not downloaded already, and then produce inference results. Here are the results in my case. It might differ, especially in the latency and number of labels detected.

Results will be saved to the runs/detect/predict folder in case you want to cross-reference, and if you open the image, it might look like the following with detections printed on the image.

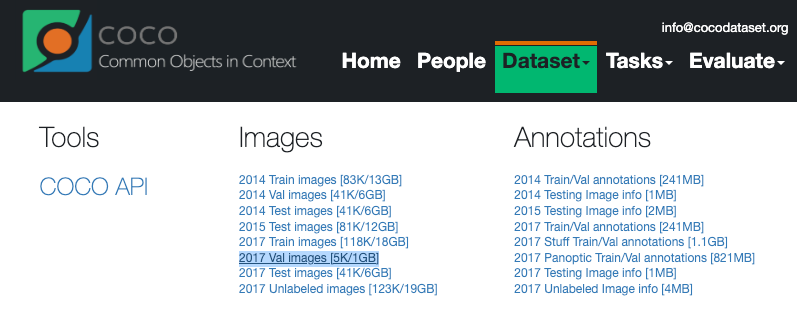
Let’s move to the next step of testing predictions on the validation set. But before that, we first need to download the validation dataset, which is coco2017.
You can see that PyTorch provides the functions to download the zip file from the URL. In the last statement below, we can unzip it into a folder location ../datasets and delete the zip file with the rm command.

The below command shows the predictions on the validation dataset.

The output of the predictions on the validation set is as
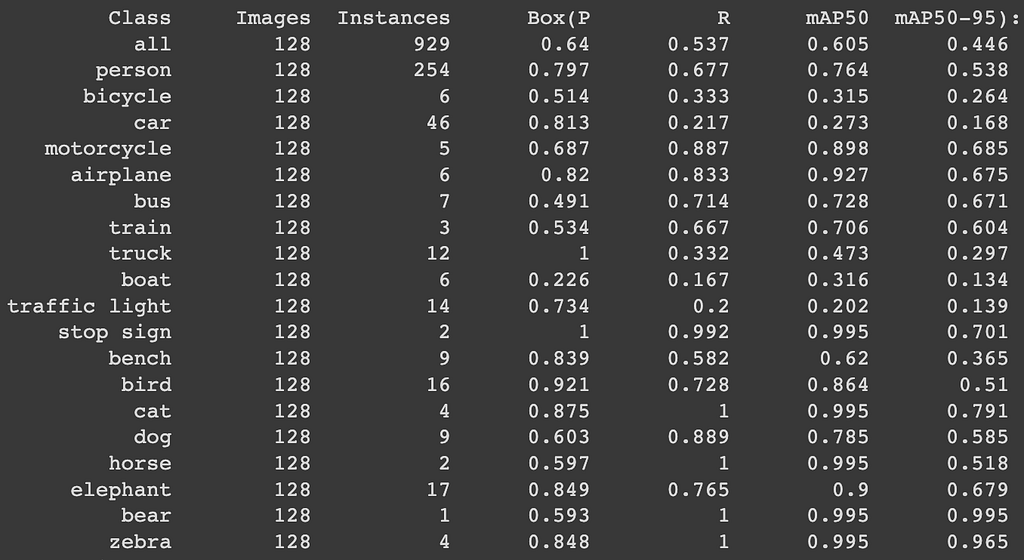
Now a question could emerge “How do I interpret these numbers?”
To interpret the YOLOv8 prediction results in summary on a validation set, you need to look at the metrics such as mean Average Precision (mAP), precision, recall, and the false positive rate (FPR). The mAP is a measure of the model’s overall performance, while the Precision, Recall, and FPR measure the model’s accuracy in detecting different classes. Additionally, you should also look at the class-wise performance of the model, which is the performance of the model for each class in the validation set. This will help you to identify which classes are being correctly detected and which classes are being missed.
For eg it shows that there are 128 images and total of 929 instances(bounding boxes) predicted as shown in the first line with precision of 0.64 and recall of 0.537. Thats kind of not very good but we can surely do improvements with more epochs or iterations of model training.
The next step is to understand how to do model training in Yolov8.
I‘m writing on model training, which we come out soon. Stay tuned!!!
YOLOv8 Is Here and It Gets Better! was originally published in Towards AI on Medium, where people are continuing the conversation by highlighting and responding to this story.
Join thousands of data leaders on the AI newsletter. Join over 80,000 subscribers and keep up to date with the latest developments in AI. From research to projects and ideas. If you are building an AI startup, an AI-related product, or a service, we invite you to consider becoming a sponsor.
Published via Towards AI
Towards AI Academy
We Build Enterprise-Grade AI. We'll Teach You to Master It Too.
15 engineers. 100,000+ students. Towards AI Academy teaches what actually survives production.
Start free — no commitment:
→ 6-Day Agentic AI Engineering Email Guide — one practical lesson per day
→ Agents Architecture Cheatsheet — 3 years of architecture decisions in 6 pages
Our courses:
→ AI Engineering Certification — 90+ lessons from project selection to deployed product. The most comprehensive practical LLM course out there.
→ Agent Engineering Course — Hands on with production agent architectures, memory, routing, and eval frameworks — built from real enterprise engagements.
→ AI for Work — Understand, evaluate, and apply AI for complex work tasks.
Note: Article content contains the views of the contributing authors and not Towards AI.
Related posts
Recent Posts


")

