
Google Colab 101 Tutorial with Python — Tips, Tricks, and FAQ
Last Updated on October 21, 2021 by Editorial Team

An in-depth tutorial on how to use Google Colab with Python, along with Colab’s tips, tricks, and FAQ
This tutorial’s code is available on Github and its full implementation as well on Google Colab.
Table of Contents
- Introduction
- Why We Use Google Colab?
- Start Google Colab
- Uploading a Notebook from Github
- Uploading Data from Kaggle
- Read Files from Google Drive
- Setting up Hardware Accelerator GPU for Runtime
- Clone a GitHub Repository to Google Drive
- Colab Magic
- Plotting
- TPU (Tensor Processing Unit) in Google Colab
- Conclusion
Introduction
Google Colab is a project from Google Research, a free, Jupyter based environment that allows us to create Jupyter [programming] notebooks to write and execute Python [1](and other Python-based third-party tools and machine learning frameworks such as Pandas, PyTorch, Tensorflow, Keras, Monk, OpenCV, and others) in a web browser.
A programming notebook is a type of a shell or kernel in the form of a word processor, where we can write and execute code. The data required for processing in Google Colab can be mounted into Google Drive or imported from any source on the internet. Project Jupyter is an open-source software organization that develops and supports Jupyter notebooks for interactive computing [4].
Google Colab requires no configuration to get started and provides free access to GPUs. One of the main functionalities of Google Colab is that it allows anyone to share live code, mathematical equations, data visualizations, data processing (cleaning and transformation), numerical simulations, machine learning models, and many other projects with others.
Why We Use Google Colab?
Google Colab has unique and critical features:
- It provides a free Jupyter notebook environment.
- It comes with pre-installed packages.
- It hosts entirely on Google Cloud.
- Users do not need to set up on servers or workstations.
- Notebooks save automatically on a user’s Google Drive.
- It provides browser-based Jupyter notebooks.
- It is completely free of cost and offers GPU and TPU power (unless you need more resources and decide to go pro with Colab Pro).
- It supports Python versions 2 and 3 (however, Google Suggests migrating important notebooks to Python 3 [2] [5]).
- It provides two hardware accelerators:
1. GPU (Graphical Processing Unit).
2. TPU (Tensor Processing Unit).
Start Google Colab
Python code can be executed directly on the web browser by using Colab. We can launch it with the URL below:
The launch window opens with a popup offering many features:

It provides options to create a notebook as well as to upload and select from different sources such as:
- GitHub
- Google Drive
- Local computer
Uploading a Notebook from GitHub
Python code can be directly uploaded from Github by using its project’s URL or by searching the organization or user. The steps below highlight how to upload a project using a Github URL:
- Launch Google Colab.
- Select the GitHub tab from the popup box.
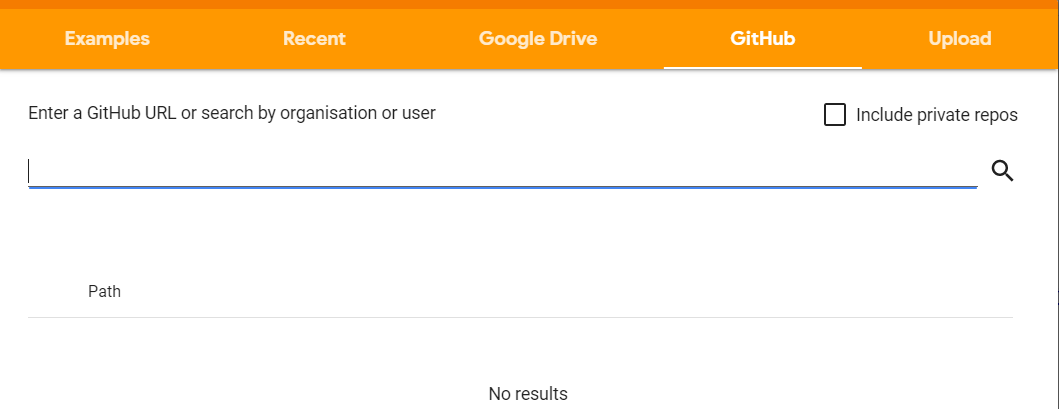
- Enter the GitHub’s project URL and search it to fetch the code

- It will upload the complete code with one click to the Google Colab notebook.
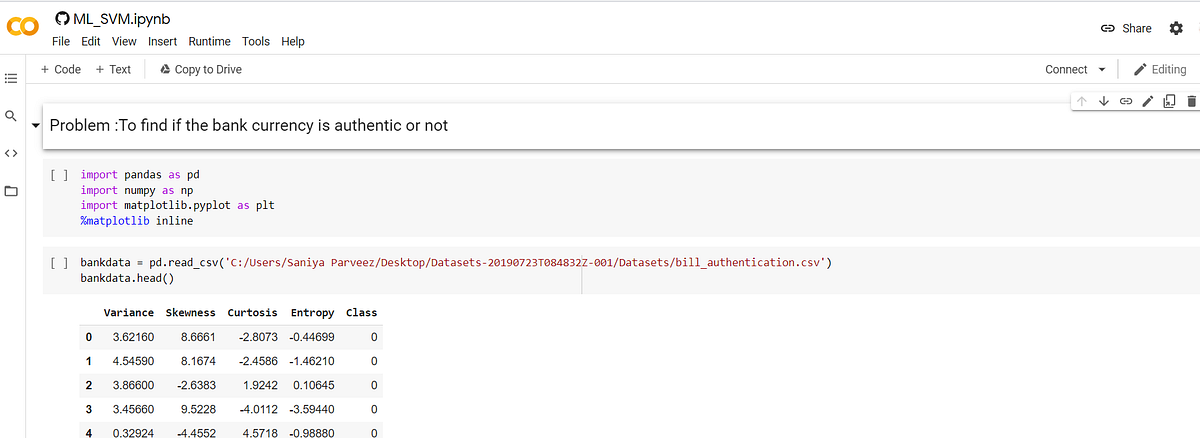
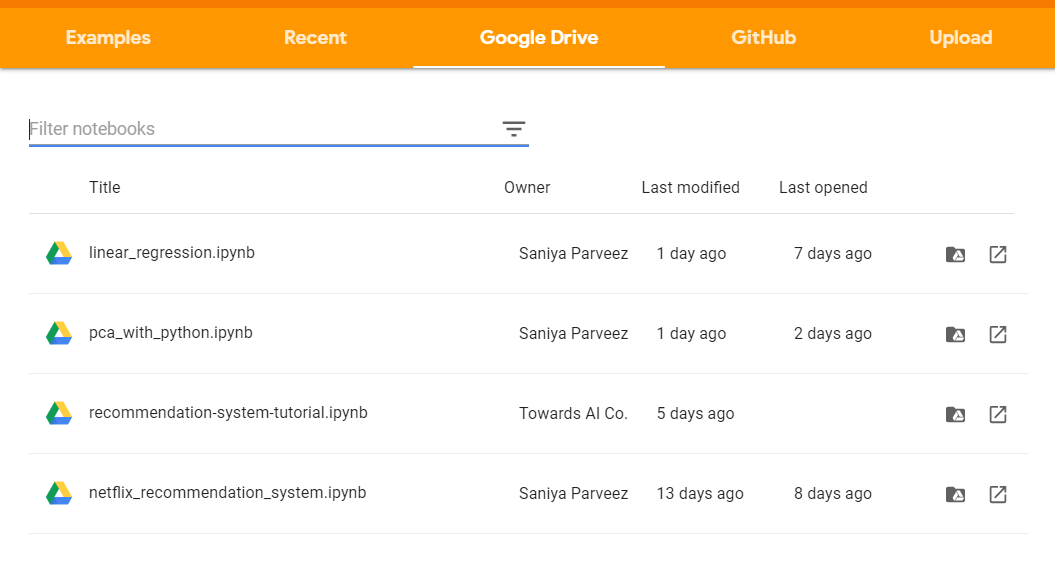
Similarly, the code can be uploaded directly from Google Drive by filtering saved notebooks by name, date, owner, or modified date.
Uploading Data from Kaggle
Data from Kaggle can be uploaded directly into Colab for processing. An API token from Kaggle is required to accomplish the data import.
Steps to generate API token from Kaggle
- Open Kaggle
- Go to “My Account”
- Scroll down to the “API” section

- Click on “Expire API Token” to remove the previous token if required.
- Click on “Create New API Token.” It will generate a new token and download a JSON file named “kaggle.json”
- The “kaggle.json” file contains the username and key like:

Steps to upload data from Kaggle
Save the “kaggle.json” file on your local computer.
Install the Kaggle package
!pip install -q kaggle
Import packages:
from google.colab import files
Upload the local file “kaggle.json”
files.upload()

Check if the Colab notebook connects with Kaggle correctly.
!kaggle datasets list

Download any competition data from Kaggle (i.e., competition name — predict future sales)
!kaggle competitions download -c competitive-data-science-predict-future-sales

Data from Kaggle will be downloaded and uploaded in Colab, like:

Read Files from Google Drive
Google Colab provides functionality to read data from google drive too.
Import packages
import globimport pandas as pdfrom google.colab import drive
Mount Google Drive
drive.mount('/gdrive')
This will ask Google to drive authorization code.

Input box for the authorization code
Click on the link and generate the authorization code.
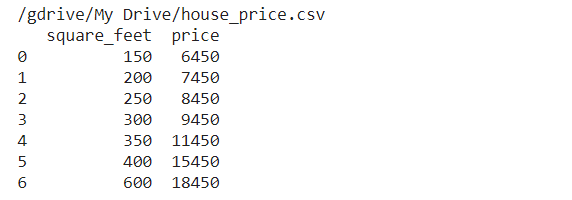
Read a CSV file from the drive.
file_path = glob.glob("/gdrive/My Drive/***.csv")for file in file_path:
    df = pd.read_csv(file)
    print(df)
Setting up Hardware Accelerator GPU for Runtime
Google Colab provides a free cloud service with a GPU hardware accelerator. High configurations GPU machines are very costly and required in machine learning and deep learning to simultaneously process multiple computations.
Why are GPUs required in Machine Learning or Deep Learning?
Nowadays, GPUs are dominant in machine learning and deep learning due to the optimized capability of more compute-intensive workloads and streaming memory models.
GPUs give outstanding performance through parallelism and can launch millions of threads in one call. They function unusually better than CPUs even though GPUs may have a lower clock speed and the absence of many-core management features compared to a CPU.
Setup Hardware Accelerator GPU in Colab
Steps to setup GPU:
- Go to Runtime → Change runtime type.
- Select “GPU” from the popup
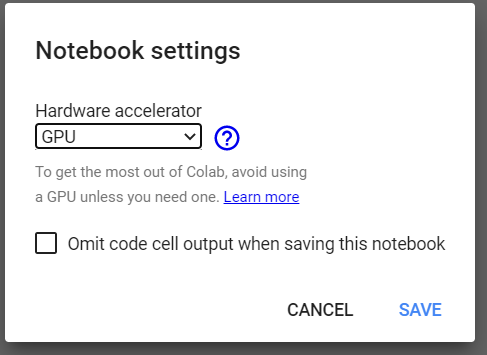
Checking details about the GPU in Colab.
Import important packages
import tensorflow as tf
from tensorflow.python.client import device_lib
Check the GPU accelerator
tf.test.gpu_device_name()

Check the hardware used for the GPU.
device_lib.list_local_devices()
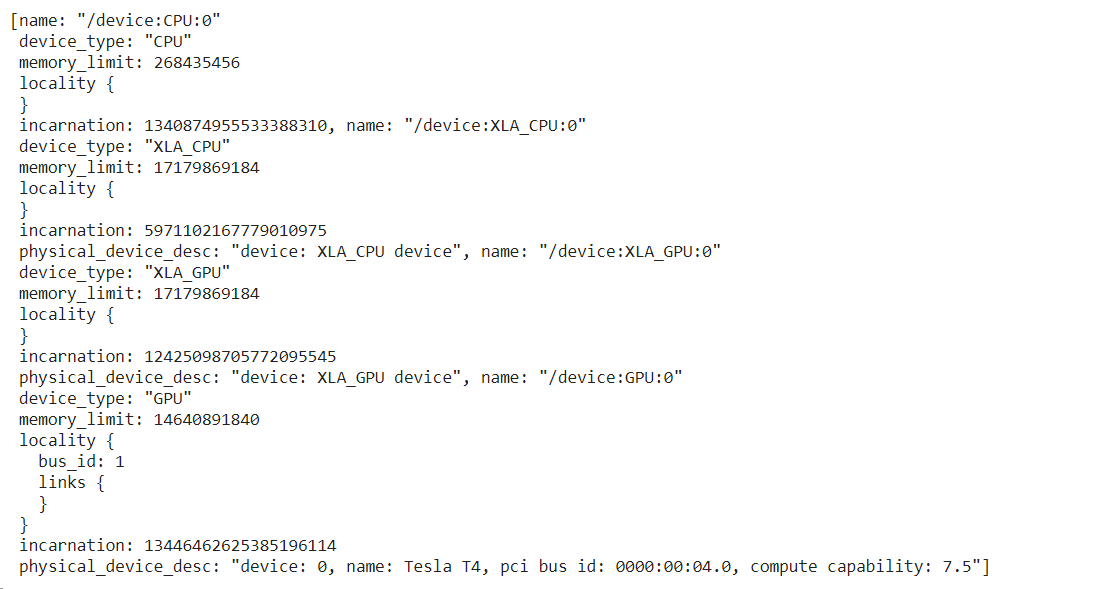
Code Example Using a GPU
Check the number of available GPUs without selecting GPU in Runtime. Keep it set to “None.”
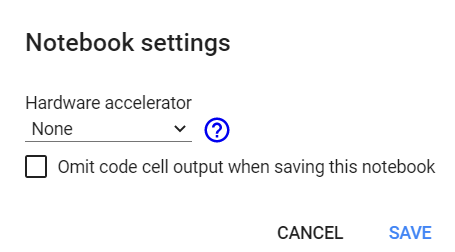
import tensorflow as tf
no_of_gpu = len(tf.config.experimental.list_physical_devices('GPU'))
print("Total GPUS: ", no_of_gpu)

Select Hardware accelerator in runtime to GPU.
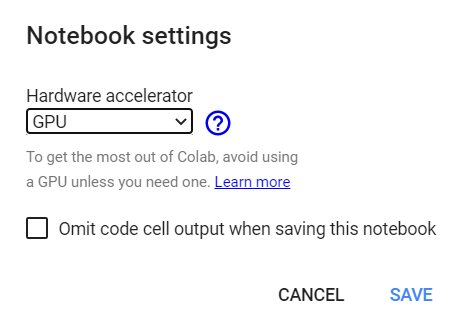
import tensorflow as tf
no_of_gpu =len(tf.config.experimental.list_physical_devices('GPU'))
print("Total GPUS: ", no_of_gpu)

Multiply Tensors on GPU:
try:
    with tf.device('/device:GPU:1'):
        tensor1 = tf.constant([[1.0, 2.0, 3.0], [4.0, 5.0, 6.0]])
        tensor2 = tf.constant([[1.0, 2.0], [3.0, 4.0], [5.0, 6.0]])
        result = tf.matmul(tensor1, tensor2)
        print(result)
except RuntimeError as exception:
    print(exception)

Clone a GitHub Repository to Google Drive
GitHub repository code can be cloned and stored into local Google Drive.
Steps to clone the GitHub repository to Google Drive:
- Mount Google Drive.
from google.colab import drive
drive.mount('/content/gdrive')

- Enter into Google drive and create a directory named “project.”
%cd gdrive/My Drive/
mkdir project
%cd project/

- Clone the repository, i.e.:
!git clone https://github.com/saniyaparveez/youtube_video_type_prediction.git

- Check the cloned project.
!ls

Colab Magic
There are some interestingly amazing tricks which Colab offers. It provides multiple commands that provide quick operations in short. These commands are used with a % prefix.
List All Magic Commands
%lsmagic

List Local Directories
%ldir

Get Notebook History
%history
CPU Time
%time

How long has the system been running?
!uptime

Display available and used memory
!free -hprint("-"*100)

Display the CPU specification
!lscpu
print("-"*70)

List all running VM processes.
%%sh
echo "List all running VM processes."
ps -ef
echo "Done"

Embed HTML Text
%%html<marquee>Towards AI is a great publication platform</marquee>
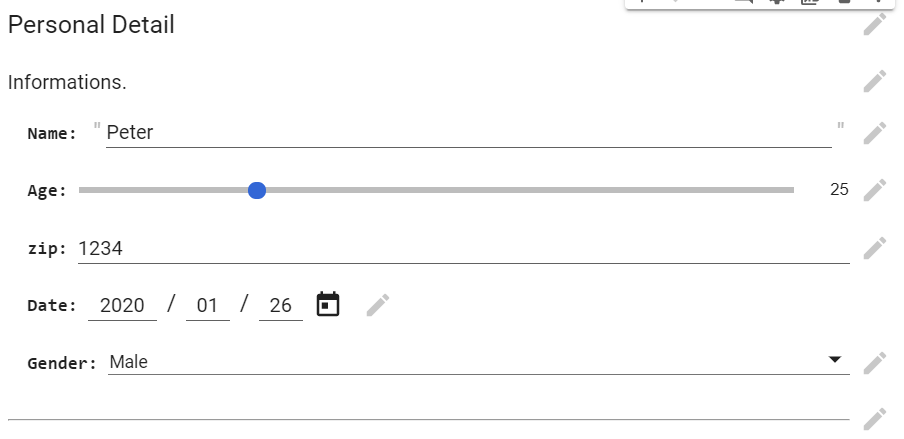
Design HTML Form
#@title Personal Details
#@markdown Information.
Name = 'Peter' #@param {type: "string"}
Age = 25 #@param {type: "slider", min: 1, max: 100}
zip = 1234 #@param {type: "number"}
Date = '2020-01-26' #@param {type: "date"}
Gender = "Male" #@param ['Male', 'Female', 'Other']
#@markdown ---print("Submitting the form")
print(string_type, slider_value, number, date, pick_me)
print("Submitted")

Plotting
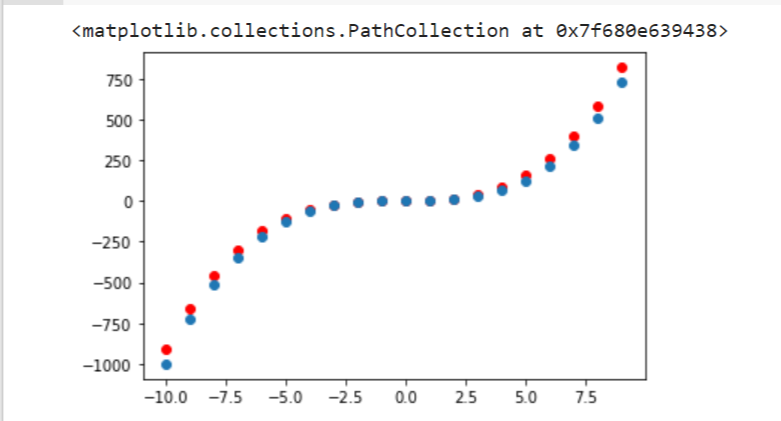
Google Colab can be used for data visualization, as well. The following code and graph show a plot containing more than one polynomial, Y = X³+X²+X [3].
x = np.arange(-10,10)
y = np.power(x,3)
y1 = np.power(x,3) + np.power(x,2) + x
plt.scatter(x,y1,c="red")
plt.scatter(x,y)
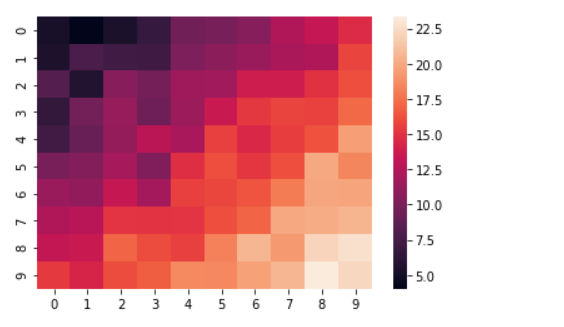
The following code and map are used to graph a heat map.
import matplotlib.pyplot as plt
import numpy as np
import seaborn as sns
length = 10
data = 5 + np.random.randn(length, length)
data += np.arange(length)
data += np.reshape(np.arange(length), (length, 1))
sns.heatmap(data)
plt.show()
TPU (Tensor Processing Unit) in Google Colab
We use Tensor Processing Units (TPUs) for acceleration on a Tensorflow graph. They are an AI accelerator application-specification integrated circuit (ASIC) specially designed for the neural network machines. Google has developed this processing unit.
TPU has a wonder configuration of teraflops, floating-point performance, and others. Each TPU packs up to 180 teraflops of floating-point performance and 64 GB of high-bandwidth memory on a single board. A teraflop is the measurement of a computer’s speed. Its speed can be a trillion floating-point operations per second.
Setup TPU in Colab
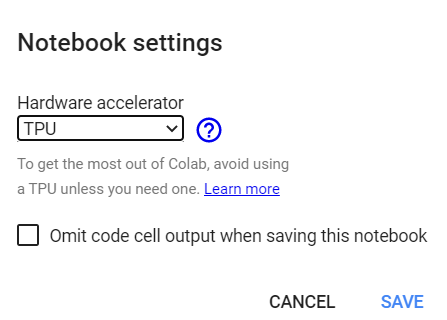
Steps to setup a TPU in Google Colab:
- Runtime menu → Change runtime
Check Running on TPU Hardware Accelerator
It requires the TensorFlow package. Below code, implementations check whether Colab has set TPU accelerator or not?
import tensorflow as tf
try:
    tpu = tf.distribute.cluster_resolver.TPUClusterResolver()
    print('Running on TPU ', tpu.cluster_spec().as_dict()['worker'])
except ValueError:
    print('Exception')

If the TPU is not set, then this code will encounter an error.
Conclusion
Google Colab or Colaboratory, from Google Research, is a Jupyter notebook environment to execute python-based code to build a machine learning or deep learning model.
It is completely free (unless you would like to go pro) and provides GPU and TPU hardware accelerators. It is effortless to use and share due to the zero-configuration features requirement.
It allows combining executable code and rich text in a single document and images, HTML, LaTex, and others. It has a vital machine learning library like TensorFlow already installed, so it is perfect for machine learning and deep learning model building. Colab is outstanding for developing neural networks.
We can achieve parallelism and execution of multiple threads by using CPU based hardware accelerator. We can share Google Colab notebooks publicly as a tutorial notebook. The insertion of HTML tags and the text’s styling builds an attractive and meaningful notebook for tutorials, and the insertion of text with code is remarkably helpful for explaining code flow and logic.
Data scientists and machine learners can harness Python libraries’ full power to analyze and visualize data, and Google Colab can import data directly from Kaggle and upload code from GitHub.
DISCLAIMER: The views expressed in this article are those of the author(s) and do not represent the views of Carnegie Mellon University nor other companies (directly or indirectly) associated with the author(s). These writings do not intend to be final products, yet rather a reflection of current thinking and being a catalyst for discussion and improvement.
All images are from the author(s) unless stated otherwise.
Published via Towards AI
Resources
References
[1] Google Colab, https://colab.research.google.com/
[2] Python 2 Deprecation, Google Colab, Google, https://research.google.com/colaboratory/faq.html#python-2-deprecation
[3] Machine Learning Algorithms for Beginners with Code Examples in Python, Pratik Shukla, Roberto Iriondo, Towards AI, https://towardsai.net/p/machine-learning/machine-learning-algorithms-for-beginners-with-python-code-examples-ml-19c6afd60daa
[4] Project Jupyter, https://jupyter.org/
[5] Google Colab, FAQ, https://research.google.com/colaboratory/faq.html


