


Build Semantic Segmentation App with Deep Java Library
Last Updated on August 29, 2022 by Editorial Team
Author(s): John Doll
Originally published on Towards AI the World’s Leading AI and Technology News and Media Company. If you are building an AI-related product or service, we invite you to consider becoming an AI sponsor. At Towards AI, we help scale AI and technology startups. Let us help you unleash your technology to the masses.
Deep Java Library (DJL) has several PyTorch Android demo apps that can run deep learning inference locally on your phone. These examples are easy to use as a base for building your own app. Today, I would like to focus on one This blog focuses on one example that I contributed to the open source project, Semantic Segmentation: an area of deep learning commonly used by self-driving cars and medical imaging machines, among other things.
Semantic segmentation is a deep learning process that sorts through an image to find objects. A semantic segmentation model goes pixel by pixel through an image, classifying each pixel as an object or the background. It does not distinguish two objects of the same type from one another — rather, it just identifies them. For example, two dogs in an image are both colored in the same color by semantic segmentation, but the model does not necessarily care that these are two different dogs. The segmentation part comes when the algorithm running the inference identifies and colors each pixel based on its classification, allowing us to see the objects colored in when it is complete. Simply put, the model will color in any objects that it finds in the image you give it. This article goes more in-depth on a semantic segmentation model and the construction of layers it has.
Setup
On your local computer/developer environment, clone the djl-demo repository from GitHub. You will need to do this in order to run the Semantic Segmentation app (or one of the other DJL apps).
git clone https://github.com/deepjavalibrary/djl-demo.git
Set up your development environment by following these instructions.
To run the app on your own Android phone, follow these steps in the terminal on your computer:
- cd djl-demo/android/pytorch_android
- Then cd once more into the app which you would like to run. If you want to run Semantic Segmentation, then run this command: cd semantic_segmentation
- From here, run the project according to your computer OS:
Mac: ./gradlew iD
Windows: ..\gradlew iD
If you don’t have an Android phone, you can install Android Studio in order to run the apps.
To run the app in the Android Studio Emulator, follow these steps:
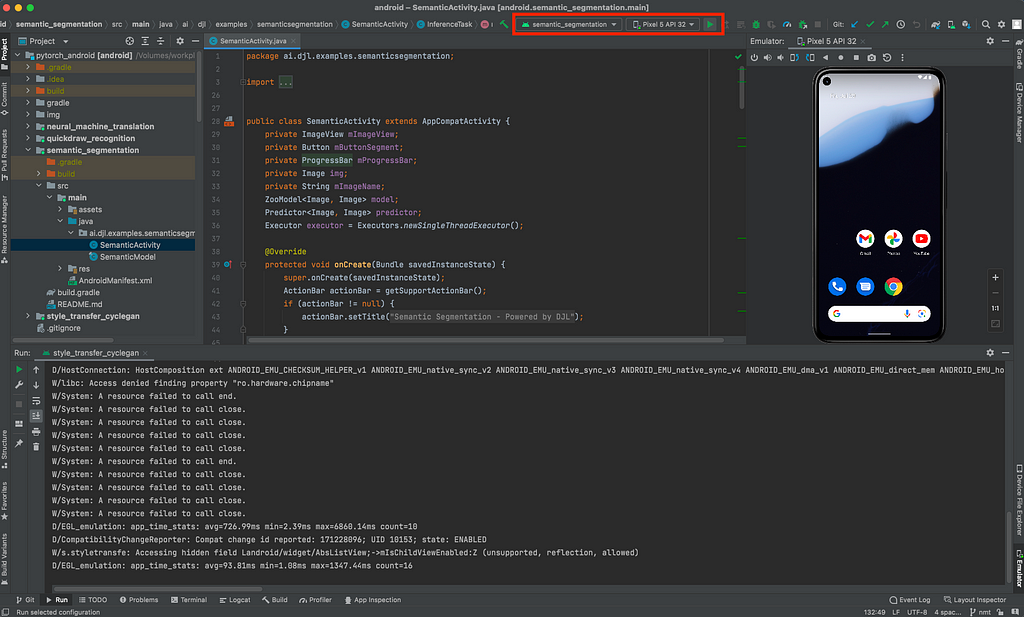
- Open the pytorch_android folder of the djl-demo directory in Android Studio. This will show the 4 currently existing DJL PyTorch apps that you can run. You might have to wait a minute for Gradle to index the project.
- Click on the green play button in the upper right next to the name of the app to be run, and the chosen emulator, and you’re set.
As far as the model input and output go, they’re relatively straightforward. The input is a PNG or JPG image, which is restricted by the model to be a size of 600×800 or smaller. The output is an image with colored objects with a size of 600×800. The translator resizes the image down to its original dimensions.
Inference
The code chunk below is taken directly from SemanticSegmentationTranslator.java from the DJL repository on GitHub. A translator is what prepares the input for the model, takes the information from the output of a model, and converts it to an output that makes intuitive sense to humans. While creating the Semantic Segmentation app, I found that the creation of the translator contributed most to my understanding of DJL. I learned the data types and structures that DJL offers and the efficient ways to use them. It was fun and exciting to explore, like putting together a puzzle with the pieces hidden. DJL makes it easy to find the right piece and fit it together with your existing creation.
The code below is the core post-processing from the Semantic Segmentation translator that ultimately creates the image output. Without it, you are just left with a few arrays of output that would not mean anything to the end user. Post-processing is vital to the use of a deep learning model.
Let’s dive into and examine some of the translator code to understand what is taking place.
int imageSize = width * height;
ByteBuffer bb = manager.allocateDirect(CHANNEL * imageSize);
int r = 0; // adjustment for red pixel
int g = 1; // adjustment for green pixel
int b = 2; // adjustment for blue pixel
byte[][] colors = new byte[CLASSNUM][3];
// randomly assign colors for each time the model is run
for (int i = 0; i < CLASSNUM; i++) {
    byte red = (byte) RandomUtils.nextInt(256);
    byte green = (byte) RandomUtils.nextInt(256);
    byte blue = (byte) RandomUtils.nextInt(256);
    colors[i][r] = red;
    colors[i][g] = green;
    colors[i][b] = blue;
}
The above code is in the post-processing method after the image has been pre-processed and run through the model. This creates a 2D byte array of randomly generated colors that correspond to different known objects in the image each time an inference is made.
The code below immediately follows the color generation; this code maps the classified pixels to their colors, which are later converted to an image. This is the meat of post-processing.
// double for loop to loop through each pixel
for (int h = 0; h < height; h++) {
    for (int w = 0; w < width; w++) {
        int index = h * width + w;
        int maxi = 0;
        double maxnum = -Double.MAX_VALUE;

       // loops through each object probability at the specific pixel
        for (int i = 0; i < CLASSNUM; i++) {
            // get score for each i at the h,w pixel of the image
            float score = scores[i * (imageSize) + index];
            if (score > maxnum) {
                maxnum = score;
                maxi = i;
            }
        }

       // if an object was probabilistically found, color it in
        if (maxi > 0) {
            bb.put(colors[maxi][r]);
            bb.put(colors[maxi][g]);
            bb.put(colors[maxi][b]);
        } else {
            bb.position(bb.position() + 3);
        }
    }
}
// image creation from the buffer
bb.rewind();
int originW = (int) ctx.getAttachment("originalWidth");
int originH = (int) ctx.getAttachment("originalHeight");
NDArray fullImage =
        manager.create(bb, new Shape(height, width, CHANNEL), DataType.UINT8);
NDArray resized = NDImageUtils.resize(fullImage, originW, originH);
return ImageFactory.getInstance().fromNDArray(resized);
The double for-loop at the top loops through each pixel in our scores array, which was returned in our output from the model. For each pixel in the image, there is an array containing the probability that the pixel is the object that corresponds to that index of the array. If no probabilities are greater than the probability at the 0 indexes, then the pixel is left uncolored (black) and becomes a part of the background. If the probability is greatest at an index other than 0, then the pixel is given the corresponding red, green and blue values that represent that object.
Once this coloring is complete, the image is generated into an NDArray of the full 600 x 800 size. This is then downsized to the original width and height of the image and returned as such.
This is what it looks like from the app.
It really is that simple. Sure, there is a learning curve to understand the DJL tools at your disposal like any other project, but once you do, you truly begin to understand the power that DJL gives you.
Summary
At first, I was skeptical that I would be able to take up and understand DJL. I’m a college student about to enter my senior year at Miami University, and I have never worked on an open-source project before. I thought it would be extremely difficult, but I actually found it to be intriguing, and it pulled me in. I was so curious to see what new DJL features I could find each day to help me better construct my app or for future DJL apps down the line.
Semantic Segmentation can be expanded greatly beyond its simple usage shown here. As I hinted at before, this isn’t the only app in DJL. There were actually three others at the time of writing this blog. One of these apps is Quickdraw Recognition, which recognizes and classifies objects that you draw in the app in real-time. Another app is Style Transfer, which uses an image that you’ve taken and converts it to match the style of artists like Vincent Van Gogh or Claude Monet. The third is Neural Machine Translation, which takes French text input and returns translated English output. So, even if Semantic Segmentation doesn’t quite match the style of app you want to build, there are several other options and examples in DJL to help you get started!
Build Semantic Segmentation App with Deep Java Library was originally published in Towards AI on Medium, where people are continuing the conversation by highlighting and responding to this story.
Join thousands of data leaders on the AI newsletter. It’s free, we don’t spam, and we never share your email address. Keep up to date with the latest work in AI. From research to projects and ideas. If you are building an AI startup, an AI-related product, or a service, we invite you to consider becoming a sponsor.
Published via Towards AI
Towards AI Academy
We Build Enterprise-Grade AI. We'll Teach You to Master It Too.
15 engineers. 100,000+ students. Towards AI Academy teaches what actually survives production.
Start free — no commitment:
→ 6-Day Agentic AI Engineering Email Guide — one practical lesson per day
→ Agents Architecture Cheatsheet — 3 years of architecture decisions in 6 pages
Our courses:
→ AI Engineering Certification — 90+ lessons from project selection to deployed product. The most comprehensive practical LLM course out there.
→ Agent Engineering Course — Hands on with production agent architectures, memory, routing, and eval frameworks — built from real enterprise engagements.
→ AI for Work — Understand, evaluate, and apply AI for complex work tasks.
Note: Article content contains the views of the contributing authors and not Towards AI.
Related posts
Recent Posts


")

