


A Guide to MLOps in Production
Last Updated on January 1, 2023 by Editorial Team
Author(s): Prithivee Ramalingam
Originally published on Towards AI the World’s Leading AI and Technology News and Media Company. If you are building an AI-related product or service, we invite you to consider becoming an AI sponsor. At Towards AI, we help scale AI and technology startups. Let us help you unleash your technology to the masses.
with Azure DevOps, Azure Kubernetes Service, and Azure Machine Learning
Introduction
Countless hours of organized effort are required to bring a model to the production stage. The efforts which were spent on all the previous steps would turn out to be fruitful only if the model is successfully deployed. For deploying the model to production, we must consider an architecture that is secure, highly available, fault-tolerant, and capable of autoscaling.
If you have figured out where I am going with this, then kudos to you. Yes, Kubernetes is the ideal candidate for our job. But setting up a Kubernetes cluster is not an easy task. We have to set up and configure load balancers, ingresses, role-based authentication, Virtual Machines, network policies, and so on. This requires a considerable amount of time which can be better spent perfecting our model. That’s why Kubernetes as a Service (Kaas) is the preferred option under these circumstances.
This article illustrates the whole lifecycle of MLOps, starting from training the model to deploying it in a production environment. The whole process is automated. The CI pipeline gets triggered whenever we make a code change, and the CD pipeline gets triggered whenever there is a new artifact available or if the CI pipeline gets completed successfully. In this way, the new functionality can be deployed with just a single commit. The below image provides a high-level overview of the whole process.
If you require an End-to-End example of a CI-CD pipeline for development and QA environments, you can refer to my article -> End-to-end example of CI-CD pipeline using Azure Machine Learning | by Prithivee Ramalingam | Apr, 2022 | Towards Dev
Content
- Prerequisites.
- Code walkthrough.
- Creating a CI pipeline in Azure DevOps to train the model and publish the artifact.
- Creating a CD pipeline to deploy the model in Azure Kubernetes Service (AKS).
- Testing the model deployed in AKS.
1. Prerequisites:
1.1 Azure Devops account
1.2 Azure Machine Learning resource
1.3 Azure Kubernetes Service (AKS) cluster
1.4 Resource Manager connection
1.1 Azure DevOps account
Azure DevOps Server is a Microsoft product that provides version control, project management, automated builds, testing, and release management capabilities. To create an Azure DevOps account, please follow these instructions.
In a production setup, automation must be preferred over manual interference. We need to automate the process of creating builds and deploying them to a Kubernetes cluster. For this use case, we make use of the pipelines provided by Azure DevOps. We create a Continuous Integration (CI) pipeline for creating a model and packaging it and a Continuous Deployment (CD) pipeline for deploying the model in Kubernetes.
1.2 Azure Machine Learning resource
Azure Machine Learning is a cloud service for accelerating and managing the machine learning project lifecycle. Azure Machine Learning, teamed up with MLFlow, providing a centralized repository to host docker images, runs, environments and artifacts. It provides functionality to create compute clusters and instances. For additional information regarding Azure Machine Learning, you can refer to my article https://medium.com/mlearning-ai/features-and-capabilities-of-azure-machine-learning-868eb3b4d333.
In this production setup, we are going to use Azure ML for logging metrics, saving model artifacts, creating an AKS cluster, and deploying the model in the created cluster. While creating an Azure Machine Learning workspace, Blob storage, a Key vault, a Container registry, and an application insights service are created along with it.
1.3 Azure Kubernetes Service (AKS) cluster
Azure Kubernetes Service (AKS) offers the quickest way to start developing and deploying cloud-native apps in Azure. With the abstraction provided by Azure Machine Learning, we can manage deployment in AKS by configuring just a few variables. We can attach an existing AKS cluster or create a new one with Azure ML.
1.4 Resource Manager connection
A Resource manager connection is essential to automate model training, model packaging, model deployment, etc.. Azure ML is the place that centralizes the whole MLOps process. So, we need to access Azure ML securely to perform the above steps. One way is going to Azure ML workspace and setting the resources manually. But in order to do it in an automated manner, we require a resource manager connection which will help us manage the resources in Azure ML from Azure DevOps.
We should create the Resource Manager connection in Azure DevOps. We can assign the scope to the Subscription level, Management Group level, or to Machine Learning Workspace level. We can also limit access to the pipelines which can access this Service Principal.
Project Settings -> Service Connections -> New Service connections -> Azure Resource Manager -> Service Principal (automatic) -> Scope level
2. Code walkthrough.
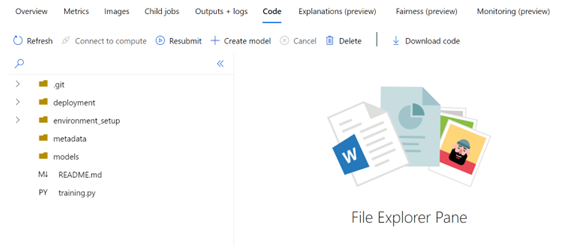
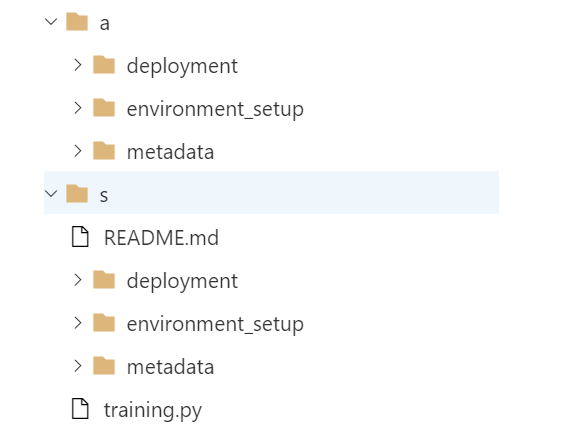
After creating all the required prerequisites, the next step is to write code for training and inference and to push it into a version control system like git or Azure DevOps. You can access the source code here.
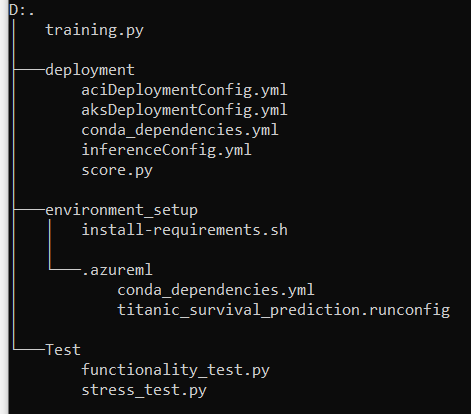
2.1 Training script
2.2 Inference scripts
2.1 Training script
The training script consists of training.py and files in the environment_setup directory. The environment_setup directory consists of install-requirements.sh, conda_dependencies.yml, and runconfig files.
install-requirements.sh -> Has the dependencies which have to be installed in the agent.
conda_dependencies.yml -> Has the dependencies which have to be installed in the compute target. The dependencies are abstracted as environments.
runconfig file (titanic_survival_prediction.runconfig) -> The driver file for the whole training logic. During execution, the runconfig file gets visited first. From there information such as the location of training.py file, environment details, docker image details, and location of conda dependency files are obtained.
framework: Python
script: training.py
communicator: None
autoPrepareEnvironment: true
maxRunDurationSeconds:
nodeCount: 1
environment:
  name: titanic_prediction_environment
  python:
    userManagedDependencies: false
    interpreterPath: python
    condaDependenciesFile: .azureml/conda_dependencies.yml
    baseCondaEnvironment:
  docker:
    enabled: true
    baseImage: mcr.microsoft.com/azureml/base:intelmpi2018.3-ubuntu16.04
    sharedVolumes: true
    gpuSupport: false
    shmSize: 1g
    arguments: []
history:
  outputCollection: true
  snapshotProject: true
  directoriesToWatch:
  - logs
training.py -> Has the logic for getting data, feature engineering, feature selection, model training, and uploading the generated model to run. The newly created model will be stored in the directory provided by the “model_path” parameter. But the model will exist in the folder only till the agent exists. So, we upload it to the artifact location provided by the “artifact_loc “ parameter.
2.2 Inference scripts
The inference scripts are placed in the deployment folder.
conda_dependencies.yml -> has the necessary dependencies for running the score.py file.
inferenceConfig.yml -> This is the driver file for inference. It has information like the path to the scoring file and the dependencies file along with the runtime used.
score.py -> Has the inference logic. It contains 2 mandatory functions, init() and run(). The init() function is called only once that is during the creation of the service. The model loading logic is written inside the init function. The run function consists of logic to receive the data from the API call, perform analysis and inference on the data and return the response.
aciDeploymentConfig.yml -> has the configuration to deploy the model as an Azure Container Instance (ACI)
aksDeploymentConfig.yml -> has the configuration to deploy the model in Azure Kubernetes Service (AKS) cluster. For more information about the parameters please refer to this.
computeType: AKS
autoScaler:
    autoscaleEnabled: True
    minReplicas: 3
    maxReplicas: 6
    refreshPeriodInSeconds: 1
    targetUtilization: 50
authEnabled: True
containerResourceRequirements:
    cpu: 0.5
    memoryInGB: 1
appInsightsEnabled: True
scoringTimeoutMs: 60000
maxConcurrentRequestsPerContainer: 2
maxQueueWaitMs: 180000
sslEnabled: False
3. Creating a CI pipeline in Azure DevOps to train the model and publish the artifact.
3.1 Agents
3.2 Variables
3.3 Tasks
3.4 Triggers
3.1 Agents
For running the CI-CD pipeline, we require agents. Agents are nothing but compute instances that will run the pipeline. It can be self-hosted agents or Azure Pipelines. We can also choose the OS of the agent based on different versions of Windows, Linux, and Mac. It is also possible to run pipelines in parallel on Agents.
3.2 Variables
Inside the app, we might have to access multiple databases and services which in turn require a username, password, and endpoint credentials. Including them along with the code is not secure. So, Azure DevOps came up with variables to provide a secure way of accessing the credentials.
We define the credentials as key-value pairs and access them at runtime. Variable groups are a collection of variables that are specific to a particular pipeline or a group of pipelines. The variable groups need to be linked with the pipeline in order to be accessed.

3.3 Tasks
A Task is an abstraction provided by Azure Pipeline to perform an action. Tasks can be used to build an app, run a tool, perform installation, construct builds, etc.. Multiple tasks constitute a pipeline, they are executed step by step based on specifications. The CI pipeline consists of multiple tasks to publish a model as an artifact.
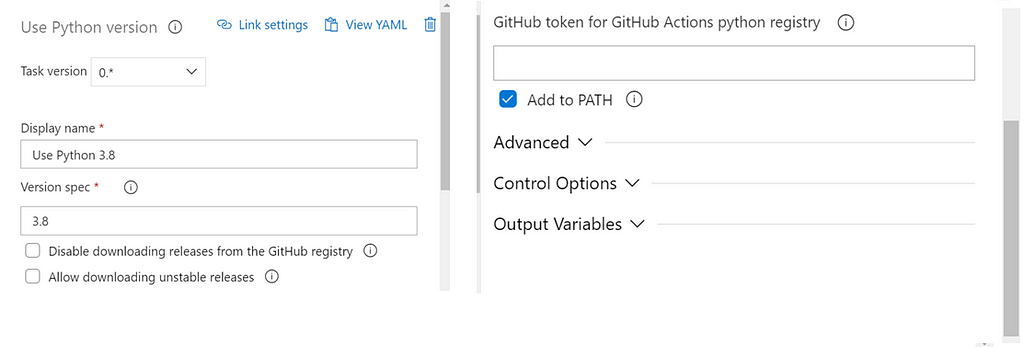
Task 1 — Use Python 3.x
Explanation — We need to install Python Environment for running python scripts
Task 2 — Install dependencies (Bash)
Type — File path
Explanation — install-requirements.sh file has certain dependencies which are required to run the scripts
environment_setup/install-requirements.sh
Task 3 — Azure CLI ML installation (Azure CLI)
Include Resource manager connection
Script type — Shell
Script location — Inline script
Explanation — Azure CLI ML extension is required as all the Azure ML based commands are executed using that extension.
az extension add -n azure-cli-ml
Task 4 — Create compute target (Azure CLI)
Include Resource manager connection
Script type — Shell
Script location — Inline script
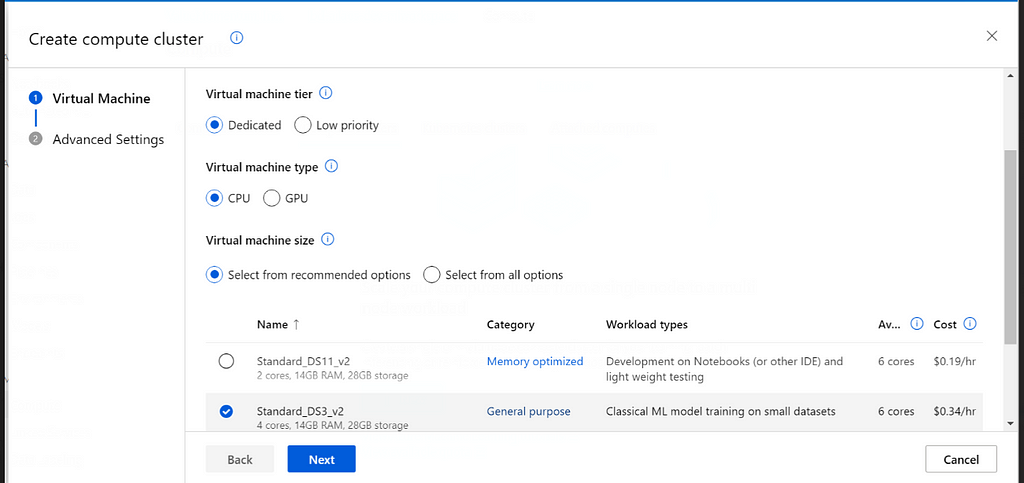
Explanation — We need access to a compute target to run the training script. Based on our requirements we can choose among CPU or GPU enabled compute targets. We can define the min and max nodes for the compute target to handle load. To save cost we can also make use of the idle-seconds-before-scaledown flag which stops the compute once it is left idle for the specified time period. Finally we have to assign system identity for the compute.
az ml computetarget create amlcompute -g $(ml.resourceGroup)
                                      -w $(ml.workspace)
                                      -n $(ml.computeName)
                                      -s $(ml.computeVMSize)
                                      - min-nodes $(ml.computeMinNodes)
                                      - max-nodes $(ml.computeMaxNodes)
                                      - idle-seconds-before-scaledown $(ml.computeIdleSecs)
                                      - assign-identity '[system]'
Task 5 — Create model and metadata folder (Bash)
Type — Inline
Explanation — “metadata” and “models” folders are created as dumping stations for the metadata generated by the models and models itself.
mkdir metadata && mkdir models
Task 6 — Training the model (Azure CLI)
Include Resource manager connection
Script type — Shell
Script location — Inline script
az ml run submit-script -g $(ml.resourceGroup)
                        -w $(ml.workspace)
                        -e $(ml.experimentName)
                        - ct $(ml.computeName)
                        -c titanic_survival_prediction
                        - source-directory .
                        - path environment_setup
                        -t ./metadata/run.json
                        training.py
                        - model_path ./models/titanic_model.pkl
                        - artifact_loc ./outputs/models/
Explanation — We trained the model on the computer that we had created earlier. The c flag refers to the run configuration file, which primarily acts as a template for training. The source Directory points to the location of training.py. We provide the experimentName in this step, and accordingly, an experiment would be created, and the metrics and dependencies would be logged within it.
model_path -> Path to store the model
artifact_loc -> Devops artifact location to store the model
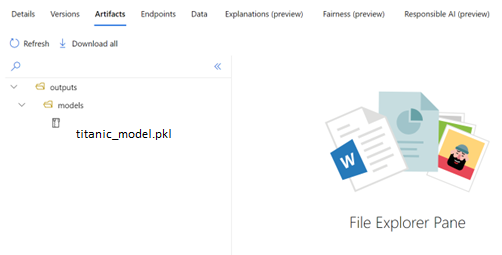
Every training script is run as an experiment, and each experiment has a run ID. We dump the model in the “models” folder which we had created in the previous step. After dumping the model in the model path specified, we upload the model to the artifact location. This is done so that we can find all the related files in the particular run of the model. It will be available in the workspace. We can download the model in outputs/models/titanic_model.pkl
After uploading the model, the generated run.json file is kept in the metadata folder. The run.json file contains information such as the experiment name, experiment id, the details of the person who has created the model, the id of computing target, git URL, mlflow id, and mlflow repo URL.
Task 7 — Register the model in the model registry (Azure CLI)
Include Resource manager connection
Script type — Shell
Script location — Inline script
Explanation — We register the model which is in artifact location to the model registry. With the model being in model registry we can access it as many times as we want and versioning can also be done efficiently. We provide a name for the model so that all the versions of the model are placed in the same repository. We can also provide tags to the model which is getting registered. Finally the model.json file is given as output. Model.json file has modelId, workspacename, resourceGroupName
az ml model register -g $(ml.resourceGroup)
                     -w $(ml.workspace)
                     -n Titanic
                     - asset-path outputs/models/
                     -d "Titanic Survival Prediction"
                     - tag "model"="Titanic Survival Prediction model"
                     - model-framework Custom
                     -f ./metadata/run.json
                     -t metadata/model.json
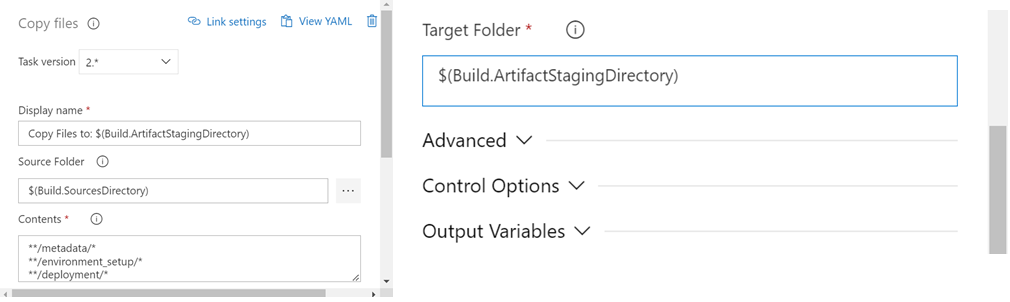
Task 8 — Copy Files to: $(Build.ArtifactStagingDirectory) (Copy Files)
Source Folder — $(Build.SourcesDirectory)
Contents — **/metadata/*
**/environment_setup/*
**/deployment/*
Target Folder — $(Build.ArtifactStagingDirectory)
Explanation — All the code and intermediate folders will be present in the Source directory, but we have to have these folders in the Artifact staging directory. So, it can be used by CD pipeline as an artifact.
Task 9 — Publish pipeline artifact
File or Directory Path — $(Pipeline.Workspace)
Artifact publish location — Azure Pipelines
Artifact name — titanic_pred_artifact
Keep custom properties as empty
Explanation — This is done so that the metadata in the artifact location can be published.
Task 10 — Delete compute instance (Azure CLI)
Include Resource manager connection
Script type — Shell
Script location — Inline script
Explanation — After model training we can delete the target which we have used to train the model.
az ml computetarget delete -g $(ml.resourceGroup)
                           -w $(ml.workspace)
                           -n $(ml.computeName)
3.4 Triggers
Triggers enable the CI pipeline to run automatically based on some action. In other words, if there is a new commit, the CI pipeline will run and create new models. We have the option to select the branch which needs to be watched, and it is not a necessity that only the main branch can be used as a trigger. To set up a trigger for the CI pipeline, we need to enable continuous integration.
4. Creating a CD pipeline to deploy the model in Azure Kubernetes Service (AKS).
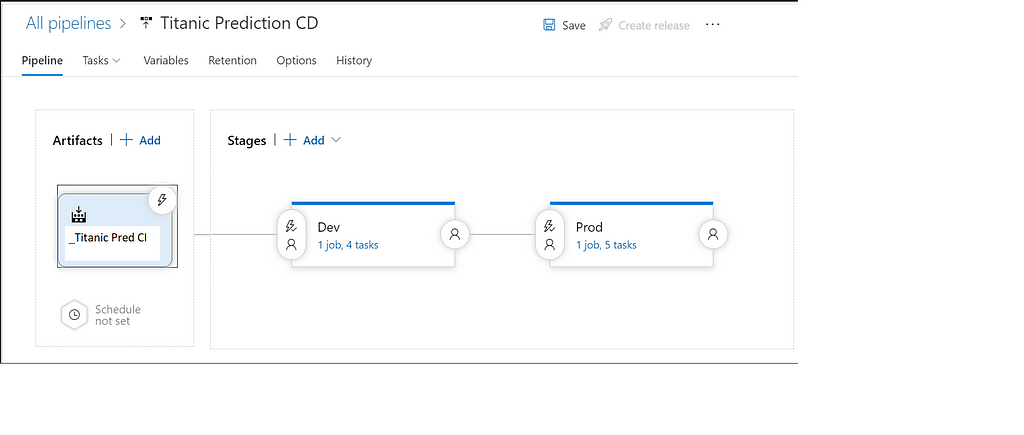
After the CI pipeline has finished running successfully, we can trigger the CD pipeline to run automatically. From the below diagram, we can get a high-level overview of the CD pipeline. We can’t straightaway deploy a model to production (AKS), so we first deploy it in dev (ACI). When all the tests get executed successfully in Dev, we move to Production.
Task 1 — Use Python 3.x
Task 2 — Azure CLI ML installation (Azure CLI)
Include Resource manager connection
Script type — Shell
Script location — Inline script
az extension add -n azure-cli-ml
Task 3 — Create AKS cluster (Azure CLI)
Include Resource manager connection
Script type — Shell
Script location — Inline script
az ml computetarget create aks -g $(ml.resourceGroup)
                               -w $(ml.workspaceName)
                               -n $(aks.clusterName)
                               -s $(aks.vmSize)
                               -a $(aks.agentCount)
Explanation — We create an azure Kubernetes cluster by specifying the type of VM which is required and the number of agents. The number of agents should be at least 3. In Azure, ML parlance agents are the equivalent of nodes. Usually, there is a quota of 10 for the number of virtual CPUs which can be used, so a bit of configuration is required if we are looking for higher-end VMs which have multiple virtual CPUs.
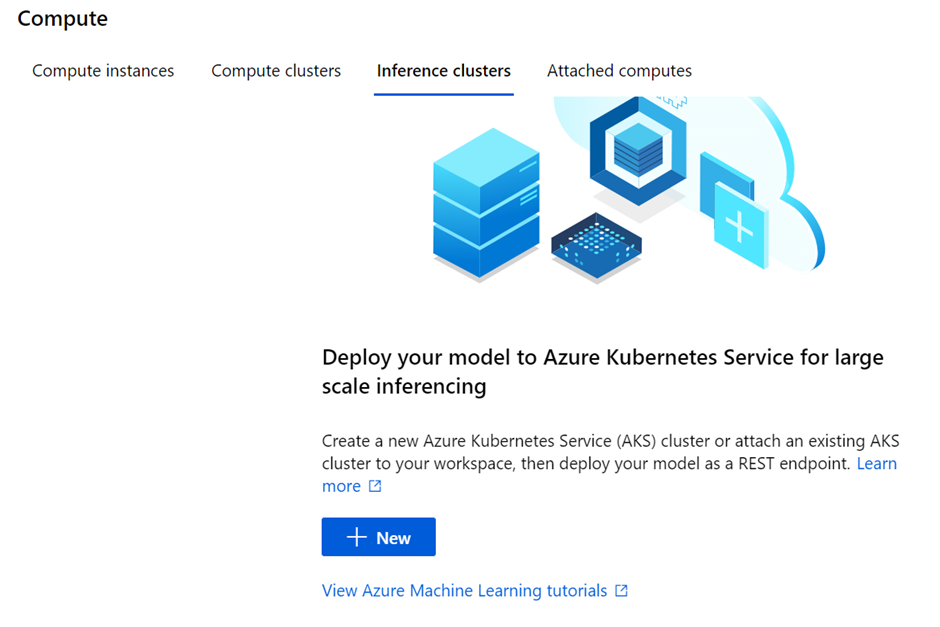
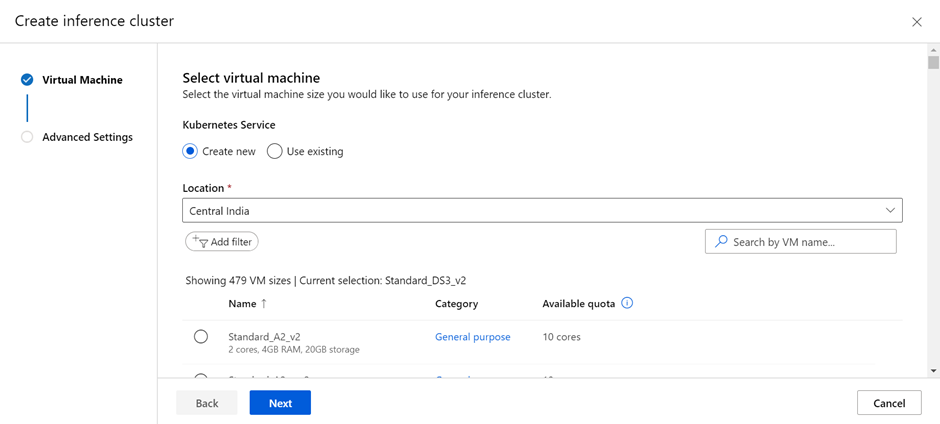
Alternative — Instead of creating the Azure AKS cluster through Azure CLI we can also use Azure ML to create the cluster. In the compute option, we have to go to inference clusters and create new clusters by specifying the number of nodes and the specifications (RAM, Cores, Storage).
Task 4 — Deploy the model (Azure CLI)
Include Resource manager connection
Script type — Shell
Script location — Inline script
Working Directory — $(System.DefaultWorkingDirectory)/_Titanic Pred CI/titanic_pred_artifact/a/deployment
az ml model deploy -g $(ml.resourceGroup)
                   -w $(ml.workspace)
                   -n $(ml.serviceName)
                   -f ../metadata/model.json
                   - dc aksDeploymentConfig.yml
                   - ic inferenceConfig.yml
                   - description "Titanic Prediction model deployed in ACI"
                   –overwrite
Explanation — We are currently in the deployment folder, as we have specified in our working directory. The inferenceConfig.yml and aksDeploymentConfig.yml are present in the deployment folder, so we keep them as it is. We also require model.json, which is in the metadata folder. So we can provide the path for that.
5. Testing the model deployed in AKS.
5.1 Functionality testing
5.2 Stress testing
After the model is deployed in the AKS cluster, we need to test the service to determine the shortcomings, if any. In this example, we are going to perform functional testing and stress testing.
5.1 Functionality testing
A functionality test is done to check whether the model is performing as expected. Multiple test cases have to be written to check edge cases and execution time.
import requests
import json

url = "<Enter AKS url here>"

payload = json.dumps({
  "Pclass": 1,
  "Sex": 0,
  "Age": 38,
  "SibSp": 1,
  "Parch": 0,
  "Fare": 71.2833,
  "Embarked": 2
})
headers = {
  'Content-Type': 'application/json'
}

response = requests.request("POST", url, headers=headers, data=payload)
response_data = json.loads(response)
if response_data['prediction'] == 1:
    print("The prediction is correct")
else:
    print("The prediction is wrong")
5.2 Stress testing
Since we have deployed the model in a Kubernetes cluster, we would be able to handle multiple requests at the same time. So, to check if the scaling (Upscaling and downscaling) is happening as expected and to make sure that the model is highly available, we perform stress testing. Stress testing involves sending multiple requests at the same time, more than what we will be receiving under normal circumstances. If we are not able to handle all the requests, we have to change the parameters in the AKS config file to suit our needs.
import asyncio
import json
import aiohttp

async def do_post(session, url, x):
    async with session.post(url, data = json.dumps(x),headers={"Content-Type": "application/json"}) as response:
        data = await response.text()
        return data

async def main_func():
    url = '<Enter the AKS url here>'
    resp_ls = [ {"Pclass": 3, "Sex": 1, "Age": 34.5, "SibSp":0,"Parch":0,"Fare":7.8292,"Embarked":2},
                {"Pclass": 3, "Sex": 0, "Age": 40, "SibSp":1,"Parch":1,"Fare":2.56,"Embarked":0},
                {"Pclass": 3, "Sex": 0, "Age": 12, "SibSp":1,"Parch":2,"Fare":300,"Embarked":1},
                {"Pclass": 3, "Sex": 1, "Age": 18, "SibSp":1,"Parch":5,"Fare":4.1,"Embarked":0},
                {"Pclass": 3, "Sex": 0, "Age": 71, "SibSp":0,"Parch":1,"Fare":72,"Embarked":1},
                {"Pclass": 3, "Sex": 1, "Age": 26, "SibSp":0,"Parch":0,"Fare":1.8,"Embarked":2}
            ]
    async with aiohttp.ClientSession() as session:
        post_tasks = []
        # prepare the coroutines that post
        for req in resp_ls:
            post_tasks.append(do_post(session, url, req))
        # now execute them all at once
        val = await asyncio.gather(*post_tasks)
        return val

asyncio.set_event_loop_policy(asyncio.WindowsSelectorEventLoopPolicy())
val = asyncio.run(main_func())
failed_request_count = 0
for resp in val:
    try:
        d = json.loads(resp)
        print(d)
    except:
        failed_request_count += 1

print("Number of requests sent",len(val))
print("Number of requests failed",failed_request_count)
Conclusion
This article shows the step-by-step process for handling MLOps in production. Azure DevOps was used to automate the CI and CD pipelines, Azure Machine Learning was used as a centralized resource for handling MLOps, and Azure Kubernetes Service was used to deploy the created model into production. This method is highly scalable, and new models can be rolled out to production quickly.
References
- (7412) Azure MLOps — DevOps for Machine Learning — YouTube
- (7412) MLOps with Azure — Hands on Session — YouTube
- Create a deployment config for deploying an AKS web service — aks_webservice_deployment_config • azuremlsdk
Want to Connect?
If you have enjoyed this article, please follow me here on Medium for more stories about machine learning and computer science.
Linked In — Prithivee Ramalingam | LinkedIn
A Guide to MLOps in Production was originally published in Towards AI on Medium, where people are continuing the conversation by highlighting and responding to this story.
Join thousands of data leaders on the AI newsletter. It’s free, we don’t spam, and we never share your email address. Keep up to date with the latest work in AI. From research to projects and ideas. If you are building an AI startup, an AI-related product, or a service, we invite you to consider becoming a sponsor.
Published via Towards AI
Towards AI Academy
We Build Enterprise-Grade AI. We'll Teach You to Master It Too.
15 engineers. 100,000+ students. Towards AI Academy teaches what actually survives production.
Start free — no commitment:
→ 6-Day Agentic AI Engineering Email Guide — one practical lesson per day
→ Agents Architecture Cheatsheet — 3 years of architecture decisions in 6 pages
Our courses:
→ AI Engineering Certification — 90+ lessons from project selection to deployed product. The most comprehensive practical LLM course out there.
→ Agent Engineering Course — Hands on with production agent architectures, memory, routing, and eval frameworks — built from real enterprise engagements.
→ AI for Work — Understand, evaluate, and apply AI for complex work tasks.
Note: Article content contains the views of the contributing authors and not Towards AI.
Related posts
Recent Posts


")

