


How to Deploy a Static Website using Github
Last Updated on December 10, 2020 by Editorial Team
Author(s): Bala Peddireddy
Make your website and share it publicly in no time.
What is Github?
GitHub is a software development platform. It gives Unlimited cloud storage and supports all programming languages.
GitHub is an open-source platform, and anybody can access it. A lot of people share and download the work in GitHub, which they have done.

If the project is uploaded with a public repository, it can be seen throughout the world.
You can get a lot of Exposure on GitHub. In such a way that you can find the code of others and use it in your projects.
What is this article all about?
This article is entirely about the deployment of a static website using GitHub in two ways:
Using Master Branch
Without using Master Branch
Any complex website can be linked with so many CSS; JavaScript files can be deployed in GitHub.
Highlights
The alignment of the folders is essential.
The HTML page name must be “index.html.”
Only one Static HTML file can be deployed with one repository in Github.
The HTML file can be linked with many CSS, JavaScript, Bootstrap, and Jquery files.
The intention behind deploying a website
Everybody wants a URL to share their website with the world. You might need a website to project your ideas on your style. You can design a website to display your portfolio and organize your projects.
Let’s get started
In this article, I’ll show you how to deploy it to publish and share your website on GitHub.
1. Create a GitHub account
Make sure you have a GitHub account. Signup in GitHub to create an account. If you have a Github account, ignore this step. By creating this Github account, you are going to get unlimited space to upload data.

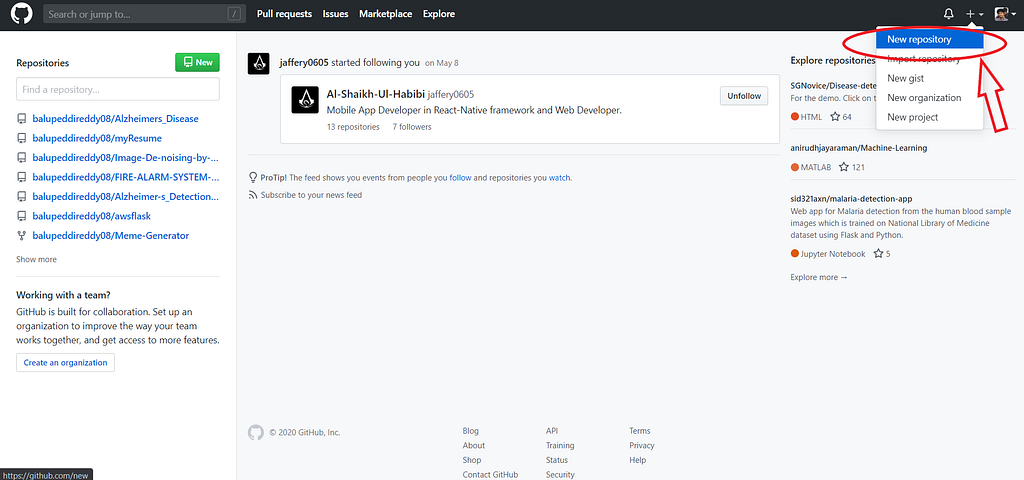
2.Create a new GitHub repository
Create a new repository by hitting the + button on the top-right of the screen. A folder is called a repository, according to GitHub terminology.
3. Name your GitHub repository
You need to name your repository. This is the most critical step. Based on the name of the repository, your website URL will be generated.
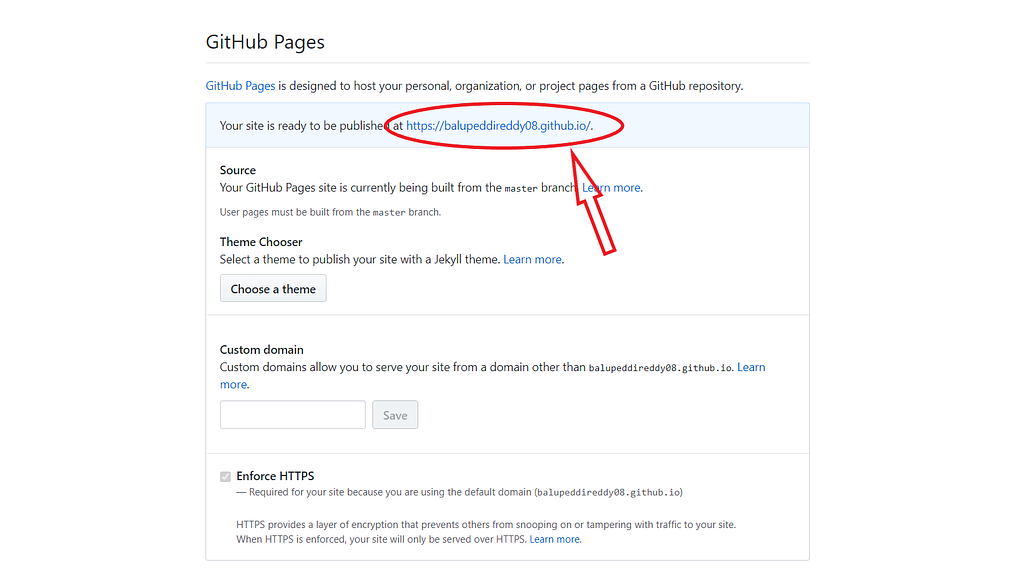
If you give the input “Name” as [username].github.io
Then your Website Link will generate as https://[username].github.io/
Recommended :
If you give the input “Name” as per your required repository name
Then your Website Link will generate as https://[username].github.io/[given repository name]/
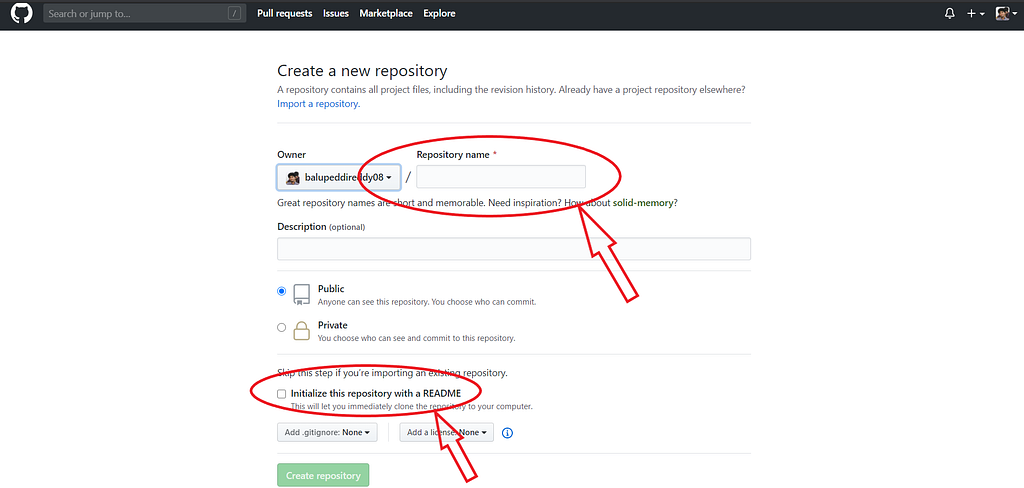
It is entirely based upon your interest in initializing the repository with a README, which will let you immediately clone the repository to your computer. Write about your project in the description part. The repository should be in the public mode to get URL access.
4. Upload your GitHub files
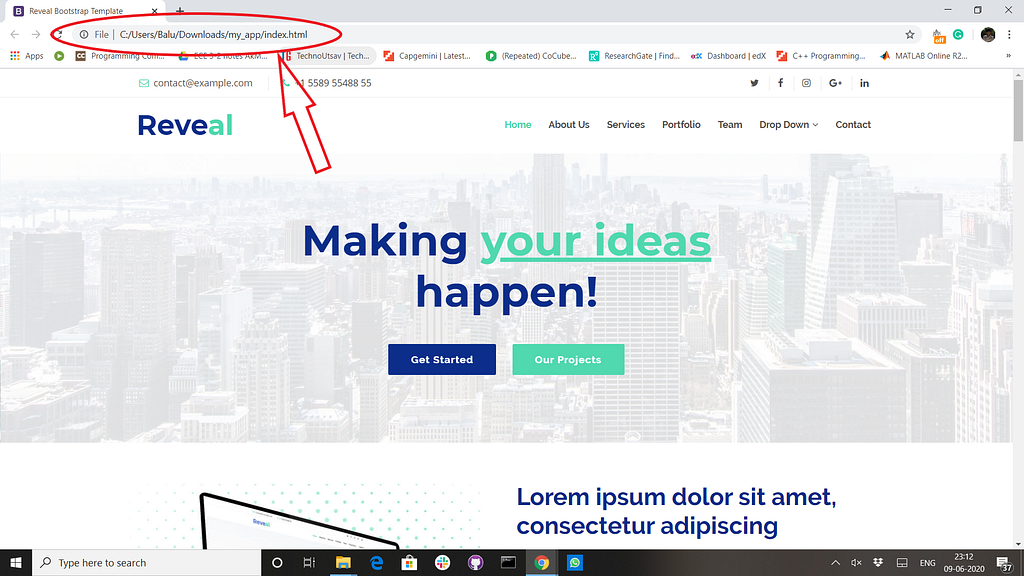
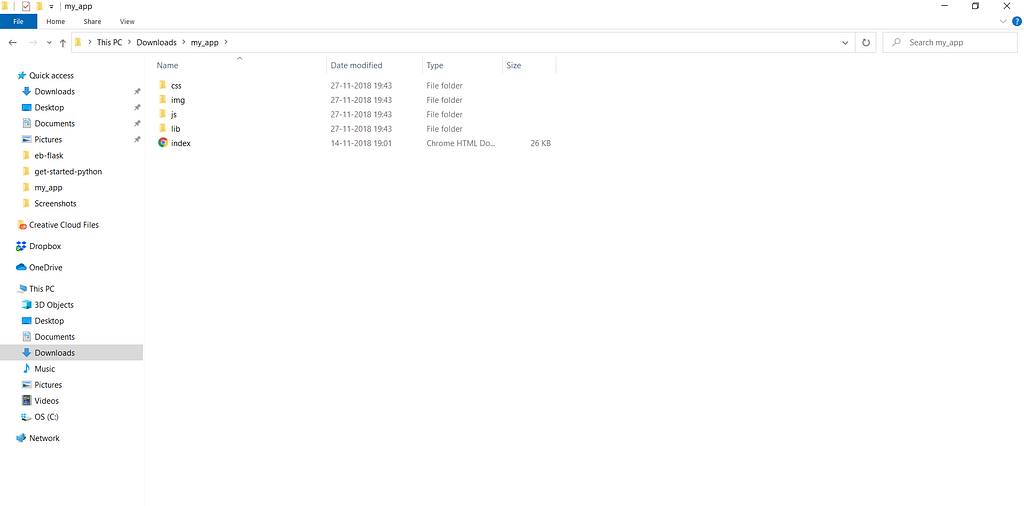
You have seen the website which was opened in my local(Computer).
The alignment, which is there, should not be changed while uploading the files into GitHub.
You can name your files as your wish. But, Follow the standard format while uploading.
The name of the HTML file must be “index.html.”
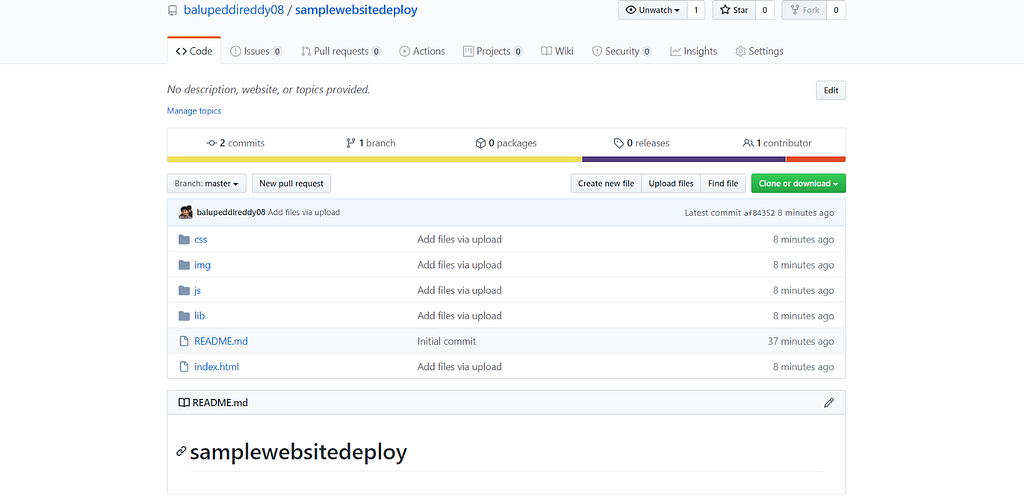
This is the alignment of files of the “samplewebsitedeploy” in my local(computer).
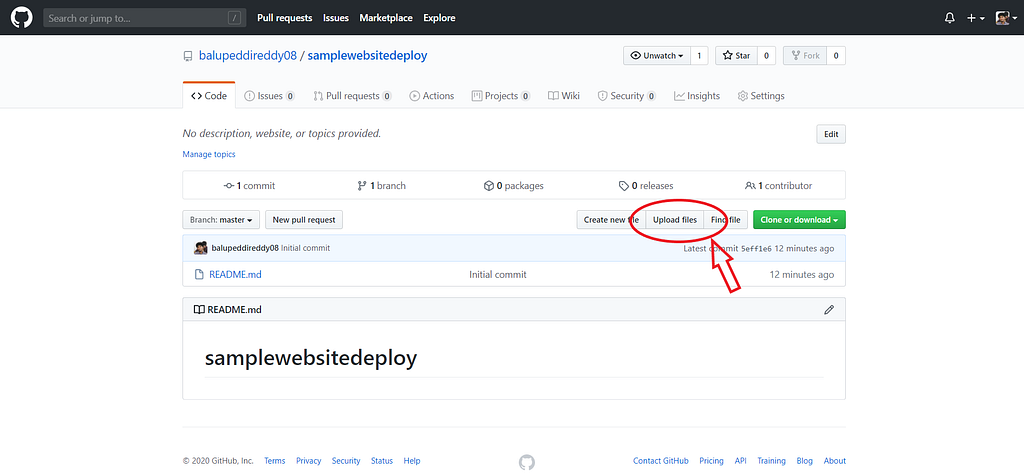
Drag and Drop all the files one by one and click the “commit changes” button.
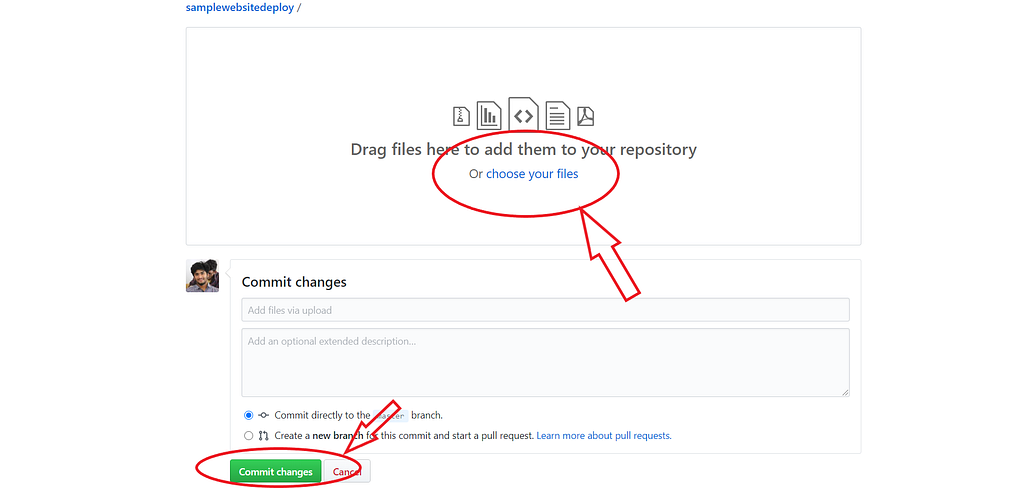
In the same alignment, You should upload them in the GitHub
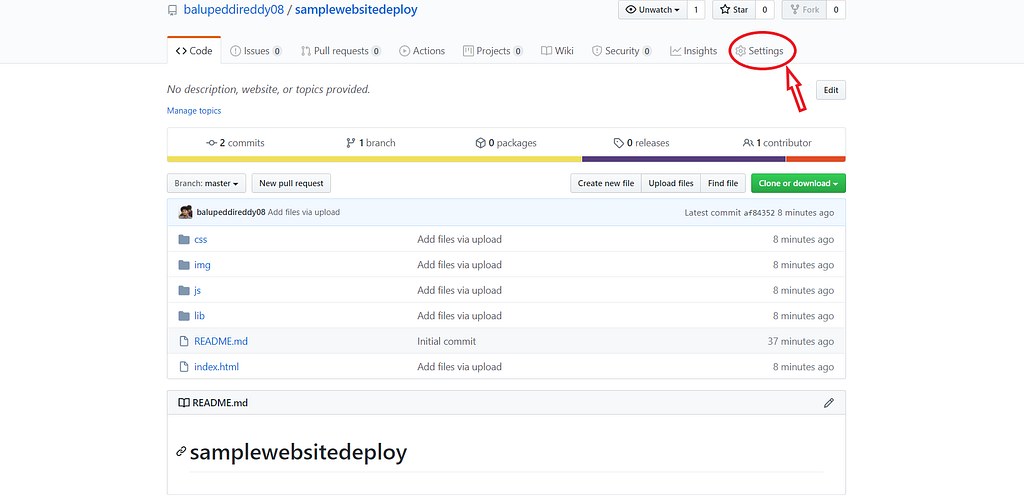
5. Publish your website
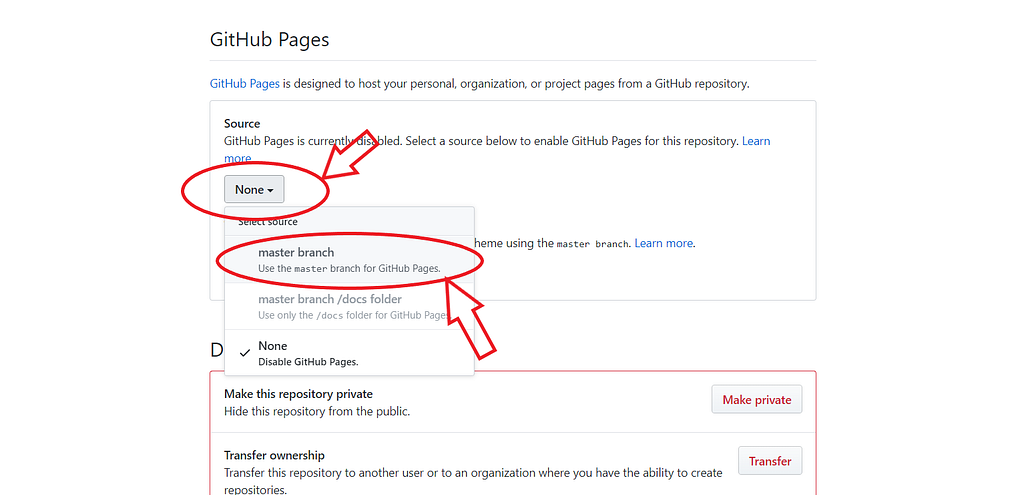
This is the most awaited part you are looking for. Click on the “Settings” button.
Scroll down until you see the“GitHub Pages” If you give the input “Name” as [username].github.io
If you give the input “Name” as per your required repository name, Now click on the “Source” dropdown menu and click on the “master branch” button.
Be cool, wait for a while, and refresh the page until you see the URL of the website.
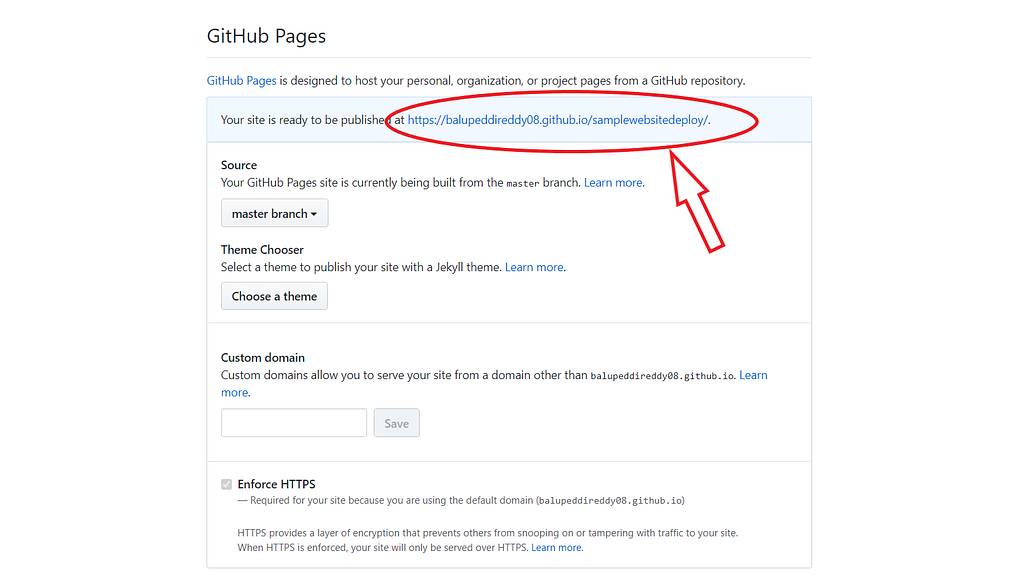
Congratulations, your website is ready…!!! 🔥😉
6. Share your website
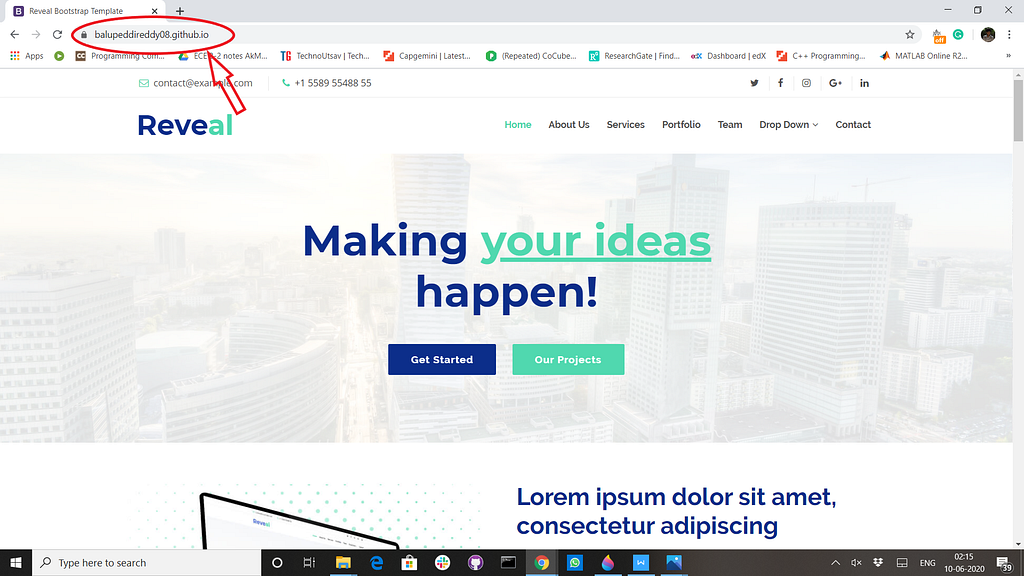
You can see your website globally with the generated URL. After clicking the link, you are going to view the website.

If you want to make changes to your website, you just commit the changes and push the files to your repository. Your changes will be seen automatically.
Happy Learning!😎
How to Deploy a Static Website using Github was originally published in Towards AI — Multidisciplinary Science Journal on Medium, where people are continuing the conversation by highlighting and responding to this story.
Published via Towards AI
Towards AI Academy
We Build Enterprise-Grade AI. We'll Teach You to Master It Too.
15 engineers. 100,000+ students. Towards AI Academy teaches what actually survives production.
Start free — no commitment:
→ 6-Day Agentic AI Engineering Email Guide — one practical lesson per day
→ Agents Architecture Cheatsheet — 3 years of architecture decisions in 6 pages
Our courses:
→ AI Engineering Certification — 90+ lessons from project selection to deployed product. The most comprehensive practical LLM course out there.
→ Agent Engineering Course — Hands on with production agent architectures, memory, routing, and eval frameworks — built from real enterprise engagements.
→ AI for Work — Understand, evaluate, and apply AI for complex work tasks.
Note: Article content contains the views of the contributing authors and not Towards AI.


Recent Posts


")

