


Create and Deploy your First Flask App using Python and Heroku
Last Updated on August 27, 2020 by Editorial Team
Author(s): Divy Shah
Programming
Flask is a web application framework written in Python. Here I created an application using Python and deployed on Heroku.
Click here to launch my demo web app.
Prerequisites
- Python
- Flask
- Git
- Heroku CLI
Installation
After installing Python install the other frameworks and libraries listed. You can easily install flask using the following command.
pip install Flask
#pip install
Define the structure of your web app
static
    |_main.css
template
    |_display.html
app.py
trending.py
requirements.txt
The static directory contains your CSS files, and the template contains the HTML file, which is used for rendering.
You can create a separate .py file for your logic and other operations or write code in the same app.py I suggest creating a separate file will reduce the confusion.
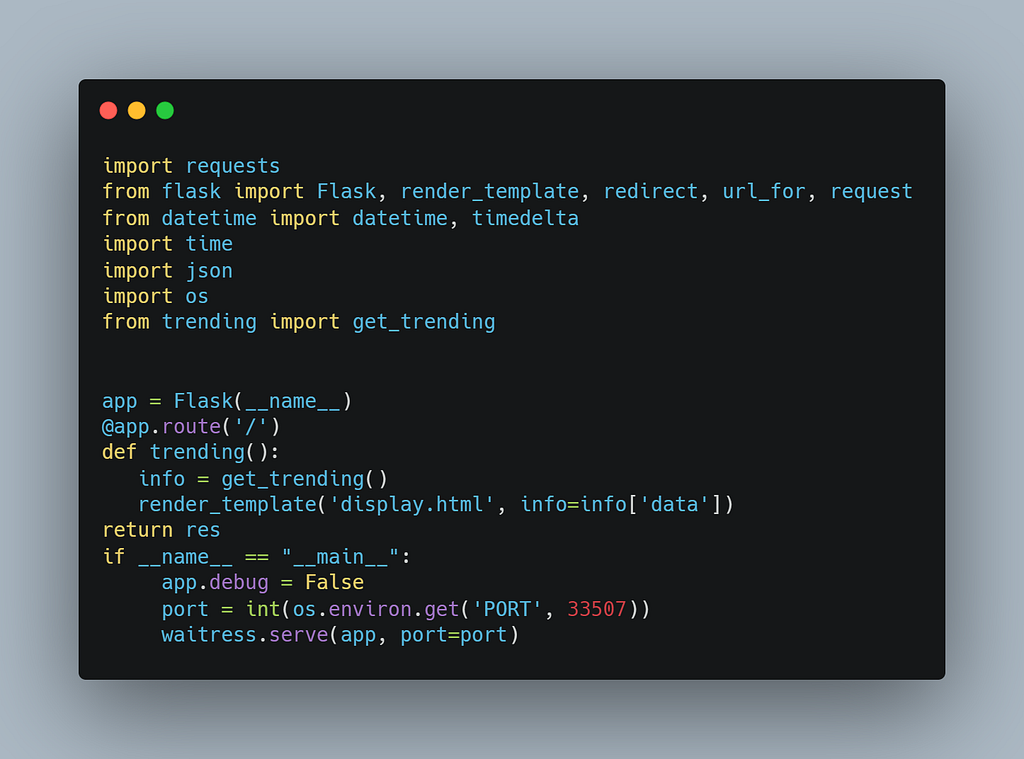
Step 1:
Create your app.py file
I used the waitress service the reason behind using this library is meant to be a production-quality pure-Python WSGI server with very acceptable performance. It has no dependencies except ones that live in the Python standard library.
Install waitress
pip install waitress
import requests
from flask import Flask, render_template, redirect, url_for, request
from datetime import datetime, timedelta
import time
import json
import os
from trending import get_trending
app = Flask(__name__)
@app.route('/')
def trending():
info = get_trending()
   render_template('display.html', info=info['data'])
return res
if __name__ == "__main__":
     app.debug = False
     port = int(os.environ.get('PORT', 33507))
     waitress.serve(app, port=port)
As shown above, we used the GET Method to send data from the server.
There are several other methods also available which are
POST: It is used to send user/form-data to the server doesn’t cache the transmitted data.
HEAD: It is similar to GET, but the difference is it is used without the response body
PUT: It is Used to replace the current resource with uploaded content
DELETE: It is used to delete the target resource provided in the URL.
Step 2:
Create trending.py file which is basically the file which contains your business logic after creation import main function in app.py file
from trending import get_trending
Below my trending.py file looks like:
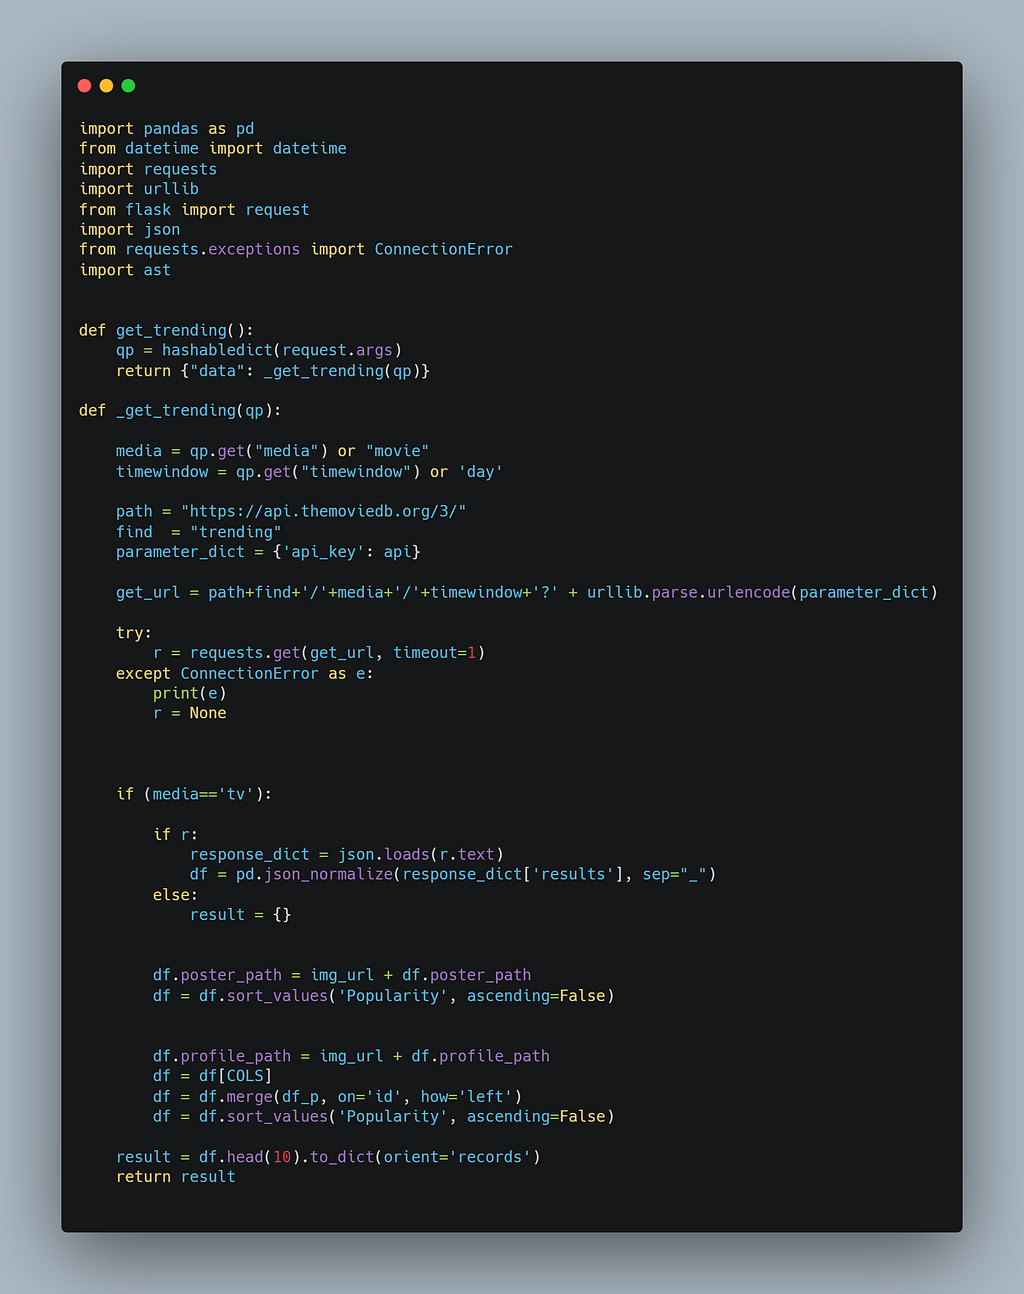
After collecting the data, we can render the output using an HTML file
The output data will be displayed on the HTML page.
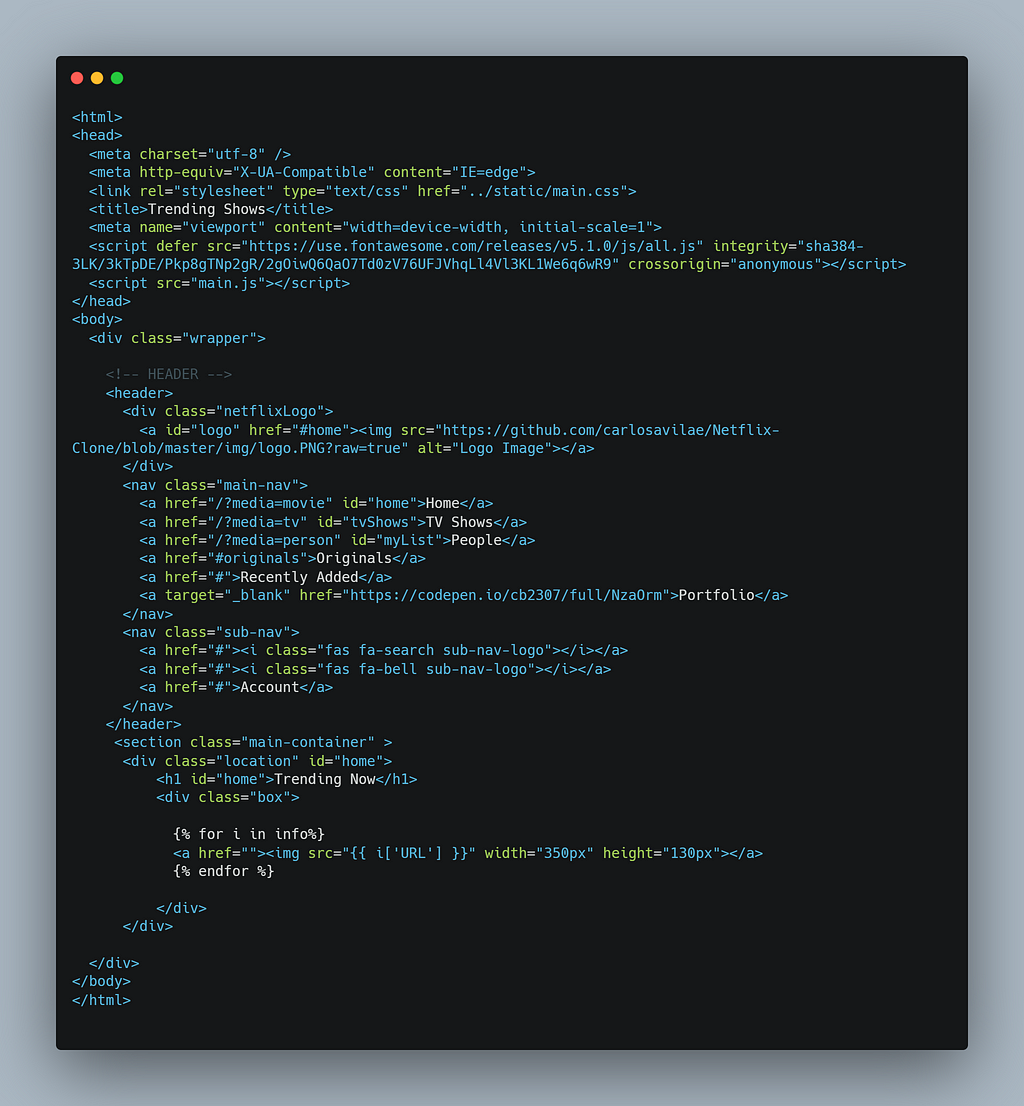
Step 3:
Create an HTML file for render the output which you collected from the response object.
Below is how my display.html file looks like
You are almost done with the coding part, and now it’s time to deploy our first flask app.
Before deploying the app, first, check the flask app on the localhost.
Deployment Steps
- Login to your Heroku account using CLI
You can log in by writing the following command in the terminal.
heroku login
2. Create a web app on Heroku
You can create a new application on Heroku using the following command
heroku create
3. Create requirements.txt file in the same project directory
To generate requirement.txt file, you can use the following command
pip freeze > requirements.txt
4. Create a Procfile
Procfile is a Process file which is required for all Heroku applications.
Procfile specifies the commands that are executed by the app on startup.
Click here to read more on Procfile
enter the following in Procfile
web: gunicorn app:app
Here the app is the name of your main (.py) file in my case it is app.py
if you don’t installed gunicorn web server then install it by using the following command
pip install gunicorn
NOTE: you have to create a Procfile without any file extensions
5. Create runtime.txt to specify the python version on runtime
After creating a runtime.txt add your build python version like below
python-3.8.1
Now, we are all set!
6. Initialize empty git repository and push the code
git init
Next, is time to commit your final code using the following steps
git add .
git commit -m "My first commit"
git push heroku master
Your app is live Now you can see your web app using generated URL
Please check out my demo web application
https://trending-shows.herokuapp.com/
Create and Deploy your First Flask App using Python and Heroku was originally published in Towards AI — Multidisciplinary Science Journal on Medium, where people are continuing the conversation by highlighting and responding to this story.
Published via Towards AI
Towards AI Academy
We Build Enterprise-Grade AI. We'll Teach You to Master It Too.
15 engineers. 100,000+ students. Towards AI Academy teaches what actually survives production.
Start free — no commitment:
→ 6-Day Agentic AI Engineering Email Guide — one practical lesson per day
→ Agents Architecture Cheatsheet — 3 years of architecture decisions in 6 pages
Our courses:
→ AI Engineering Certification — 90+ lessons from project selection to deployed product. The most comprehensive practical LLM course out there.
→ Agent Engineering Course — Hands on with production agent architectures, memory, routing, and eval frameworks — built from real enterprise engagements.
→ AI for Work — Understand, evaluate, and apply AI for complex work tasks.
Note: Article content contains the views of the contributing authors and not Towards AI.


Recent Posts


")