


Creating AI Web Apps using TensorFlow, Google Cloud Platform, and Firebase
Last Updated on January 6, 2023 by Editorial Team
Author(s): Jonathan Quijas
Machine Learning, Cloud Computing
From the Sandbox to the Cloud: How to Easily Deploy your Machine Learning Models into Production Web Applications
Introduction
Training Machine Learning models for a web app with ML functionalities is only part of the entire project’s development scope. One often overlooked aspect is going beyond the sandbox and into a production environment. In this article, I will demonstrate how to easily serve a TensorFlow model via a prediction service using Google Cloud Platform (GCP) AI Platform and Cloud Functions. Afterward, I will show how to deploy and host the web client using Firebase to query the model using HTTP requests.
The final project architecture will look similar to the figure below:

Disclaimer: This article will help you get started. This is not a tutorial on Firebase or Google Cloud Platform. For further details, I highly encourage readers to visit the official documentation. The official TensorFlow documentation is an excellent resource for a more in-depth view and details.
Model Training and Saving
Google Colab for Model Training

One great resource for training deep learning models is Google Colab. They provide free GPUs and TPUs, both of which can significantly improve training times. These are provided at no cost, and paid options exist for more advanced use cases. After training, models can be downloaded for further processing and deployment. For details on how to use Colab and begin training your models, I recommend this tutorial.
The following code defines an example TensorFlow model to use:
SavedModel Format
After training, you can save it using TensorFlow’s SavedModel format. This file represents a version of your model, containing the computation graph and other pertinent data. See here for further details on using a SavedModel. The following snippet shows how to save a TensorFlow model in the Saved Model format:
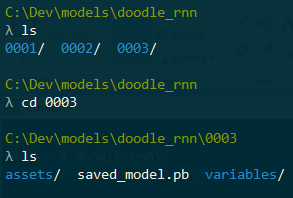
Versioning your models enables you to keep track of changes and improvements. This makes it easier when deploying or rolling back your app to a previously known good model. For example, the figure shown here displays a directory containing three versions of the model in the directory doodle_rnn.
Prediction Service
A simple way to deploy your trained model into a production environment is to create a prediction service using the GCP AI Platform. The web app requests a prediction on some query data (for example, user input), and the prediction service will provide the model’s predictions as a response. To begin, you will need to login into GCP and create a project. See here for more details on creating a project in GCP.
Creating a Bucket for your Project
After creating your project, store your SavedModel in a bucket. Follow this example on creating buckets for a quick and easy walkthrough.
According to the official documentation:
Buckets are the basic containers that hold your data. Everything that you store in Cloud Storage must be contained in a bucket.

Once you have a bucket ready, upload the SavedModel’s directory into it. For example, if you have a directory ~/models/doodle_rnn, which contains model versions 0001, 0002, and 0003, you would upload the root directory (in other words, doodle_rnn, along with all the versions).
Create a Model
After uploading the SavedModel into a project bucket, create a Model on the AI Platform. Using the left navigation menu, under the Artificial Intelligence section, navigate to AI Platform, then click on “Create Model”. Alternatively, go here to navigate to the same page.
See this example for further details on creating a model on the AI Platform
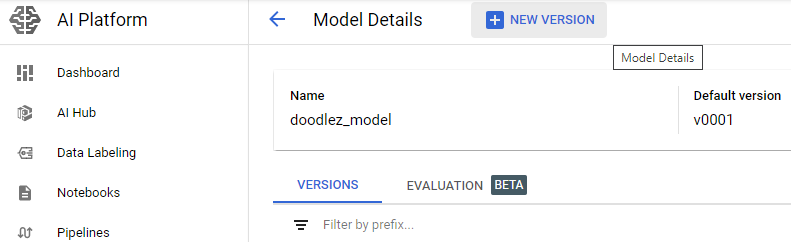
After creating the model resource, create a model version by clicking on your model resource, then clicking on NEW VERSION. Fill in all the required version details, including machine type and the full path to the model resource. This is the full path to the location in the bucket, including version directory (for example, doodle_rnn/0003).
IMPORTANT: Be careful when selecting the machine type. For a more affordable option, be sure to select a low-end machine option to avoid high costs.
After creating the model version, you would have successfully deployed your model to the cloud.
Application Backend
We can write a GCP Cloud Function to listen to prediction requests, load the model, and generate and return the predictions.
Service Account
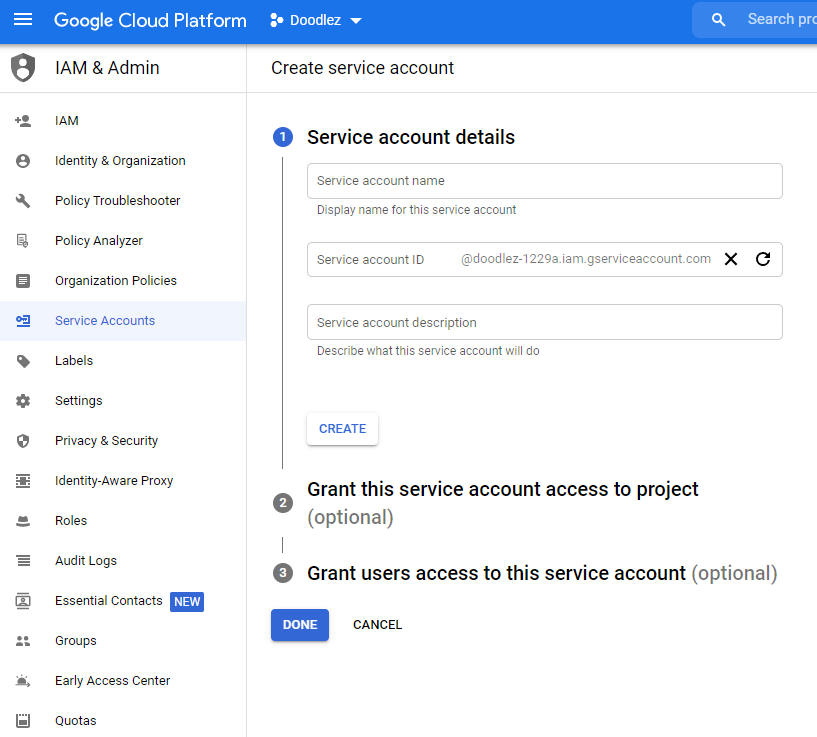
A service account is required to authenticate the client code and access the deployed model. In the left navigation menu, go to the IAM & Admin section, then click on Service Accounts. This will display a table with all service accounts associated with your project. Fill in the form and create a new service account. Afterward, assign to it the ML Engine Developer role. This will allow the service account to make predictions using the deployed model, and nothing else.
It is good practice to assign permissions on a need-to-have basis to avoid future conflicts or unintended access privileges.
Cloud Functions
We will use a Cloud Function to handle our web app’s backend. This is a serverless function in Python that will be triggered every time we send a web request to our specified URL. See here for more details on Google Cloud Functions.

To get started:
- Download and install the Google Cloud SDK. This will enable you to deploy your Cloud Function.
- Download the Google API Python Client. We will need this to interact with our deployed model from within our Python Cloud Function code.
- Optional and highly recommended: Download the Function Frameworks for Python. This is a lightweight framework that will allow you to run your Cloud Function locally. This is very useful for development and debugging.
Below is a Python Cloud Function that handles an HTTP request, loads our model, and returns a prediction:
Some important variables to keep in mind are:
- GOOGLE_APPLICATION_CREDENTIALS_FILE: Environment variable used for local debugging. If running locally, set this to the path where the service account key file is (for example, using a .env file).
- GOOGLE_APPLICATION_CREDENTIALS: This environment variable is required to use the ML service. If running the Cloud Function locally, then this is set with GOOGLE_APPLICATION_CREDENTIALS_FILE as explained above. Otherwise, this value can be set directly via the CLI when you deploy the function via theservice-account option, as shown in the deployment example.
- WEB_CLIENT_URL: This environment variable is the web client’s URL. This is needed to enable CORS securely, otherwise, client requests will fail.
- model_path = request.json[“model_path”]: This is a useful way to let the client specify what model version to use. For example, when doing A/B testing, the web client tells the Cloud Function what model to use based on some environment variable (see Web Client section below for an example). The Cloud Function simply loads the specified model and returns the predictions.
To deploy your function to the cloud, execute the following command in your terminal:
Some important and useful command options:
- –service-account: Make sure this is your newly created service account. This way, when the function is deployed, it is deployed with the correct roles and permissions (in this case, the ML Engine Developer role)
- –trigger-http: Specify this if you want your function to be triggered by HTTP requests (instead of RPC, for example).
- –env-vars-file: This allows you to specify an env.yaml file with environment variables. This is a very useful feature for deploying your application with any values you want to package along with it (for example, the value of WEB_CLIENT_URL as shown in the Cloud Function above).
See here for more details on setting environment variables when deploying the Cloud Function.
Hosting the Web Client with Firebase
Firebase is a platform developed by Google for creating web and mobile apps. It provides many useful features and integrates nicely with tools commonly required in web apps like authentication, monitoring, storage, and more.
We will use Firebase’s hosting service to deploy and host our web app. To get started:
- Download the Firebase SDK
- Create a Firebase project from your existing CGP project. Click on Add Project, then enter your GCP project name and create the Firebase project.
- In your terminal, execute firebase login to login into Firebase.
- Execute firebase init to initialize your project. Select the Hosting feature. Select the option Use an existing project, then select your newly created project. NOTE: Make sure to specify the correct build directory when filling in the following section What do you want to use as your public directory?. For example, if you use a tool like npm, you would specify the build directory as the public directory. This way, Firebase knows where to look for the production-ready built version of the web app and push that into the cloud.
- Execute firebase deploy to deploy.
That is it! Deploying is as easy as that!
Real-World App: Sketch Drawing Classifier
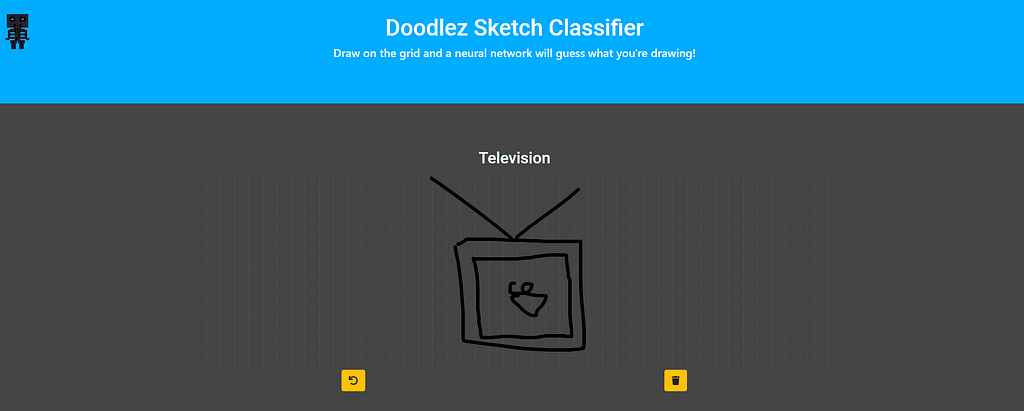
I created and deployed a web app using the very same methodologies presented in this article, from training using the Colab to handling HTTP requests using a Python Cloud Function, and everything in between. Hopefully, this will serve as a guide to get you started creating and deploying amazing AI web apps.
Conclusion
In this article, I presented an end-to-end walkthrough to deploy and productize a web app that uses a prediction service. Specifically, I covered how to:
- Train models at no cost using Colab
- Save models using the SavedModel format
- Create a prediction service using AI Platform
- Create a lightweight backend using Cloud Functions
- Deploy an existing web client using Firebase hosting
This approach will enable you to easily and quickly deploy any future machine learning projects with very affordable cost options.
Be Careful with Costs
Keep in mind your app’s usage and be mindful of your budget. Although for most user projects the price range will be quite reasonable, there is always a risk of running unintended large costs. One strong suggestion is to create a budget and and set alarms to be automatically triggered once you reach certain thresholds in your budget (for example, $0.50). This will allow you to monitor and disconnect services if needed.
Creating AI Web Apps using TensorFlow, Google Cloud Platform, and Firebase was originally published in Towards AI on Medium, where people are continuing the conversation by highlighting and responding to this story.
Published via Towards AI
Towards AI Academy
We Build Enterprise-Grade AI. We'll Teach You to Master It Too.
15 engineers. 100,000+ students. Towards AI Academy teaches what actually survives production.
Start free — no commitment:
→ 6-Day Agentic AI Engineering Email Guide — one practical lesson per day
→ Agents Architecture Cheatsheet — 3 years of architecture decisions in 6 pages
Our courses:
→ AI Engineering Certification — 90+ lessons from project selection to deployed product. The most comprehensive practical LLM course out there.
→ Agent Engineering Course — Hands on with production agent architectures, memory, routing, and eval frameworks — built from real enterprise engagements.
→ AI for Work — Understand, evaluate, and apply AI for complex work tasks.
Note: Article content contains the views of the contributing authors and not Towards AI.
Related posts
Recent Posts


")

