


A New Way of Building Machine Learning Pipelines
Last Updated on January 7, 2023 by Editorial Team
Author(s): Abid Ali Awan
A New Way of Building Machine Learning Pipelines
Designing your first machine learning pipeline with a few lines of codes using Orchest. You will learn to preprocess the data, train the machine learning model, and evaluate the results.
In this article, we will go through all steps required to build a ML (Machine Learning) pipeline. We will be using Kaggle binary classification data COVID-19/SARS B-cell Epitope to analyze, preprocess, train and evaluate our model. We won’t be going deep into code and how these models work as you can find a detailed explanation from my previous project published on Deepnote.
We are going to utilize SARS-CoV and B-cell datasets to classify peptides into two categories, antibodies with inducing properties are labeled as positive (1) and antibodies without inducing properties are labeled as negative (0). To learn more about the dataset read the research paper.
Orchest
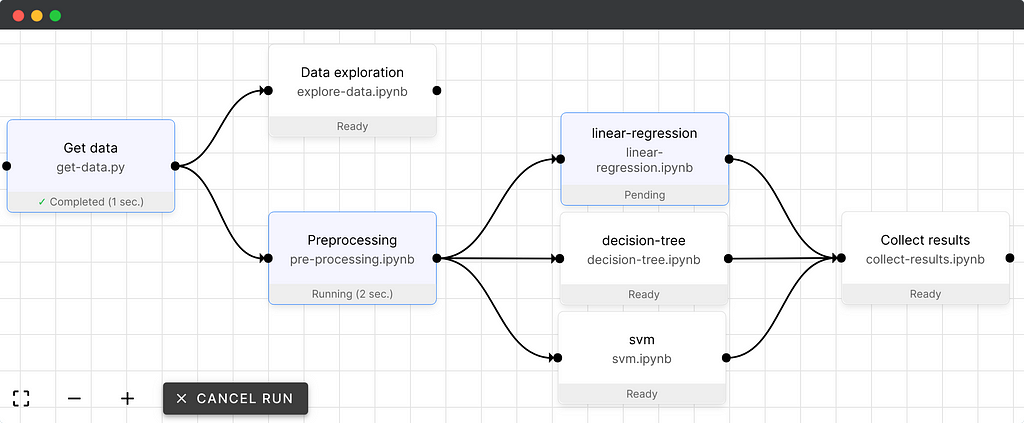
Orchest is a tool for building data pipelines that don’t require DAGs and frameworks. The environment is simple to navigate, and you can code Python, R, and Julia using the data scientist’s favorite tool Jupyter notebook.
A pipeline in Orchest contains which are called steps. These steps are executable files that execute within the isolated environment and the connections define the way the data flows. We can visualize our progress by monitoring each step or we can schedule run our pipeline to receive a full report on the dashboard.
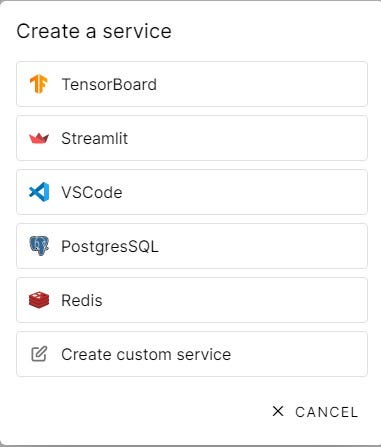
Additional Service
Orchest also comes with additional services such as visualizing your performance metrics on TensorBoard or write code in VSCode as these services are integrated seamlessly within the same environment.
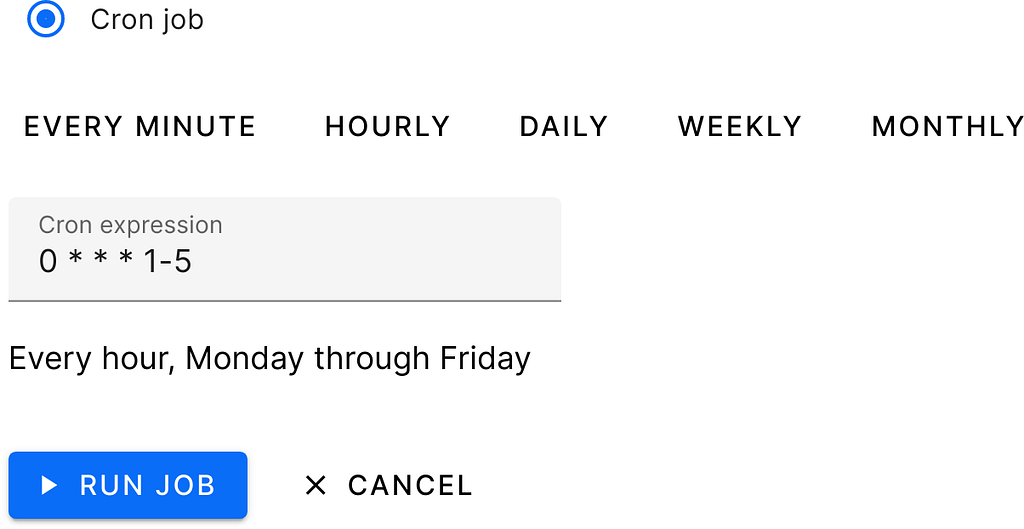
Scheduling Pipeline
Just like Airflow, you can schedule to run your pipeline, for a specific minute and hour of the day. This process doesn’t require you to code or even monitor the pipeline.
Installation
Installation for the local server is easy for Linux users, but for windows, you can get a similar experience by installing additional applications.
Windows
Make sure you have everything installed mentioned below
- Docker Engine latest version: run docker version to check.
- Docker must be configured to use WSL 2.
- Ubuntu 20.04 LTS for Windows.
- Run the script below inside the Ubuntu environment.
Linux
For Linux, you just need the latest docker engine and then run the script below to download and install all dependencies.
git clone https://github.com/orchest/orchest.git && cd orchest
./orchest install

# Verify the installation.
./orchest version --ext

# Start Orchest.
./orchest start
First Project
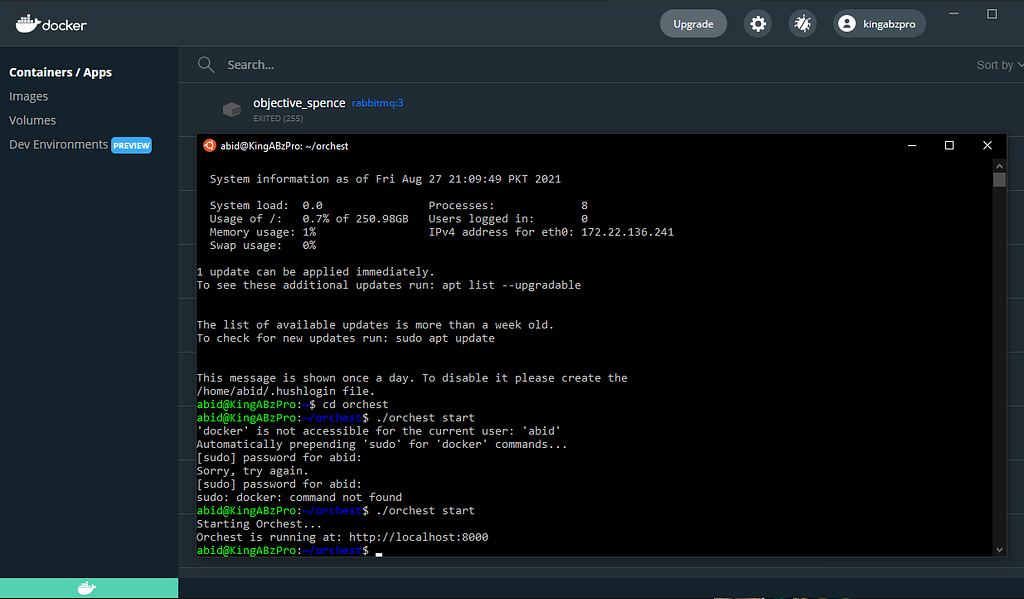
It’s time for us to start our local server. Type the script below within the Ubuntu environment as we will be running Linux virtual environment on windows. Make sure the Docker Engine is working properly.
After successfully running the script, you will receive a local web address that you can copy and paste into your browser.
cd orchest
./orchest start
On the landing page will see this amazing user interface. Finally, it’s time for us to create a new project by clicking on Create Project button.
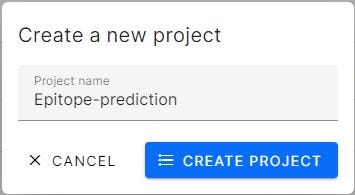
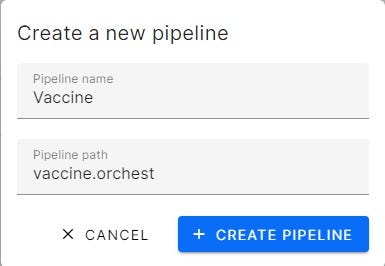
A project contains many pipelines, so now it’s time to create our Vaccine ML pipeline. By creating a pipeline will add vaccine.orchest file into your directory which contains metadata about every step.
For code, we will be using our previous project and focus on building an effective pipeline.
Epitope prediction used in vaccine development
ML Pipeline
Machine Learning pipelines are independently executable code to run multiple tasks involved in preparing and training models on processed data Azure Machine Learning. The figure below explains the generic machine learning model that is used in every machine learning project. The arrows represent data flow from one isolated task to another completed the machine learning life cycle.

Creating Steps
Let’s save theory for later and learn by practice, let’s learn by practice.
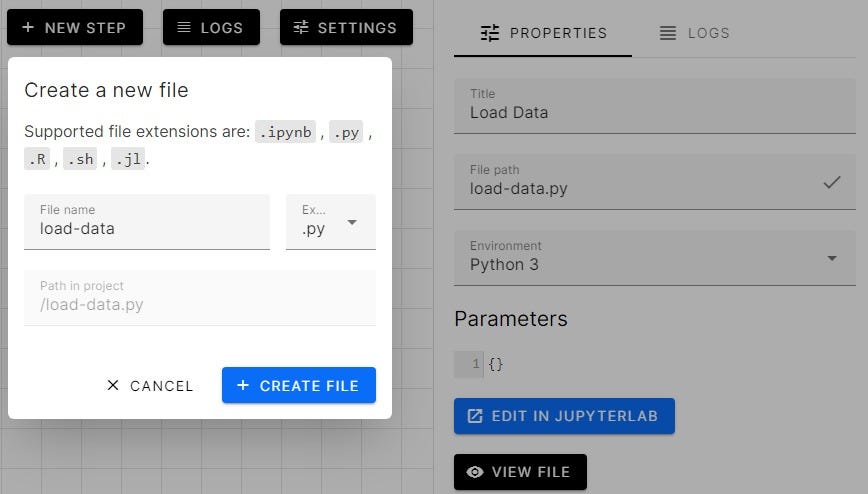
First your need to create the step by clicking on the New Step button. We need to add a step and if we don’t have a python file or .ipynb in our direction, we can create a new file with one simple step shown below.
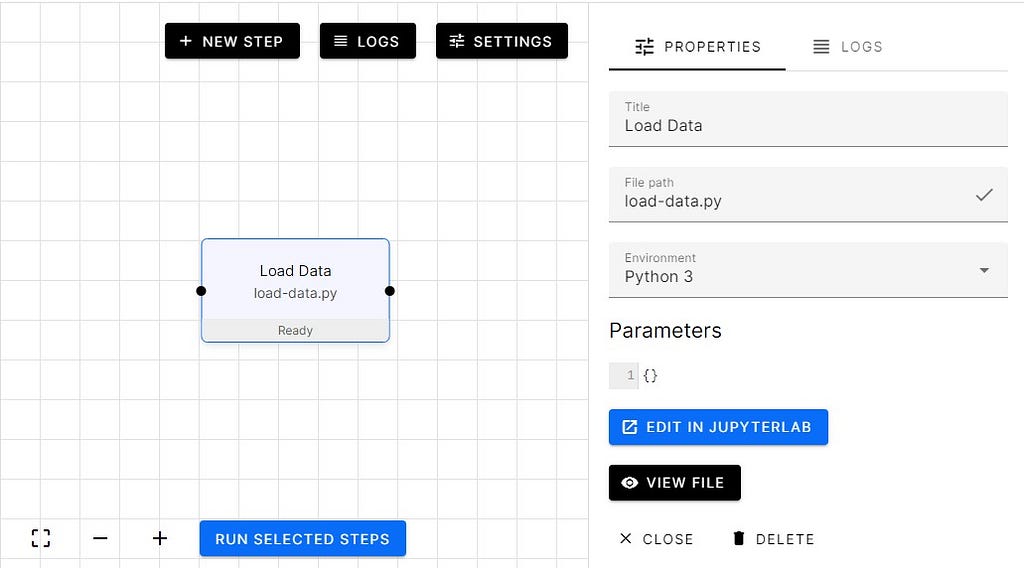
Voilà we have successfully created our first step and now we need to create a few more and try to connect the nodes.
We have added EDA (Exploratory Data Analysis) and Preprocessing step. Then joined them with the Load Data step so that each step has access to extracted data.
We will go into more detail on how we are going to code these steps later.
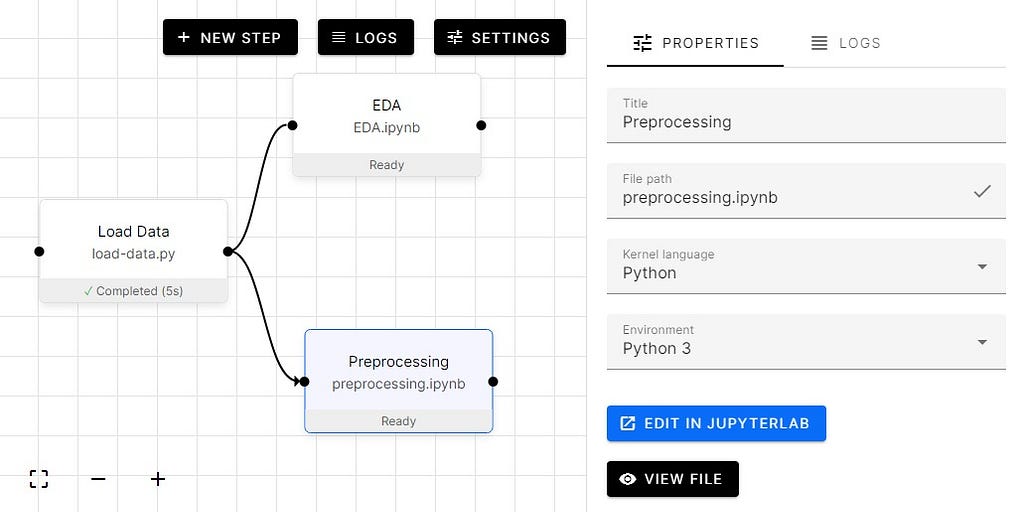
To code steps, click on the button Edit in JupyterLab, which will take us to the Jupyter notebook where you can start coding.
To run all the steps, select all by using a mouse and then click on the blue button on the bottom left called Run Selected Steps. This will run all steps one after another.
We can click on each step and check the logs, or we can just go directly to the notebook to check the progress.
Output
After connecting nodes, let’s make some changes in our code.
- we need to import orchest
- load data using pandas read_csv
- Concat bcell and sars dataframe.
- Use orchest.output to output the data for the next step (using a named output).
Orchest output takes single or multiple variables and creates dataflow, which we can use in the following steps. In our case bcell, covid, sars, bcell_sars are stored in the dataflow variable called ‘data’.
import orchest
import pandas as pd
# Convert the data into a DataFrame.
INPUT_DIR = “Data”
bcell = pd.read_csv(f”{INPUT_DIR}/input_bcell.csv”)
covid = pd.read_csv(f”{INPUT_DIR}/input_covid.csv”)
sars = pd.read_csv(f”{INPUT_DIR}/input_sars.csv”)
bcell_sars = pd.concat([bcell, sars], axis=0, ignore_index=True)
# Output the Vaccine data.
print(“Outputting converted Vaccine data…”)
orchest.output((bcell, covid, sars, bcell_sars), name=”data”)
print(bcell_sars.shape)
print(“Success!”)
Outputting converted Vaccine data…
(14907, 14)
Success!
Input
Now we are going to look at the input step. That takes all four variables and used them to explore and analyze the data. I have added only a few Jupyter notebook cells to demonstrate data flow between nodes. To see complete analysis check EDA | Deepnote.
Let’s import required libraries including Orchest.
Use orchest.get_inputs function to create an object and then add the name (‘data’) of the data pipeline variable to extract variables from the previous step.
As we can see we have successfully loaded the data from the previous task.
Using PCA from sklearn to reduce dimensionality to 2 and use scatter plots to visualize the target distribution.
Input and Output
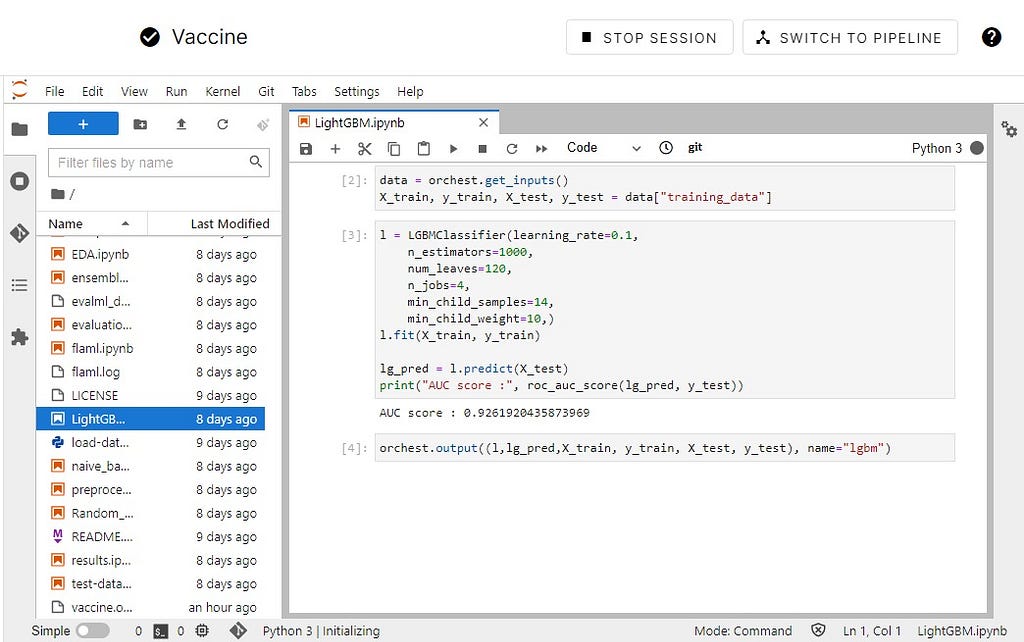
Let’s use both input and output functions to extract training data and then use it to train our Random Forest Classifier. After training, we will export our data for evaluation.
Input train test split from Preprocessed step using ‘training_data’ as name of data flow.
Using 400 estimators and fitting our train data set. As we can see our AUC score is quite good for a model without hyperparameter tuning.
Let’s output both our model and prediction for evaluation.
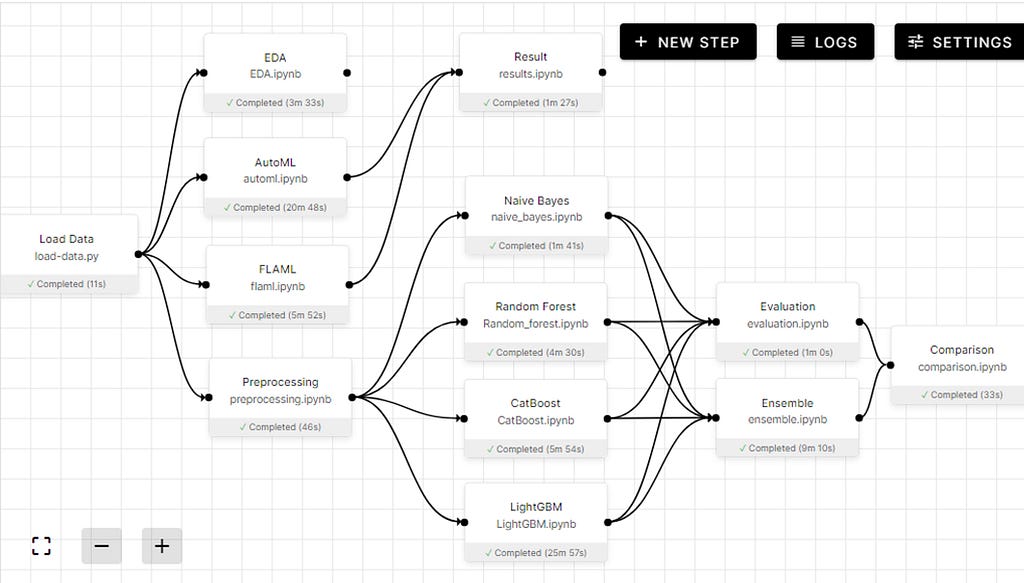
Final Pipeline
- Loading the data
- Exploratory Data analysis
- Using Alteryx EvalML and Microsoft FLAML to preprocess, train multiple modes and then evaluate results
- Processing data for training
- Train on Naive Bayes, Random Forest, CatBoost, and LightGBM.
- Evaluating results.
- Ensembling
- Comparing Accuracy Score.
Result
AutoML results
The final result of each model and ensemble with AUC and accuracy score.
Project
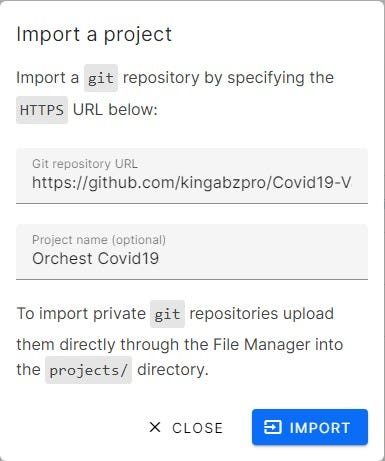
You can find this project on GitHub if you want to explore each step. You can also use my GitHub repo and load it into the Orchest local server, and it will run from the get-go, with similar results.
Orchest Cloud
The Orchest Cloud is in closed beta but you can apply for it and within few weeks you can get access. To be honest the could service was hassle-free as It was easy to load the GitHub project directly which ran smoothly.
Conclusion
Yannick Perrenet and Rick Lamers are simply amazing guys who have helped me throughout the learning process. If I had any issues or discovered any bug, they were quick to respond and proposed an alternative solution while updating the current workflow. At first, I was facing a lot of issues with installation and loading certain libraries, but these problems were quickly solved by the Orchest Slack community. Overall, my experience of using Orchest was quite amazing, and I think this will be the future of data science.
The cloud IDE needs to adopt ML pipelines to remain competitive.
We have developed a complete machine learning pipeline from data ingestion to model training and evaluation. We have also learned how it’s simple to create steps and join nodes using a single click. I hope my article has made your life simpler and for a beginner, it’s a gold mine as you can learn, train and deploy your machine learning model from a single platform.
You can follow me on LinkedIn and Polywork where I post amazing articles on data science and machine learning.
Machine Learning was originally published in Towards AI on Medium, where people are continuing the conversation by highlighting and responding to this story.
Published via Towards AI
Towards AI Academy
We Build Enterprise-Grade AI. We'll Teach You to Master It Too.
15 engineers. 100,000+ students. Towards AI Academy teaches what actually survives production.
Start free — no commitment:
→ 6-Day Agentic AI Engineering Email Guide — one practical lesson per day
→ Agents Architecture Cheatsheet — 3 years of architecture decisions in 6 pages
Our courses:
→ AI Engineering Certification — 90+ lessons from project selection to deployed product. The most comprehensive practical LLM course out there.
→ Agent Engineering Course — Hands on with production agent architectures, memory, routing, and eval frameworks — built from real enterprise engagements.
→ AI for Work — Understand, evaluate, and apply AI for complex work tasks.
Note: Article content contains the views of the contributing authors and not Towards AI.
Related posts
Recent Posts
")


")


