


Automate Machine Learning using Databricks AutoML — A Glass Box Approach and MLFLow
Last Updated on June 11, 2021 by Editorial Team
Author(s): Niranjan Kumar
Automated Machine Learning
Automate Machine Learning using Databricks AutoML — A Glass Box Approach and MLFLow
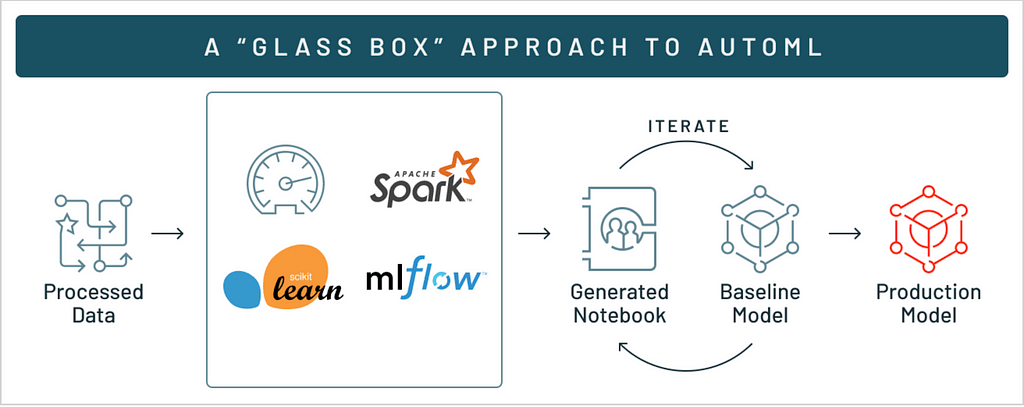
Databricks AutoML allows you to quickly generate baseline models and notebooks
Databricks recently announced their Databricks AutoML platform during the Data + AI Summit 2021. In this article, we will discuss how to use Databricks AutoML Platform to automatically apply machine learning to a dataset and deploy the model to production using the REST API.
Table of contents:
1. Overview of Databricks AutoML.
2. Setting up the Azure Databricks environment.
3. Configuring AutoML in Azure Databricks.
4. Exploring the notebooks generated by AutoML.
5. Registering the model to the MLflow model registry.
6. Deploy the model using REST API.
Databricks AutoML
AutoML refers to the automation of repetitive tasks in building machine learning or deep learning models. AutoML tries to automate the tasks in the ML pipeline such as data cleaning, feature engineering, handling of categorical features, hyper-parameter tunning with as little manual interaction as possible.
The main aim of AutoML is to bring the machine learning tools to non-machine learning or non-technical experts.
Databricks AutoML allows us to quickly build machine learning models by automating the tasks such as data preprocessing, feature engineering, hyper-parameter tuning, and best model selection. Databricks AutoML integrates with the MLflow to register the best-performed model to the model registry for model deployment (Serving model over REST API).
Setting up Azure Databricks Environment
In order to continue with the hands-on part of this tutorial, you need a Microsoft Azure account. Don’t worry if you don’t have an account, we can create it for free.
Go to Microsoft Azure Portal and signup for a free account. Once you have created your account, you will be credited with approx 200 USD for exploring azure services for 30 days.
Creating Azure Databricks Service
Before we can open databricks, we need to create an azure databricks service.
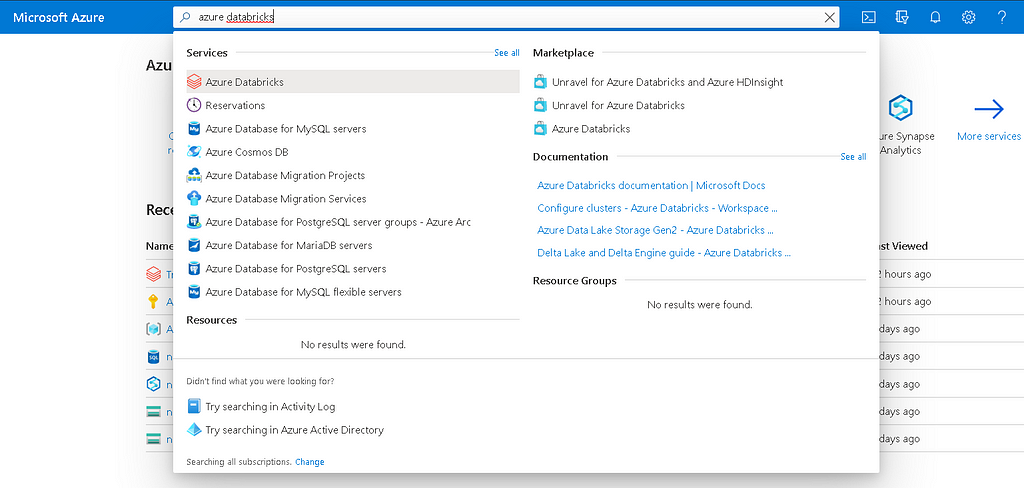
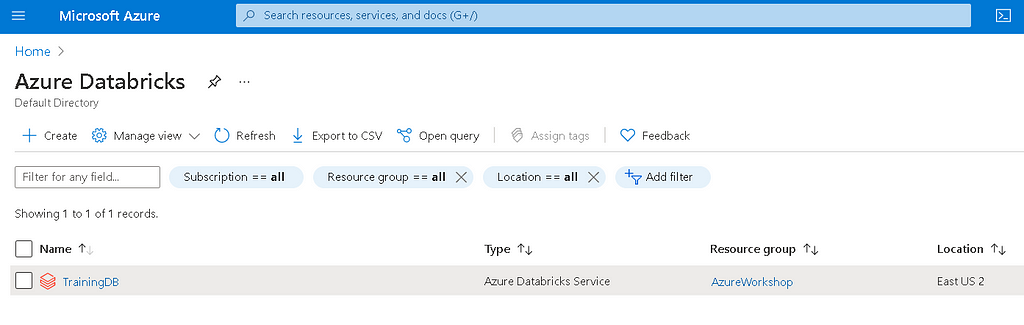
- Go to the Azure portal home page and search azure databricks in the search bar and select Databricks.
- Once you are inside the Azure Databricks default directory, we need to create an Azure Databricks workspace by clicking on create button.
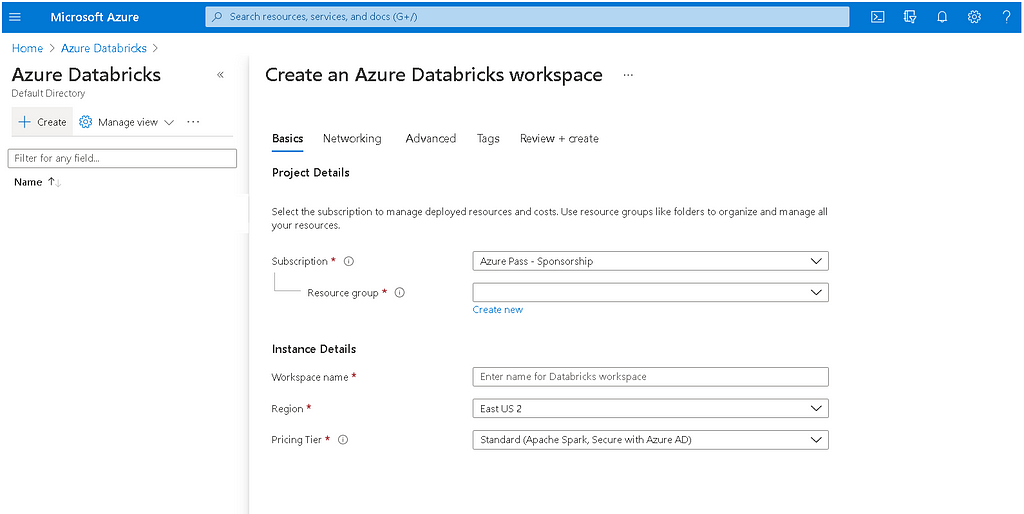
- Select a subscription service and create a resource group (A resource group is a collection of resources that share the same lifecycle, permissions, and policies).
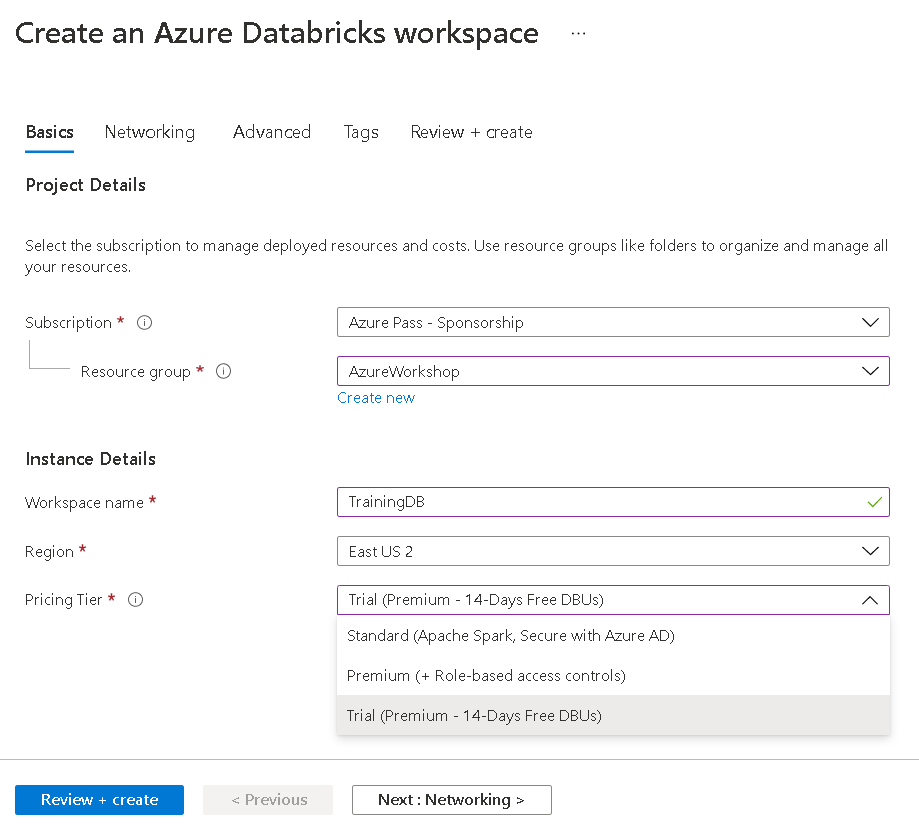
- Enter a unique workspace name for the resource group selected.
- Pricing Tier: Select Trail version or Premium tier. Click here to know the Azure Databricks pricing details.
- Next, we will not modify any networking or advanced settings given by the azure. We will go with the default settings.
- Finally, click on the review+create button to create the resource. Once the deployment is successful, you will see an Azure Databricks service created in the default directory.
Launching Azure Databricks Service
To launch the Azure Databricks service, click on the name of the service (TrainingDB). It will open the home page of the service.
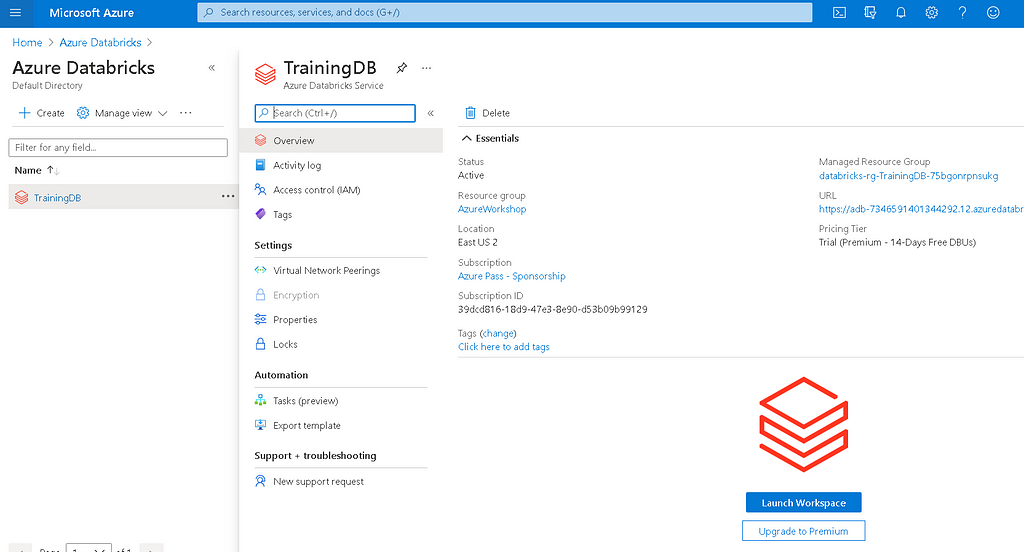
Once the service home page is opened, select the overview tab there you will see a button “Launch Workspace”. On clicking that button, Azure Databricks will be launched.
Configuring AutoML in Azure Databricks
I hope you are able to flow the tutorial up to this point. The next thing we will do is we will set up an AutoML experiment in Azure Databricks.
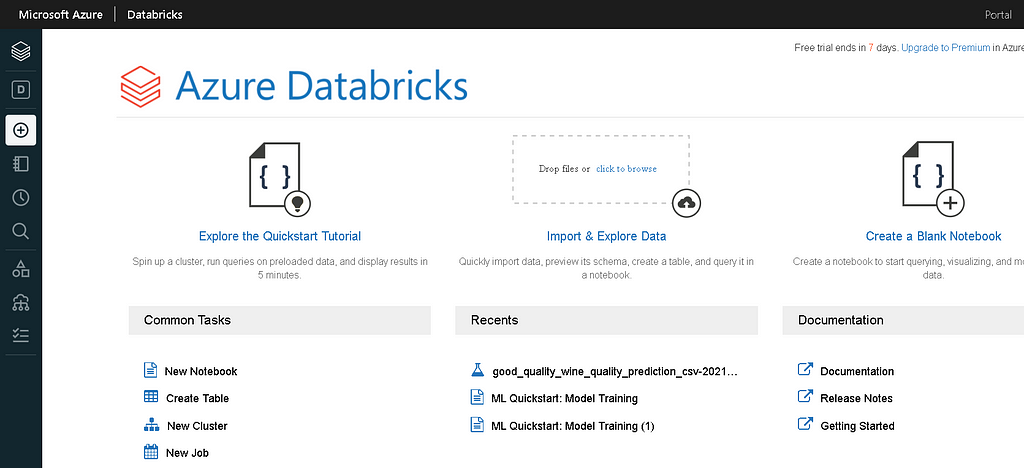
- To open the machine learning page in databricks, hover your mouse over the left sidebar in the Databricks workspace.
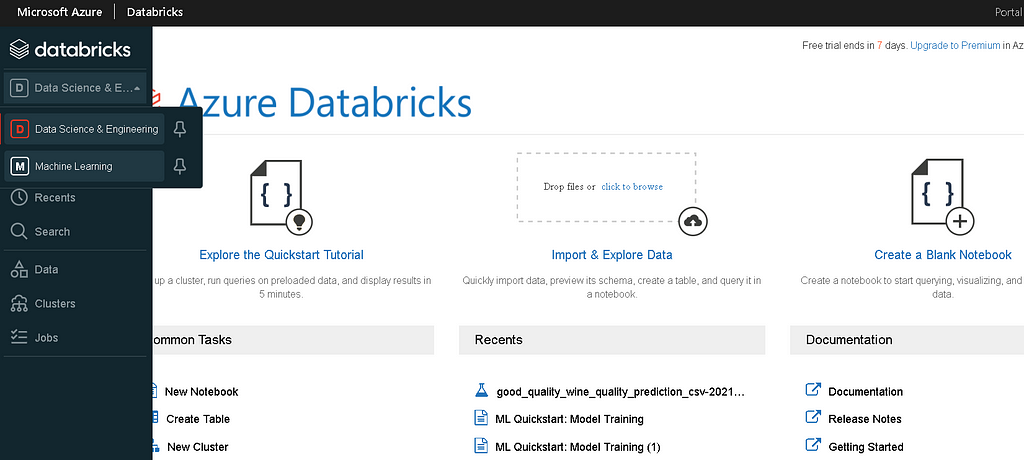
- From the persona switcher at the top of the sidebar, select Machine Learning.

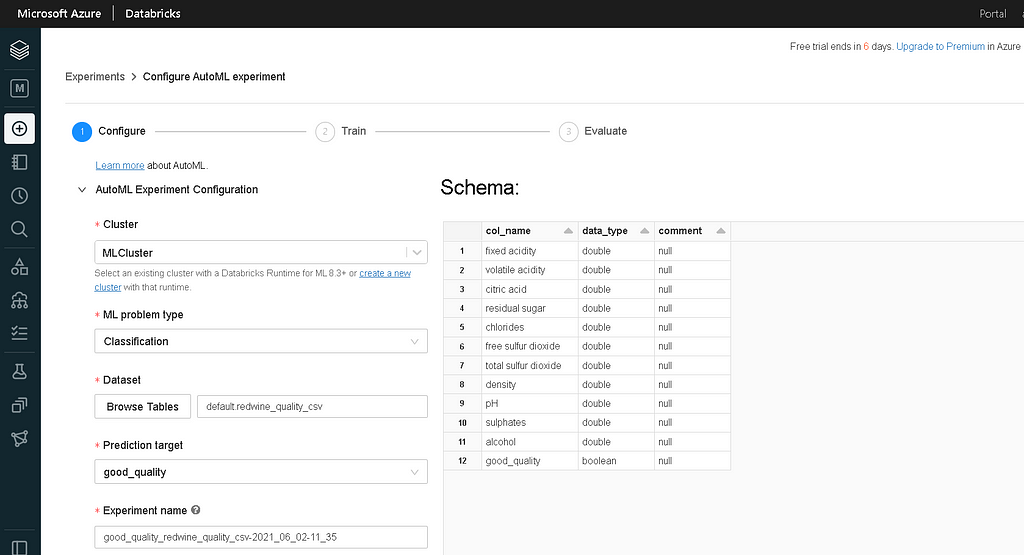
For this AutoML experiment, I used Kaggle’s Red Wine Quality dataset to predict whether a wine is of good or bad quality. To convert this into a classification problem, I have transformed the quality feature to boolean good_quality based on the quality score. If the quality score is greater than or equal to 7 then the feature will be set to Trueelse False

Creating Cluster in Databricks
In order to configure AutoML Experiment first, we need to create a cluster in databricks. To create a cluster hover your mouse over the left sidebar in the Databricks workspace and select clusters. It will open the clusters home page, if there are any active clusters you can see them here.
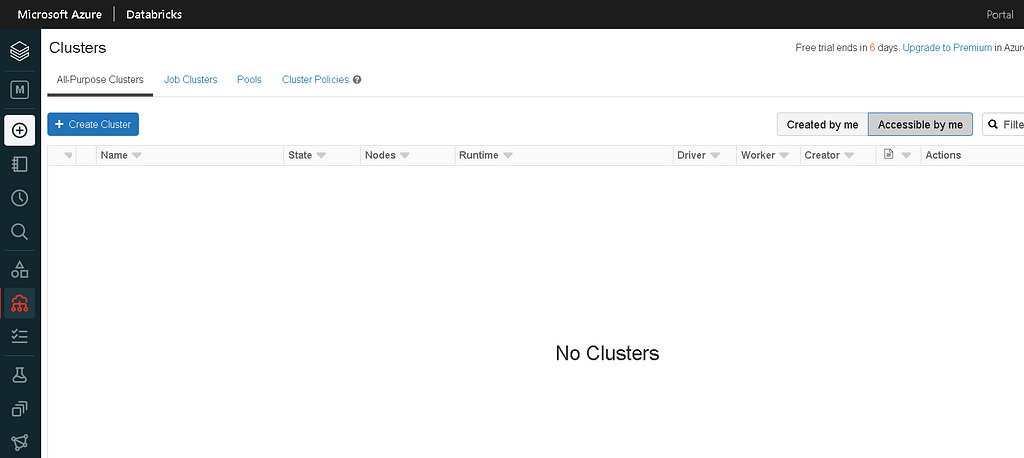
- Click on the “create cluster” button on the top left to create a new cluster.
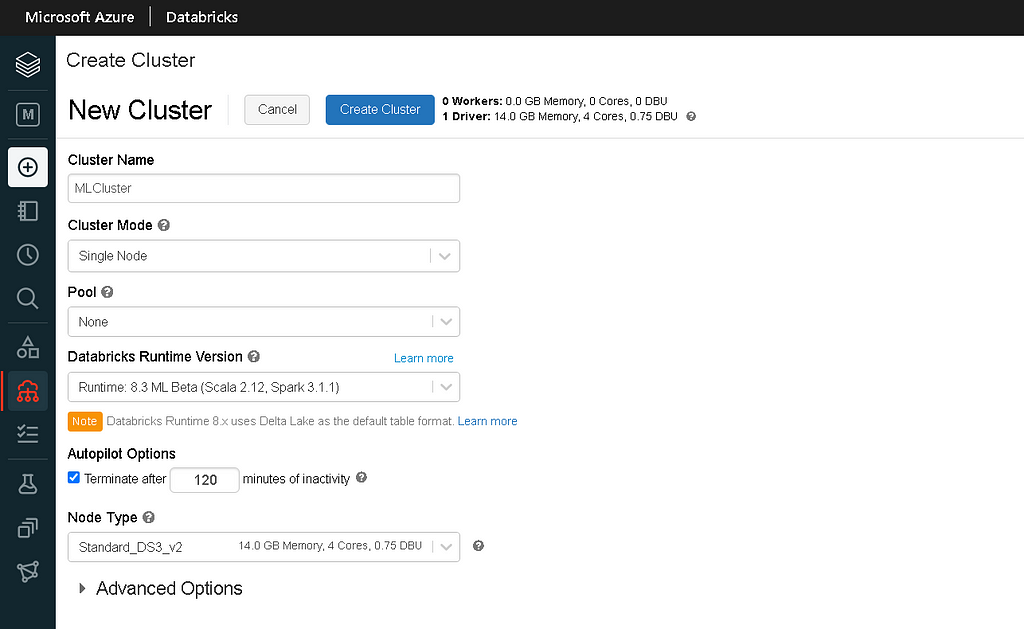
- Cluster Details:
– Cluster Name: Enter any cluster name
– Cluster Mode: Single Node (Since we are only experimenting on small data.
– Pool: Name
– Runtime Version: 8.3 ML Beta or Above
– Node Type: Standard_DS3_v2 (Default)
Loading the Data into Databricks
- Click on the data icon present in the left side menu bar. It will open a panel to create a new table.
- Upload the CSV file into the DBFS Target Directory
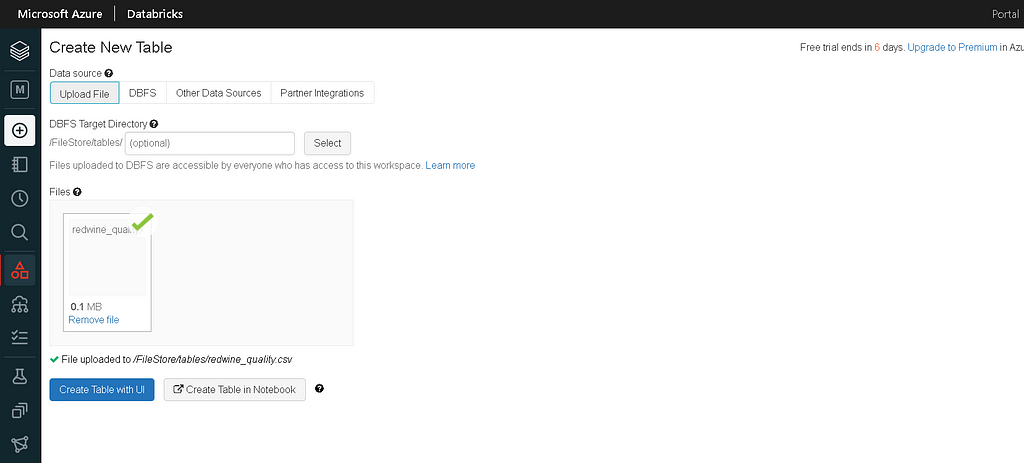
- After uploading the file, click on “Create Table with UI” & select the cluster that we created.
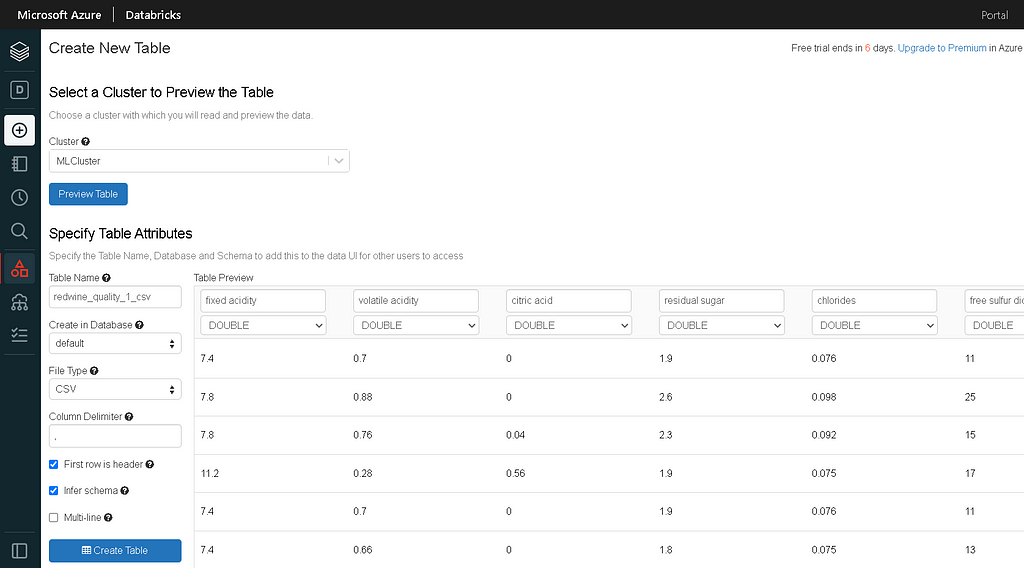
- Select the first row as header & infer schema options and create the table.
Setting up AutoML Experiment
- Now we are done with the prerequisites — setting cluster and created the data table. we will go ahead and set up the AutoML experiment.
- AutoML configuration:
– Cluster: MLCluster.
– ML problem type: Classification.
– Dataset: Browse the table that we created.
– Prediction target: good_quality (Auto selected by the platform)
– Experiment Name: Auto populated or Enter custom name.
- Next, we need to select the evaluation metric — F1 score (Because the data is imbalanced).
- We can even configure the stopping criteria — time out and a number of trail runs in the advanced configuration settings.
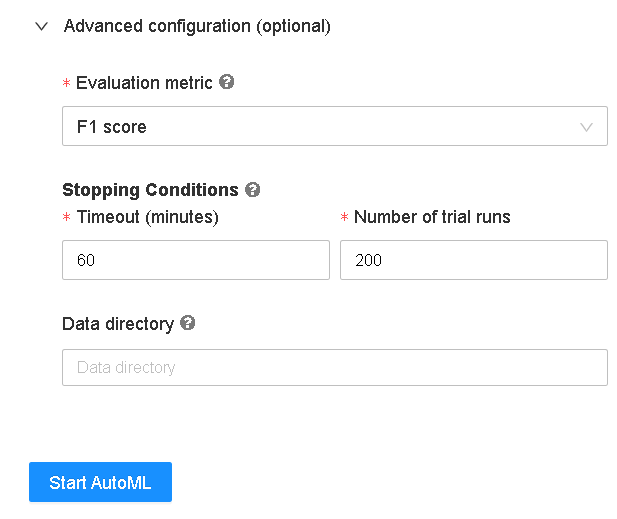
- After setting all the configurations, click on “Start AutoML” to train different iterations of the classification algorithms.
Exploring the notebooks generated by AutoML
Now that an hour has been passed, AutoML has completed executing different combinations of model iterations.
- If you take a close look at the metrics, they are automatically sorted by the validation f1_score in descending order such that the best model is at the top of the table.
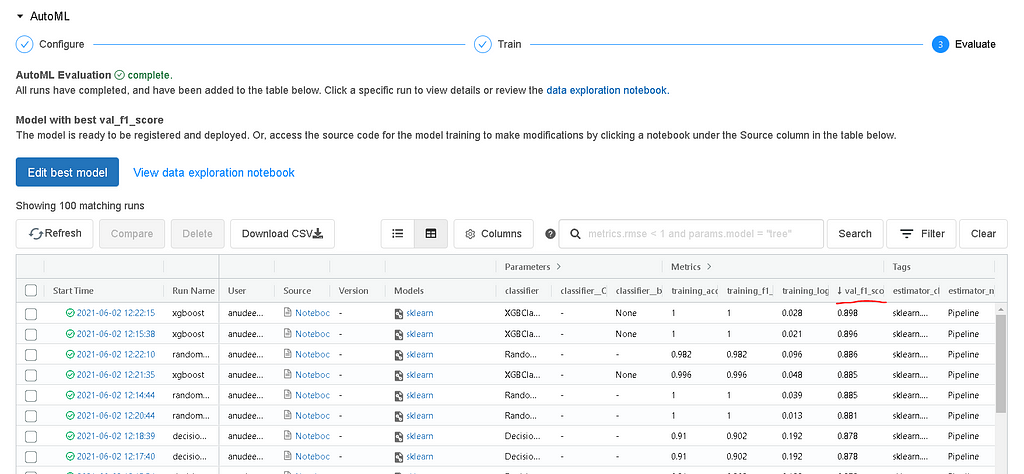
AutoML is integrated with MLflow to tracking all the model parameters and evaluation metrics associated with each run. MLflow is an open-source platform to manage the ML lifecycle, including experimentation, reproducibility, deployment, and a central model registry[1].
MLflow makes it easy to compare two or more model runs and select the best model run among these for further iteration or pushing the model to production.
Data Exploration in AutoML
Before we take a deep dive into the model execution runs, Databricks AutoML creates a basic data exploration notebook to give a high-level summary of the data. Click on the view data exploration notebook to open the notebook.
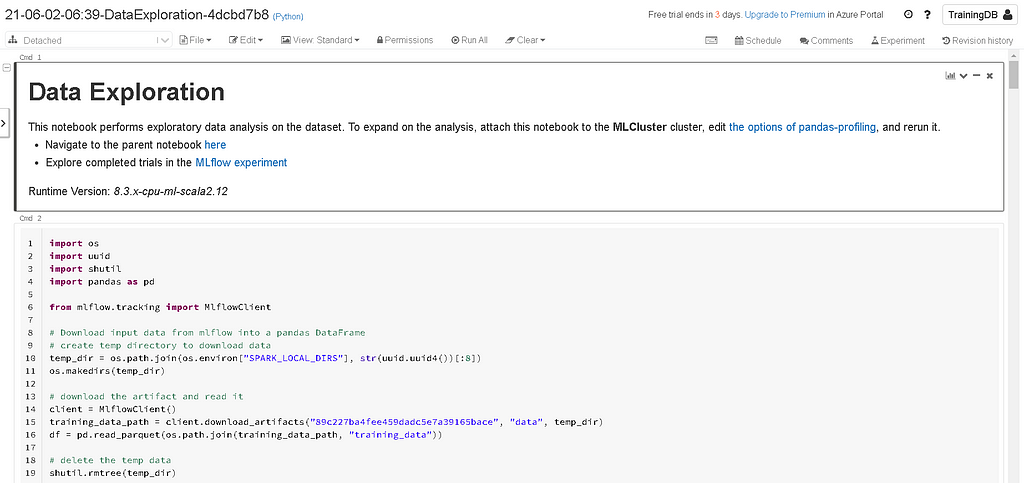
Without properly understanding the data, how many advanced algorithms we use on the data to build models it might not give appropriate results. So data exploration is a very important phase in machine learning but it is a time taking process most of the time data scientists will skip this phase.
Databricks AutoML saves time by creating the baseline data exploration notebook, data scientists can edit this notebook to expand on the data analysis techniques.
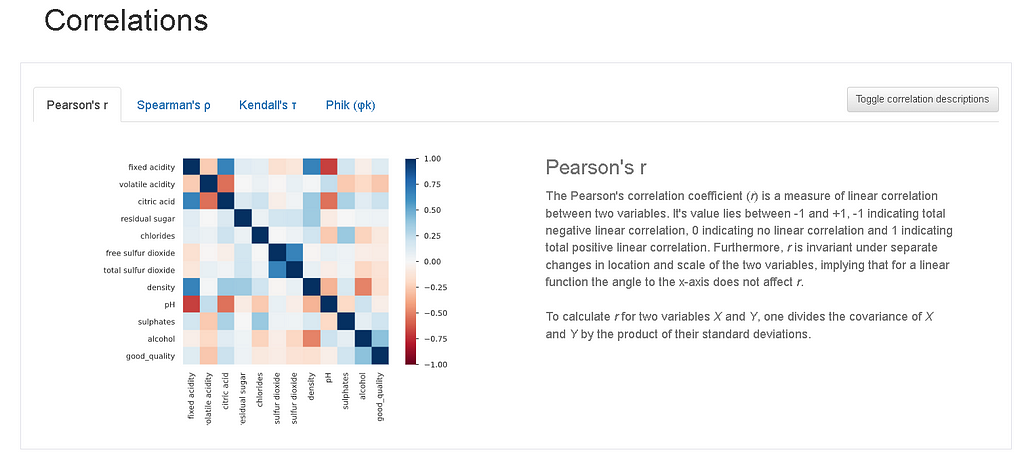
Internally AutoML uses pandas profiling to give information about correlations, missing values, and descriptive statistics of the data.
Exploring the AutoML Run Notebook
Now that you have a good understanding of the data after going through the data exploration notebook and you want to look at the AutoML model building code.
Databricks AutoML displays the model results and provides an editable python notebook with the source code for each trial run so that we can review or modify (eg: create a new feature and include that in the model build) the code. Under the source column on the experiment home page, you will see the reproducible notebook for each trial run — that is why it is called a Glass Box Approach (Allows you to look under the hood).
In order to open the source code for a run, click on the notebook icon under the source column for that run.
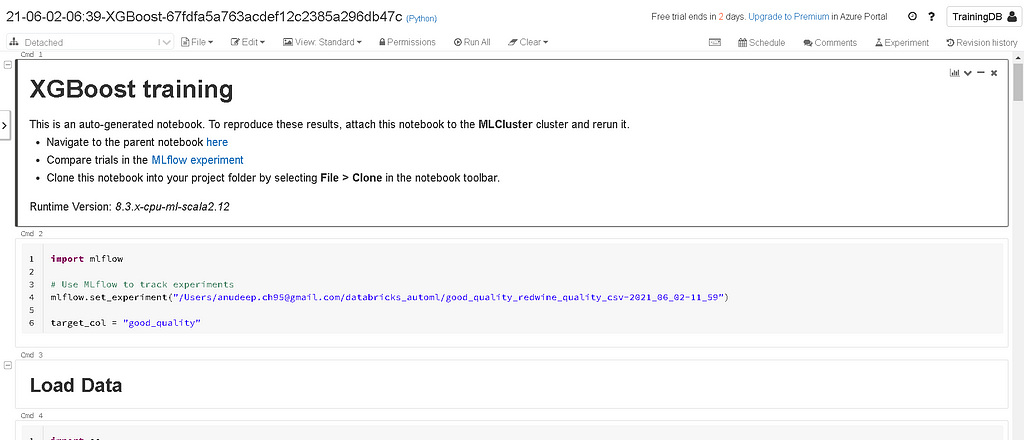
Each model in the AutoML runs is constructed from open source components, such as scikit-learn and XGBoost. They can be easily edited and integrated into the machine learning pipelines.
Data scientists or analysts can utilize this boilerplate code to jump-start the model development process. Additionally, they can use their domain knowledge to edit or modify these notebooks based on the problem statement.
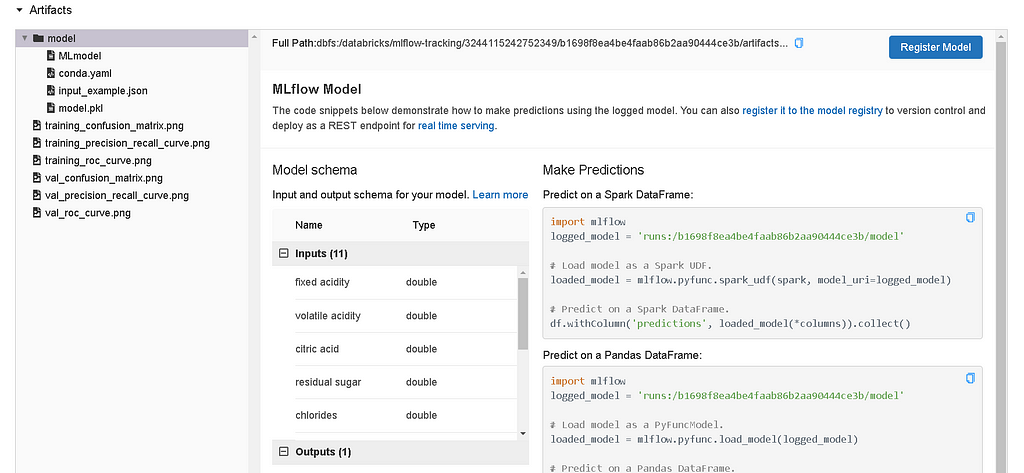
Registering the model to the model registry
Before we can deploy our model for serving, we need to register the model in the MLflow model registry.
Model Registry is a collaborative hub where teams can share ML models, work together from experimentation to online testing and production, integrate with approval and governance workflows, and monitor ML deployments and their performance[2].
To register a model on the model registry click on the run of your choice (my choice is the best run i.e.. the top run) and scroll down to the artifacts section & click on the model folder.
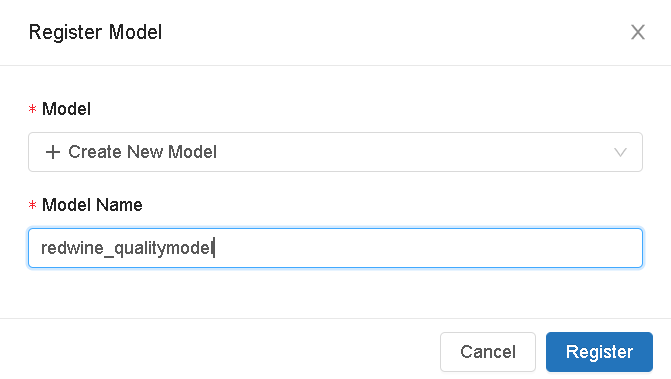
- Click on the Register model, select create a new model and enter the model name.
- You can register all the relevant models (models predicting quality of red wine) under the same name for collaboration (sharing models across different teams)
Now that we registered our model into the model registry, click on the popup icon located at the top right corner of the artifacts section to open the model registry user interface.

Exploring Model Registry
The model registry provides information about the model, including its author, creation time, its current stage, and source run link.
Using the source link you can open the MLflow run that was used to create the model. From the MLflow run UI, you can access the source notebook link to view the backend code for creating the model[3].
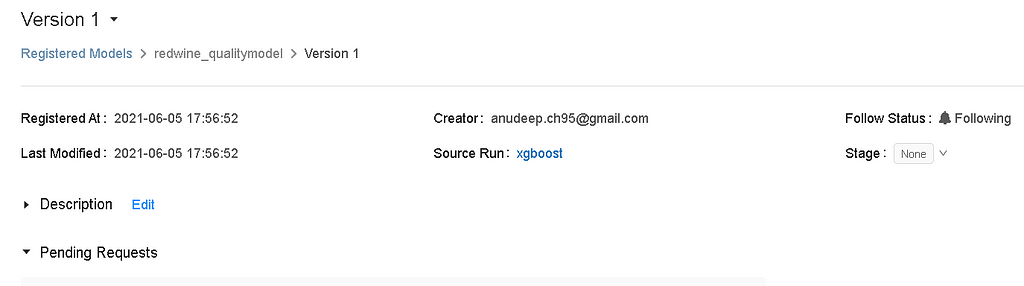
- You can even edit/add the model description for the model. Remember that the model description is dependent on the model version.
- Stages: Model Registry defines several model stages: None, Staging, Production, and Archived. More on this in the next section.
Deploy the model using REST API
We are in the final section of this tutorial. In this section, we will discuss how to push the model into production and serve the model using REST API.
Changing Model Stage
- As we have seen in the previous section about different stages in the model registry. Each stage has a different meaning.
- For example, Staging is meant for model testing, while Production is for models that have completed the testing or review processes and have been deployed to applications.
- In order to change the stage of a model, Click the Stage button to display the list of available model stages and your available stage transition options.
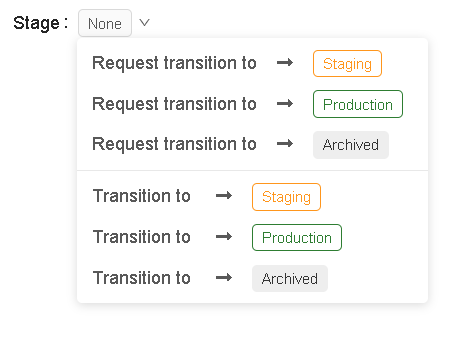
In an enterprise setting, when you are working with multiple teams such as the Data Science team and MLOps team. A member of the data science team requests the model transition to staging, where all the model testing takes place.
- All the tests are done, the model will be transitioned to the production environment for serving.
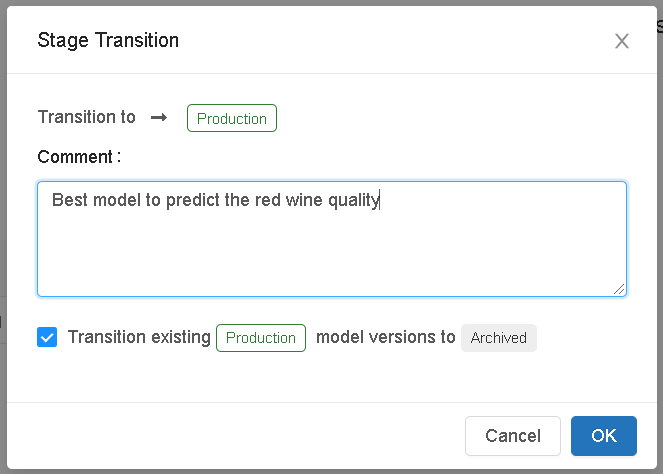
In this tutorial, I will directly push the model to production for simplicity. To push the model to production, Select Transition to -> Production, enter your comment, and press OK in the stage transition confirmation window to transition the model to Production.
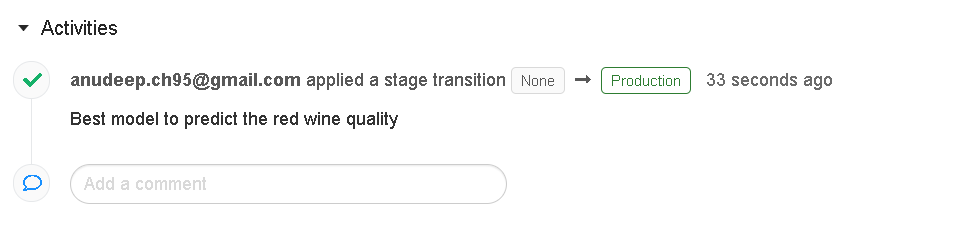
- After the model version is transitioned to Production, the current stage is displayed in the UI, and an entry is added to the activity log to reflect the transition.
- To navigate back to the MLflow model registry main page, click on the model’s icon on the left sidebar.
- MLflow Model Registry home page displays a list of all the registered models in your Azure Databricks workspace, including their versions and stages.
- Click the redwine_qualitymodel link to open the registered model page, which displays all of the versions of the forecasting model.
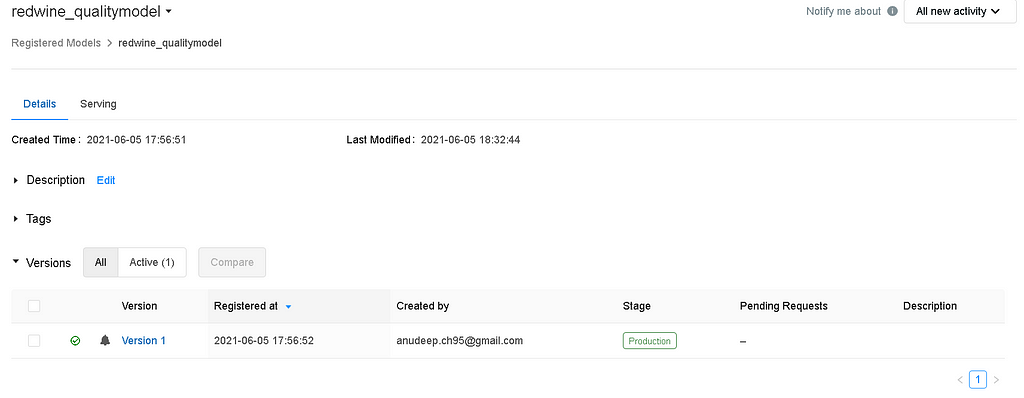
- You can see from the above image, there is a model “Version 1” is in the production stage.
Model Serving
Model serving in Databricks is performed using MLflow model serving functionality. MLflow performs real-time model serving using REST API endpoints that are updated automatically based on the availability of model versions and their stages.
- To enable serving, click on the serving tab present in the redwine_qualitymodel model registry page.
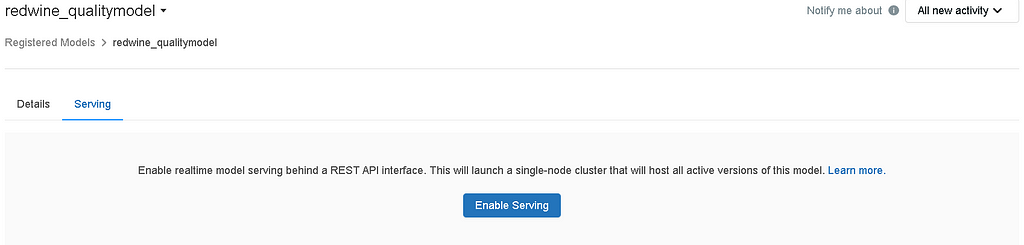
- If the model is not already enabled for serving, the Enable Serving button appears.
- When you enable model serving for a given registered model, Azure Databricks automatically creates a unique cluster for the model and deploys all non-archived versions of the model on that cluster[4].
Predictions using Served Model
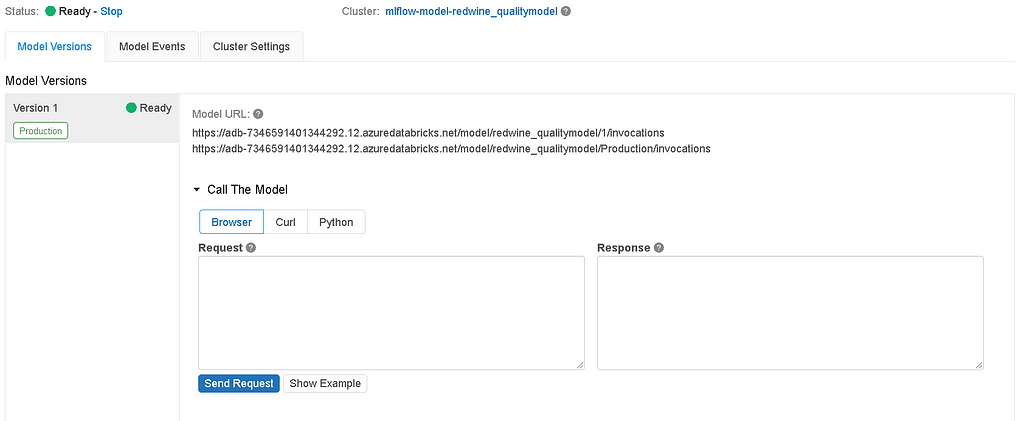
- After you enable the serving, it will take a couple of minutes for the serving cluster to be enabled. Once it is enabled you will see “ready” status.
Testing Model Serving
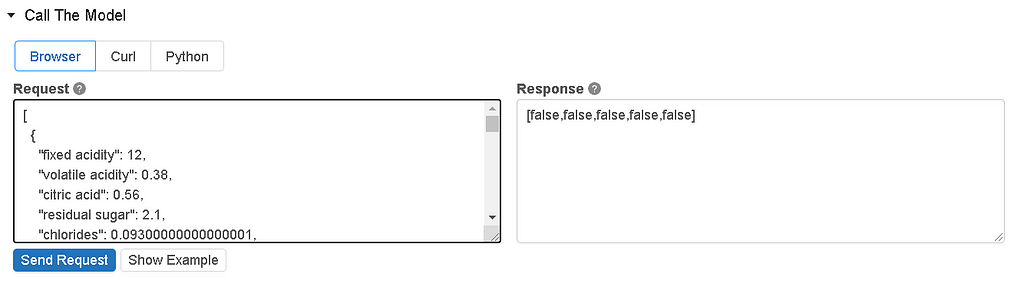
- After the serving cluster is ready, we can validate the model response by sending out a request in the request tab and view the response.
- In order to send a request, we need some sample data points. Click on the show example tab, it will automatically populate 5 data points and click -> send request to view the response.
Model URL
- On the serving page, you will see the model URL endpoints, Use these endpoints to query your model using API token authentication.
For more information (code snippets) on serving using REST API, check out the serving documentation.
MLflow Model Serving on Azure Databricks – Azure Databricks – Workspace
Cluster Settings
- By default, databricks will assign a basic instance type to the serving cluster. But if you are working on a very large dataset, you might need a more powerful cluster to handle the volume of predictions (responses) in real-time.
- To change the cluster settings, go to cluster settings and change the instance type based on your usage and click save.
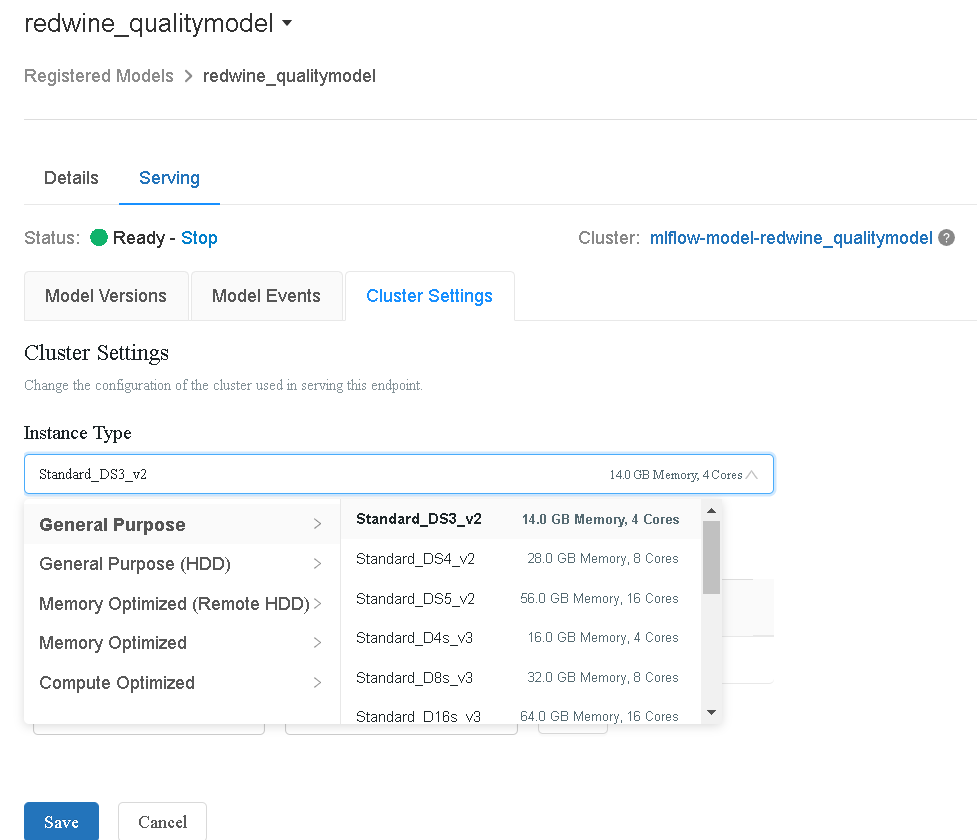
- It is important that you don’t confuse this cluster with the cluster we created when setting up the AutoML experiment.
– Serving Cluster: Cluster associated with serving endpoint.
– Databricks Cluster: Cluster associated with executing AutoML/Spark.
Note:
- The serving cluster is maintained as long as serving is enabled, even if no active model version exists.
- As long as the serving cluster is maintained, you will be charged as per the configuration of the instance that you selected for serving.
Remember to stop both the clusters before you log out from your azure account.
- To stop the serving cluster, click on the stop button next to the status on the serving page.
- To stop the databricks cluster, go to the clusters page by hovering the mouse on the left bar and select the cluster & click terminate.
There you have it, we have successfully configured the AutoML experiment and pushed the best into production for serving in real-time.

What’s Next?
Practice Practice
In this tutorial, we only covered the classification problem but you can also try out the regression problem using AutoML and get a complete understanding of model automation and transiting the model to production.
- Instead of configuring AutoML from the UI, you can even include AutoML functionality in your code using the Python API of AutoML.
- Check out the databricks AutoML documentation for how to configure Python API and relevant code snippets.
Conclusion
In this article, we started by discussing the overview of databricks AutoML. After that, we have discussed how to set up and launch the azure databricks service inside the Azure portal. Then we have seen how to configure the AutoML experiment using the red wine quality dataset. Finally, we have learned how to transition the model stages in the model registry and enable model serving using the REST API.
Feel free to reach out to me via LinkedIn or Twitter if you have any issues completing this tutorial. I hope this article has helped you in getting started with AutoML and understanding how it works.
In my next blog, we will discuss how to set up PySpark on your local computer and get started with PySpark Hands-on. So make sure you follow me on Medium to get notified as soon as it drops.
Until next time Peace 🙂
NK.
References:
- https://mlflow.org/
- https://databricks.com/product/mlflow-model-registry
- MLflow Model Registry example
- MLflow Model Serving on Azure Databricks
Automate Machine Learning using Databricks AutoML — A Glass Box Approach and MLFLow was originally published in Towards AI on Medium, where people are continuing the conversation by highlighting and responding to this story.
Published via Towards AI
Towards AI Academy
We Build Enterprise-Grade AI. We'll Teach You to Master It Too.
15 engineers. 100,000+ students. Towards AI Academy teaches what actually survives production.
Start free — no commitment:
→ 6-Day Agentic AI Engineering Email Guide — one practical lesson per day
→ Agents Architecture Cheatsheet — 3 years of architecture decisions in 6 pages
Our courses:
→ AI Engineering Certification — 90+ lessons from project selection to deployed product. The most comprehensive practical LLM course out there.
→ Agent Engineering Course — Hands on with production agent architectures, memory, routing, and eval frameworks — built from real enterprise engagements.
→ AI for Work — Understand, evaluate, and apply AI for complex work tasks.
Note: Article content contains the views of the contributing authors and not Towards AI.
Related posts
Recent Posts
")


")


