


Step by Step Creation of an EC2 Instance in AWS and Access it via Putty & WinSCP
Last Updated on August 26, 2020 by Editorial Team
Author(s): Balakrishnakumar V
Cloud Computing
An EC2 instance is a virtual server (Just like our computer, but in the cloud) in Amazon’s Elastic Compute Cloud (EC2) for running applications on the Amazon Web Services (AWS) infrastructure.
Let’s get started.
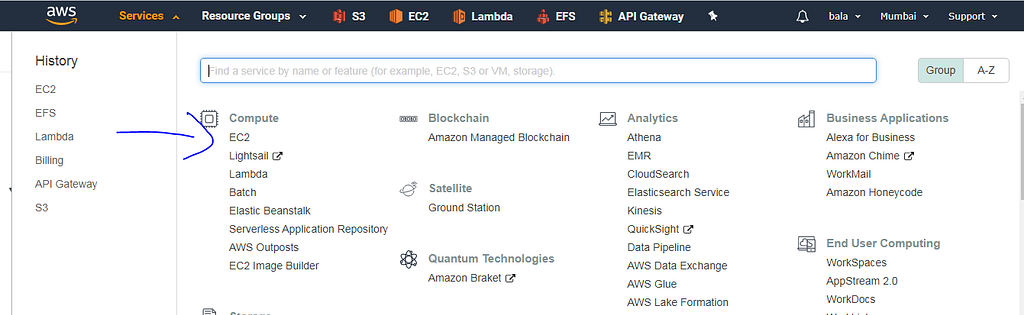
- Under services, click EC2 present under the compute section.
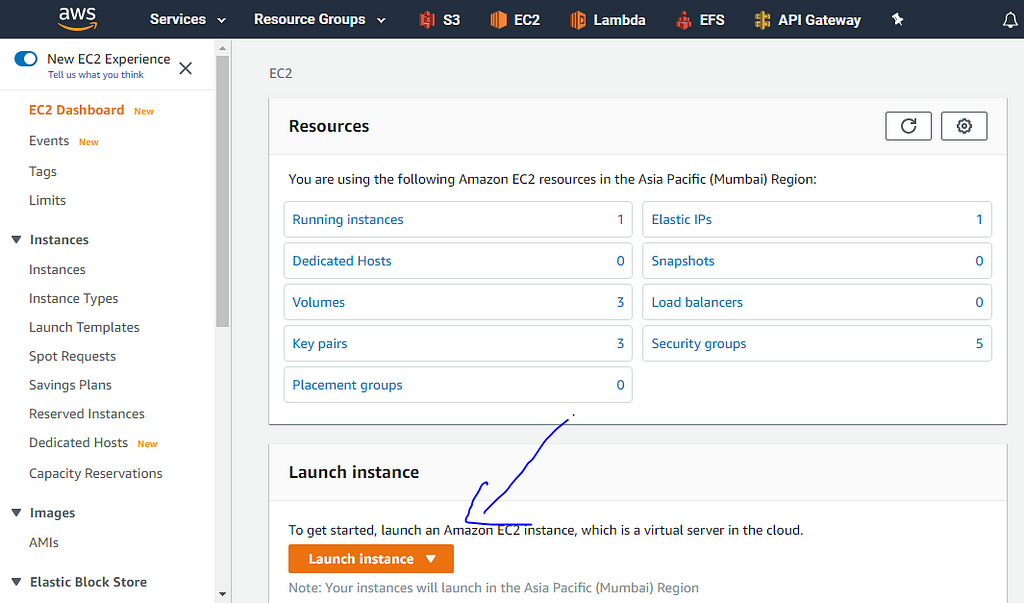
2. Click Launch Instance
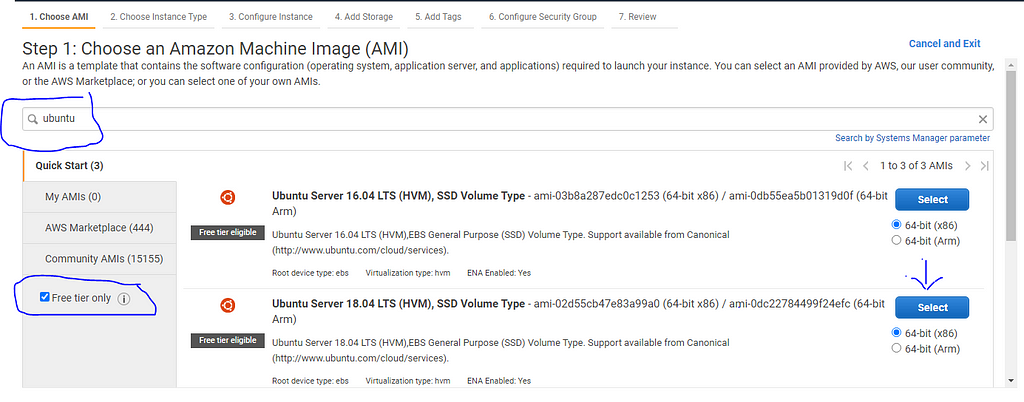
3. Search for ubuntu-based instance, also click Free Tier only, to avoid incurring any charges and now we select Ubuntu server of 18.04 Version for running deep learning-based applications. You can also choose other OS such as windows etc. But here we stick to the ubuntu based server. Then click select
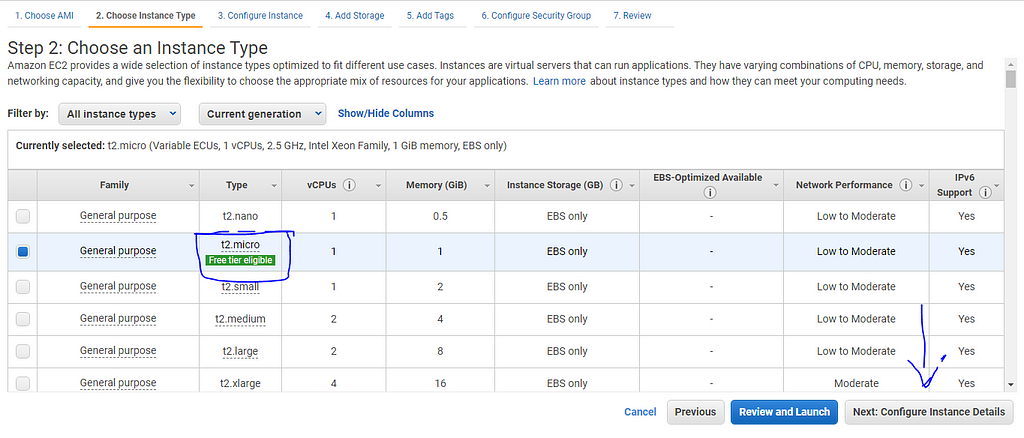
4. Select t2.micro instance, again to stay under free tier & it provides good performance for entry-level applications and click Next: Configure Instance Details.
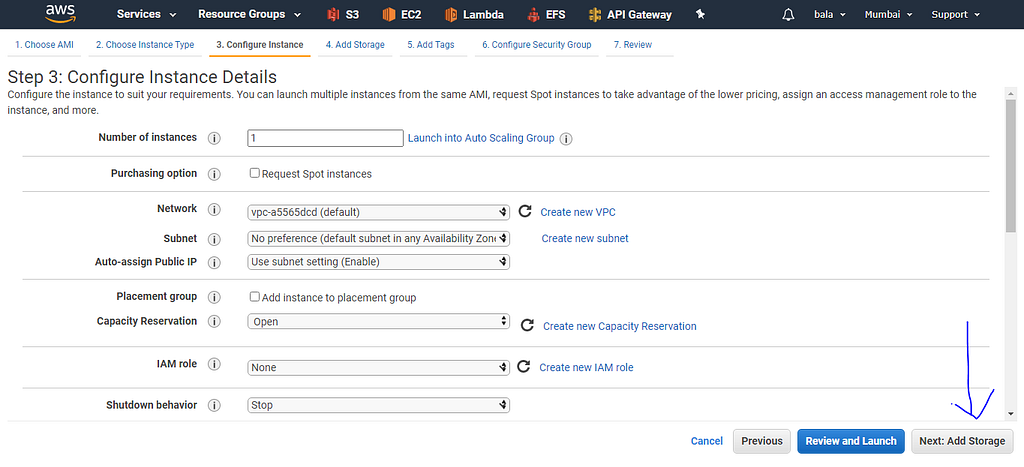
5. Leave the defaults as it is, and if you wish to change any parameters feel free to do it.
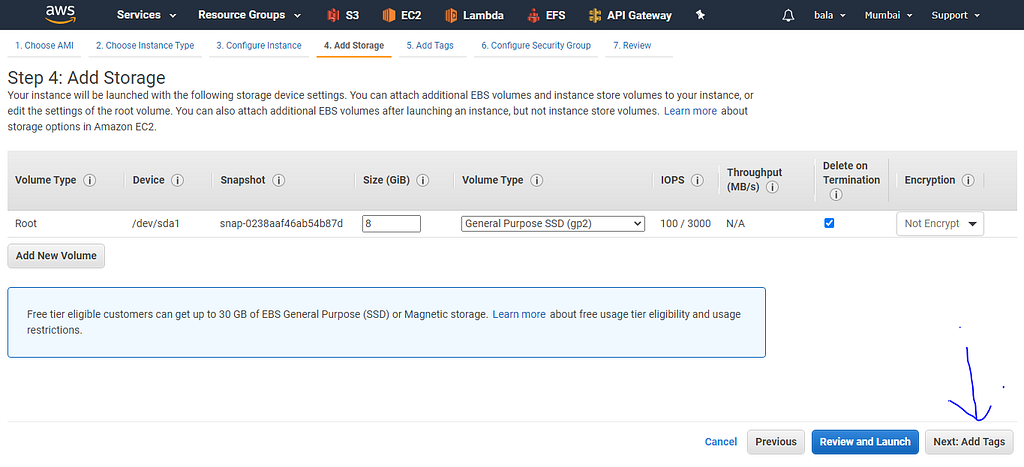
6. Next for storage, we leave the default 8 GB of space and make sure Delete on Termination is enabled( Disable it if you wish but not recommended) and click Next: add Tags
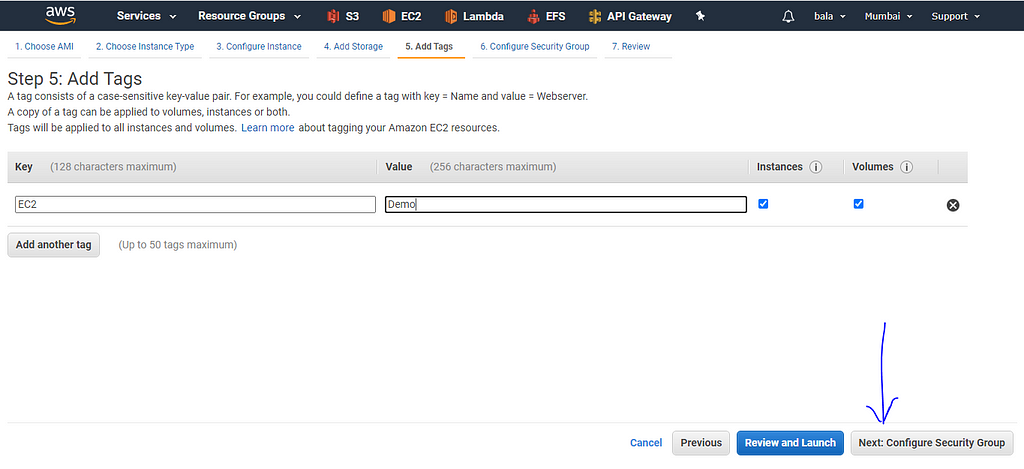
7. Choose to add tags by creating a new Key & Value pair for easy identification of particular EC2 instances, in case you will be managing more EC2’s in the future and click Next: Configure Security Groups
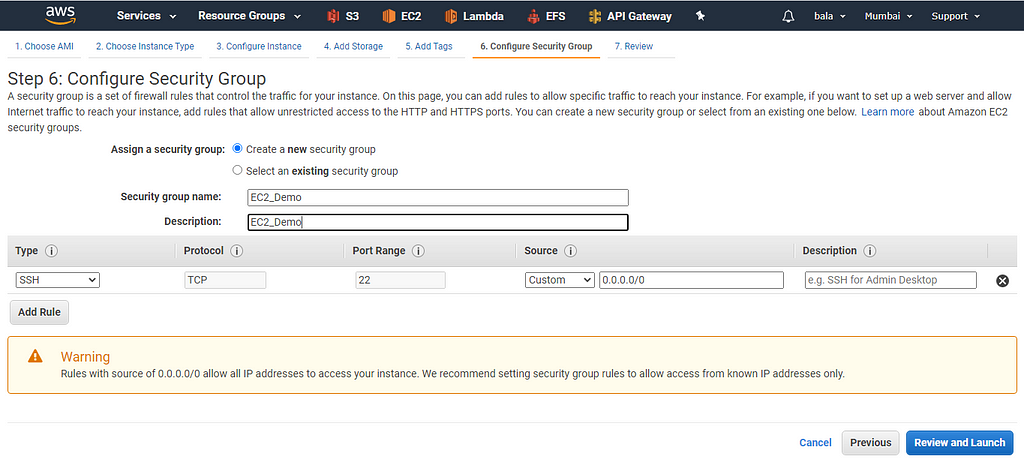
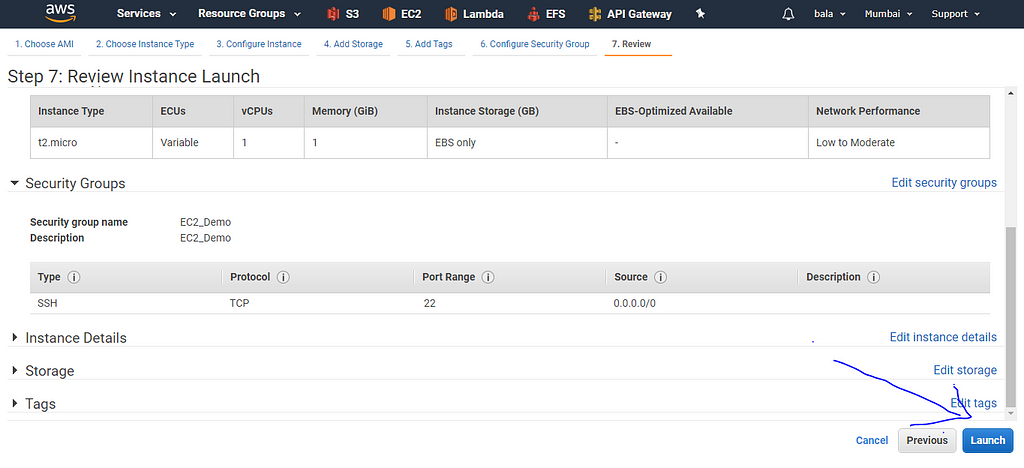
8. You can create either a new security group or use a previously created or default one. Here I created a new security group and provided access only to SSH-based connection via putty using the default port of SSH — 22.
You can open other ports such as HTTP(80) / HTTPS(443) based on requirements. And click Review and Launch
9. Make sure you verify all of the fields and then click on the launch.
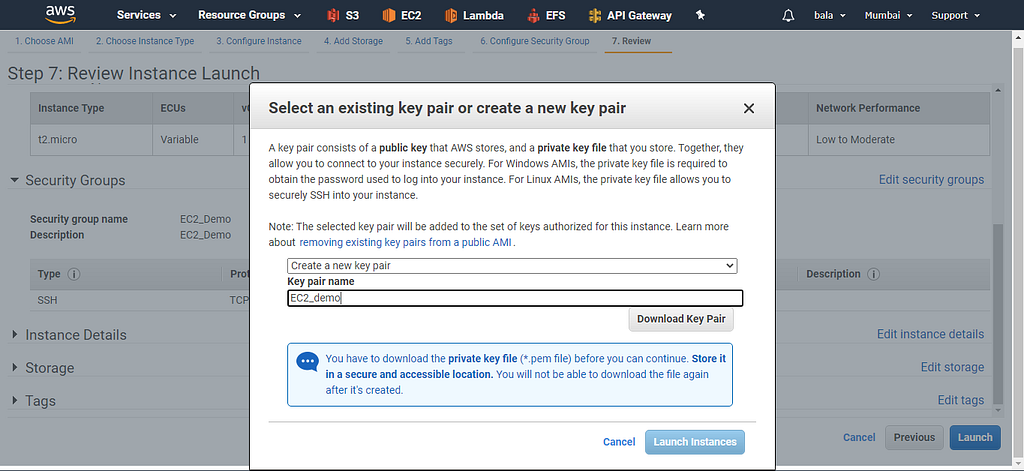
10. Now a pop-up window opens and now create a new key pair and download it by clicking the button Download Key Pair.
This will download a .pem file, which is used as a security measure to access our created EC2 instance every time. Beware without this key pair (.pem) file you not will able to access into your server, so make sure to keep this file safe and secure.
Avoid sharing your (.pem) file with others, because anyone can access your server with this file.
Now click on launch instance to finally launch our EC2.
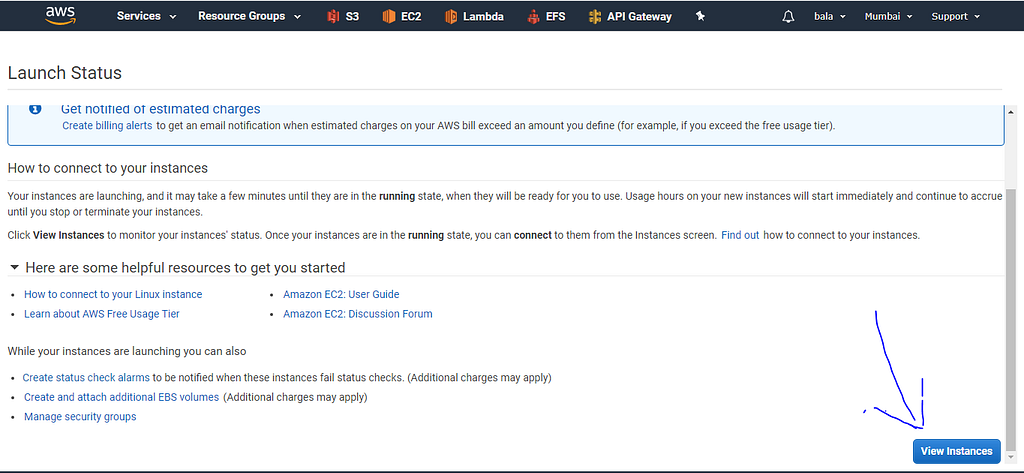
Now Click View instance.
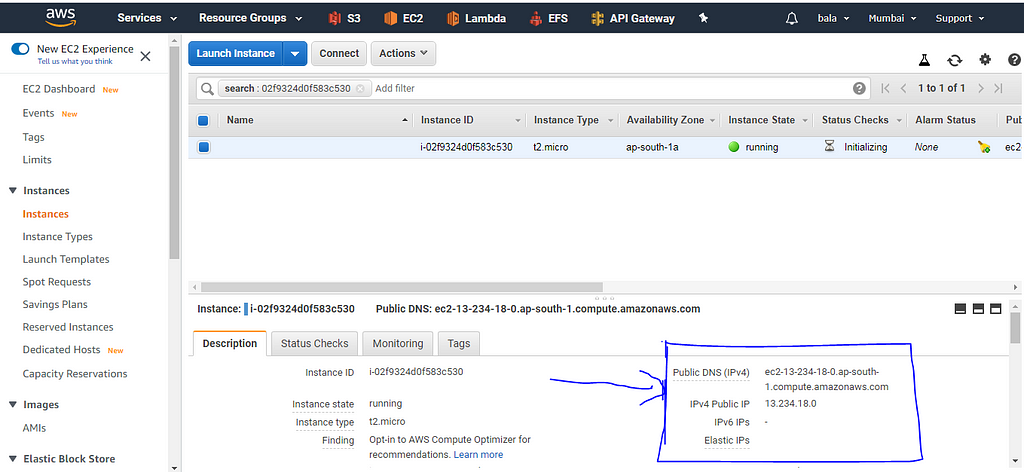
11. Add a name to identify your instance and in the descriptions tab, you have the IPV4 DNS & address to connect into your instance. Now let us use the downloaded (.pem) file and try to access the newly created EC2 instance.
12. There are many ways to connect and view our EC2 instance. Here I will demonstrate 2 methods of connecting to our EC2 instances.
I. Using Putty
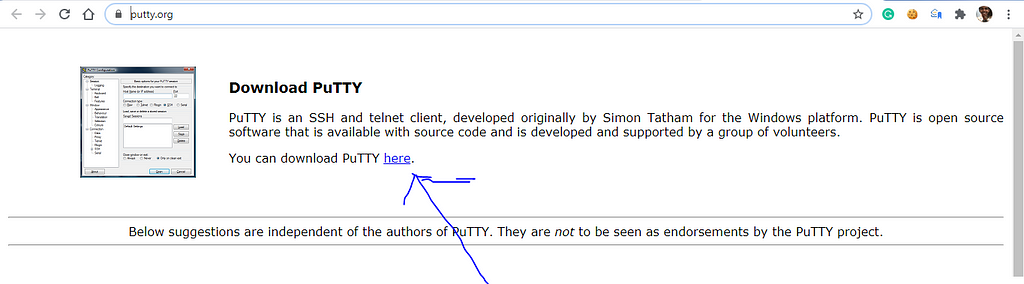
Download the putty software here: https://www.putty.org/
II . Using WinSCP
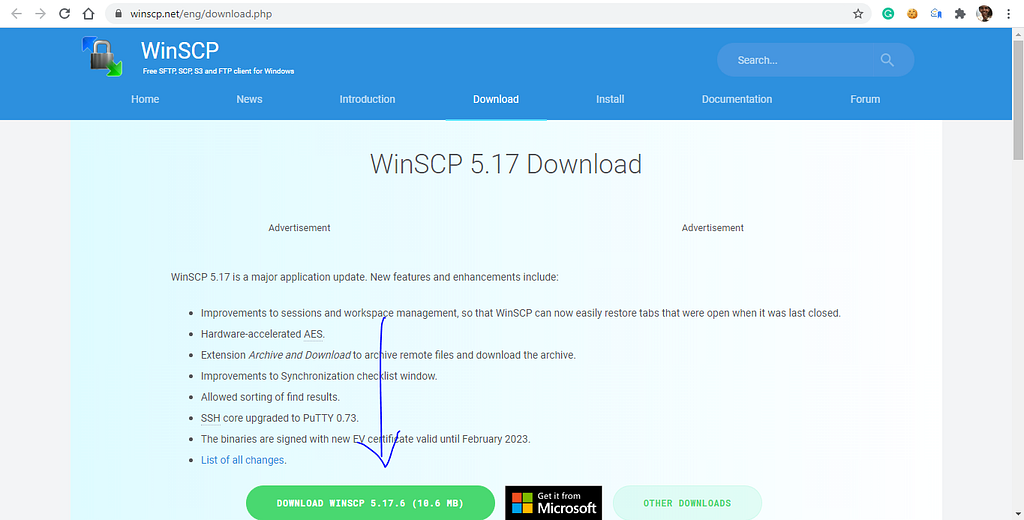
II. Download WinSCP software here: https://winscp.net/eng/download.php
Using Putty
13. Now after installing the software of your choice, we have to convert the downloaded key file (.pem) → (.ppk) to access our instance using the two software listed above
But nothing to worry, it can be done using the putty that we installed before.
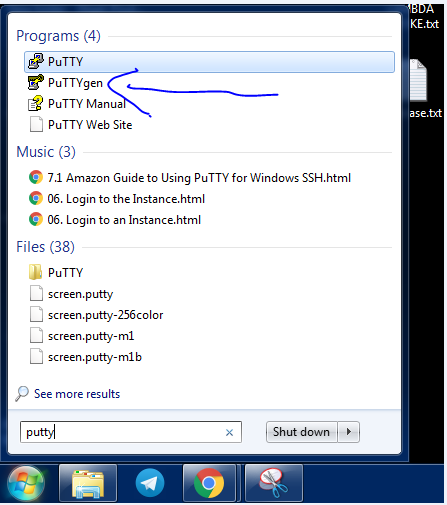
On the windows start menu, type putty, and select puTTYgen.
14. Now click the load button and select the downloaded (.pem) file of your choice.

15. After loaded, click on save private key and a prompt opens and select yes to save it without a passphrase and no if you wish to have a passphrase. In our case, we select YES.
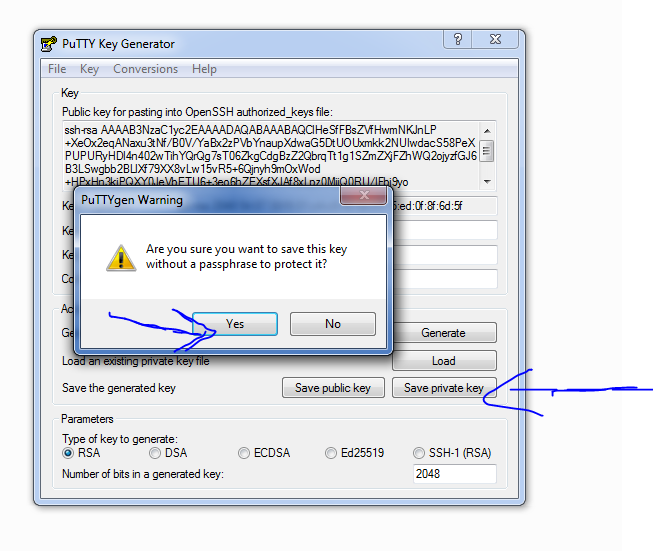
16. Now give it a new name and save the file with (.ppk) format and click ok.
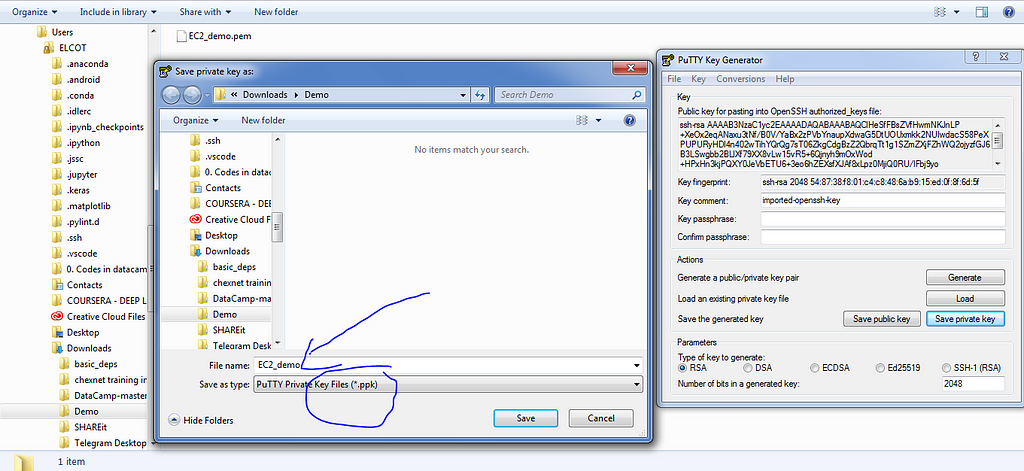
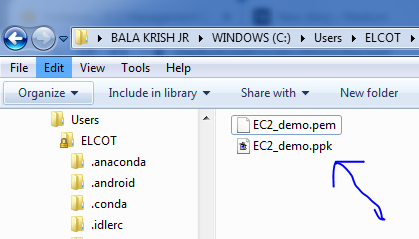
17. Now we have successfully converted (.pem) to (.ppk) format.
18. Now let’s try to access our EC2 instance using putty with the new (*.ppk) file generated.

19. Select putty from the start menu.
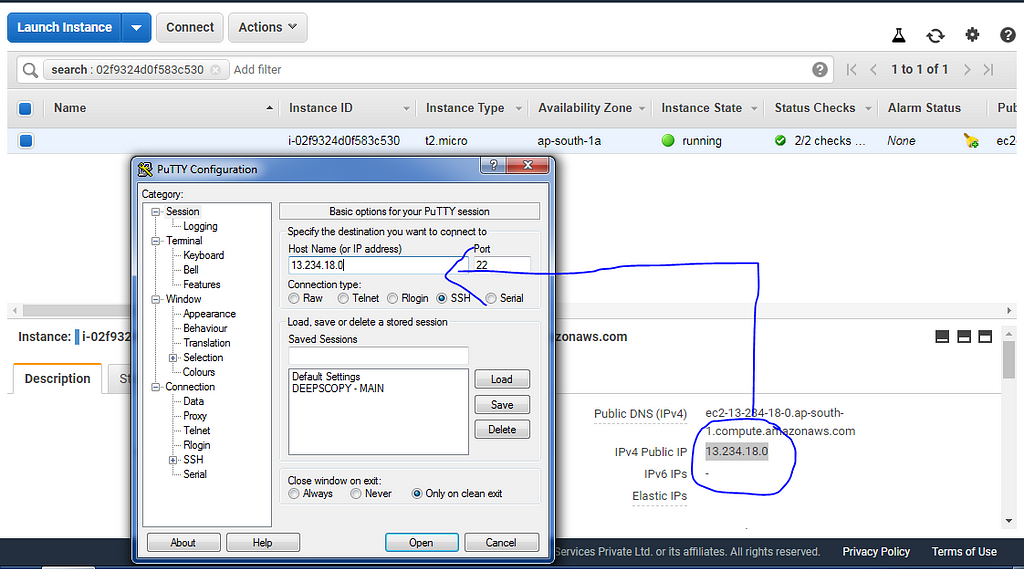
20. Now go back to AWS EC2 instance console and copy the public IP address and paste it in the putty configuration window.
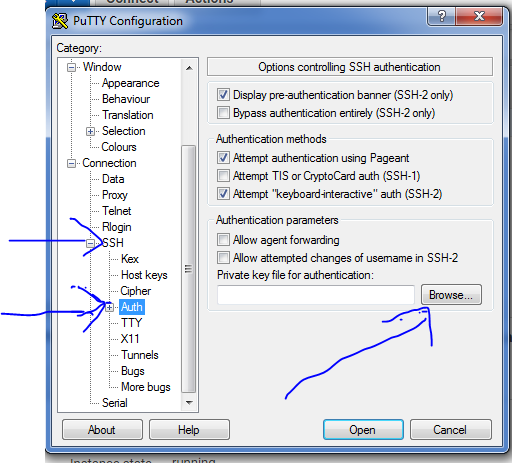
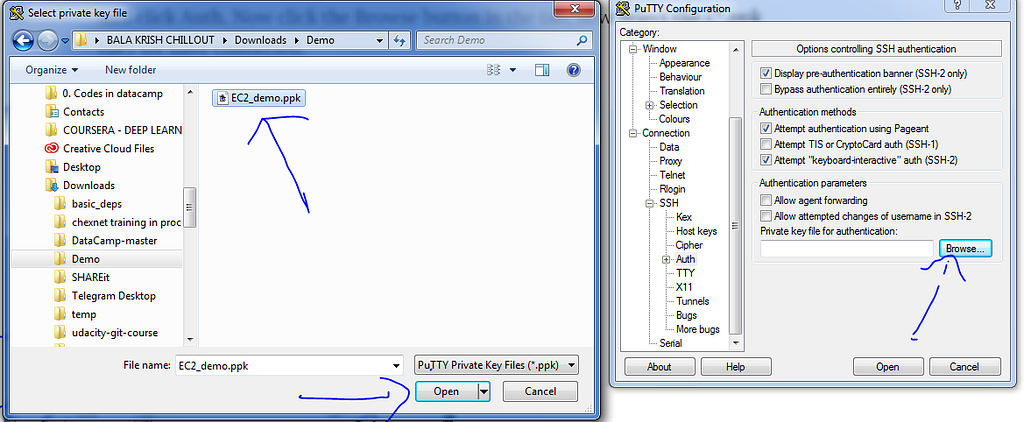
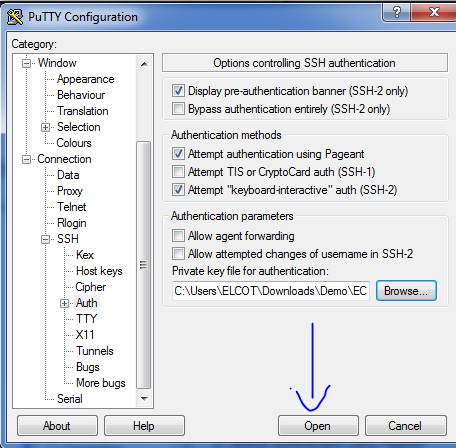
21. Now after pasting the IP address, navigate to ssh category in the putty, and click Auth. Now click the Browse button in the tab, now select the (*.ppk file) we have converted and open it.
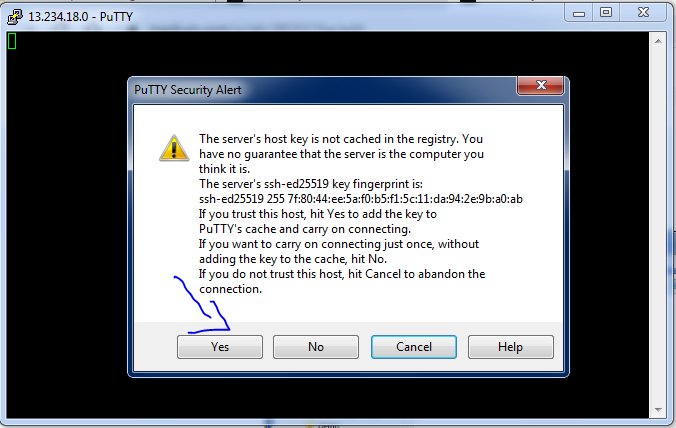
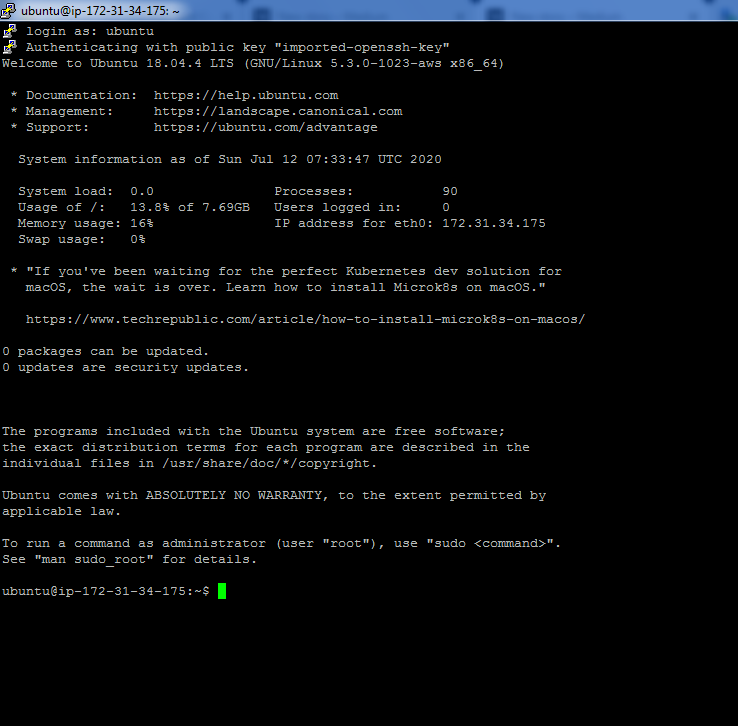
22. Now a new command-line interface will open and in the prompt window, click yes (since we trust this network)
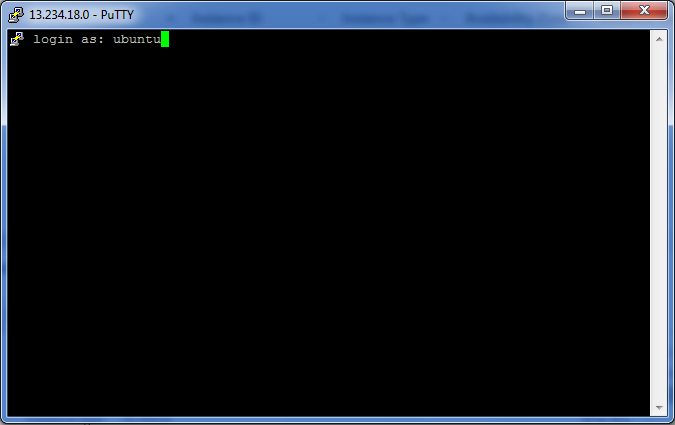
23. Now it asks for the username, so for our ubuntu instance, the username is ubuntu. Type and press enter. Now we have successfully logged into our instance.
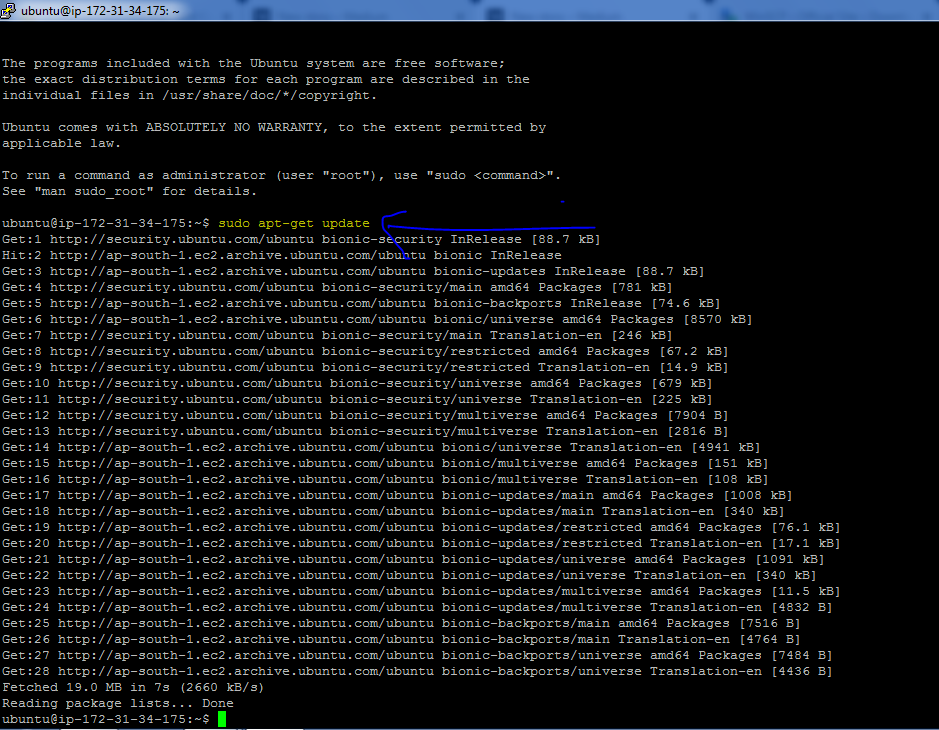
Run the command: “ sudo apt-get update “ for the first time to update the ubuntu packages for security measures and new updates. Run this command occasionally to update your system.
Since AWS EC2 provides a virtual server, one of the way we can interact with it is via the command line. It will be a little bit intimidating for the first time since most of us are using the GUI based interface in our windows.
But believe me, it’s going to be awesome and also it’s very fast.
Using WinSCP
24. Connecting via WinSCP software is another way to connect into our instance and this option provides us a GUI based interface, so we feel like windows based options which we are already used to.
Now open WinSCP from your start menu.
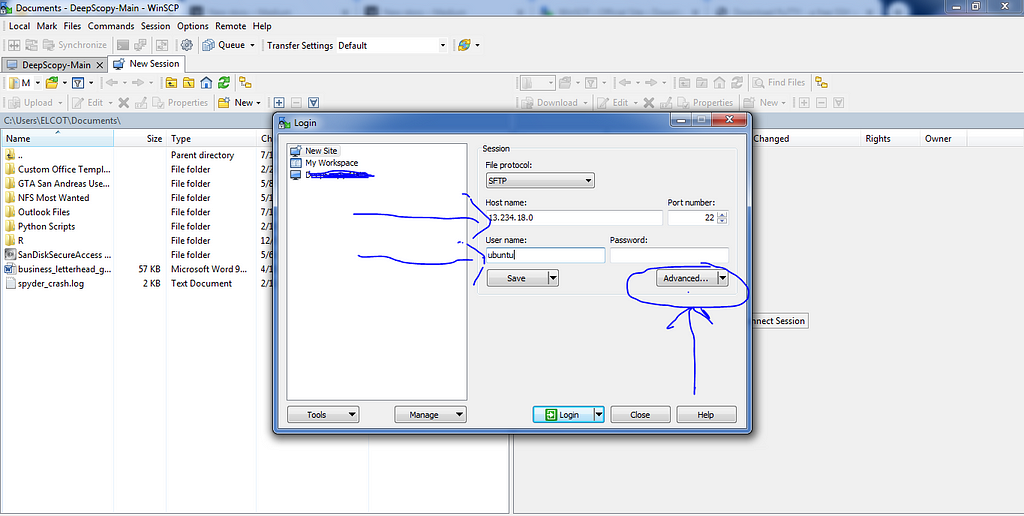
Now Click New session tab and then in the pop-up window click New Site, and then populate the field Host name : (your IP address of EC2) and username: ubuntu (incase of ubuntu based instance).
Then click the Advanced button in the menu
25. Upon clicking the Advanced button, a new pop-up window opens, now select the SSH tab, and select the Authentication tab under it.
Here add your (*.ppk) file under the private key file and finally click OK.

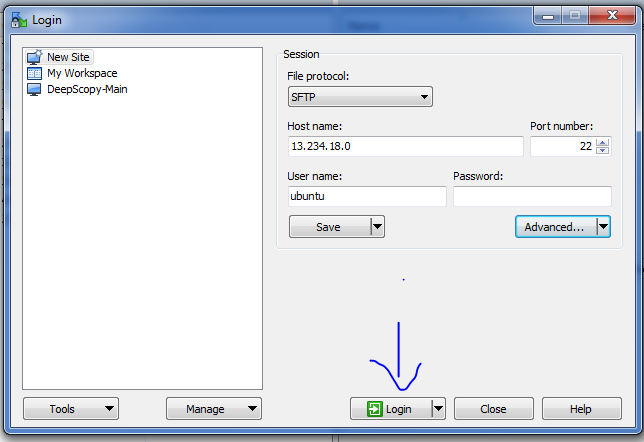
Now click the login button.
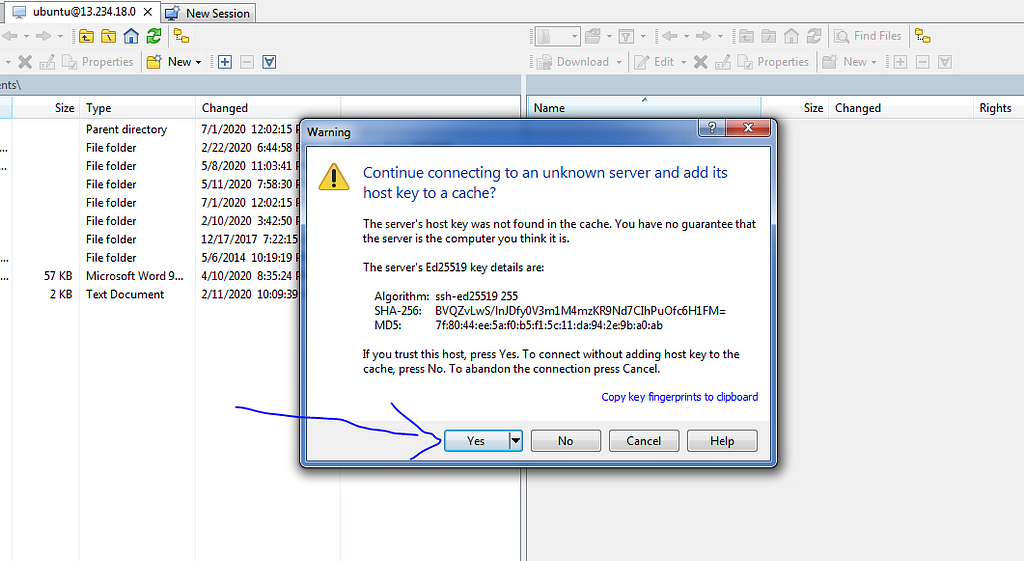
Click Yes (because we trust this network).
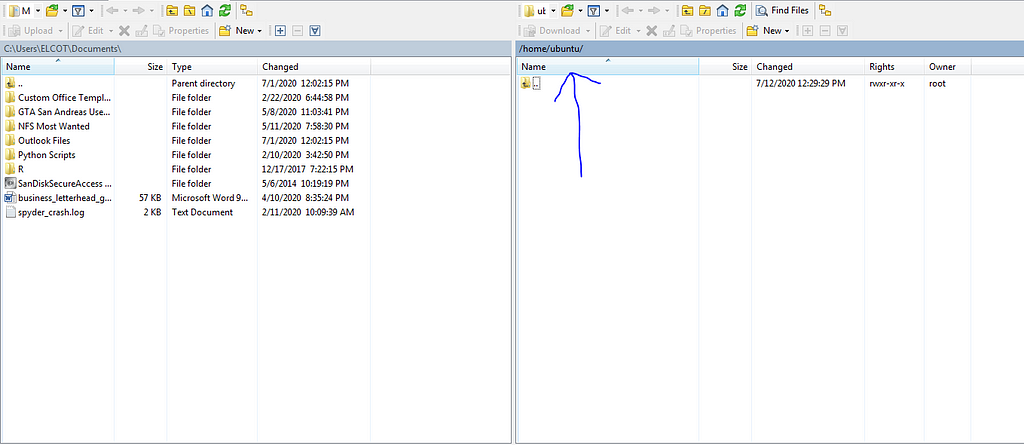
26. Success, now we can access the EC2 instance via WinSCP with a custom GUI interface.
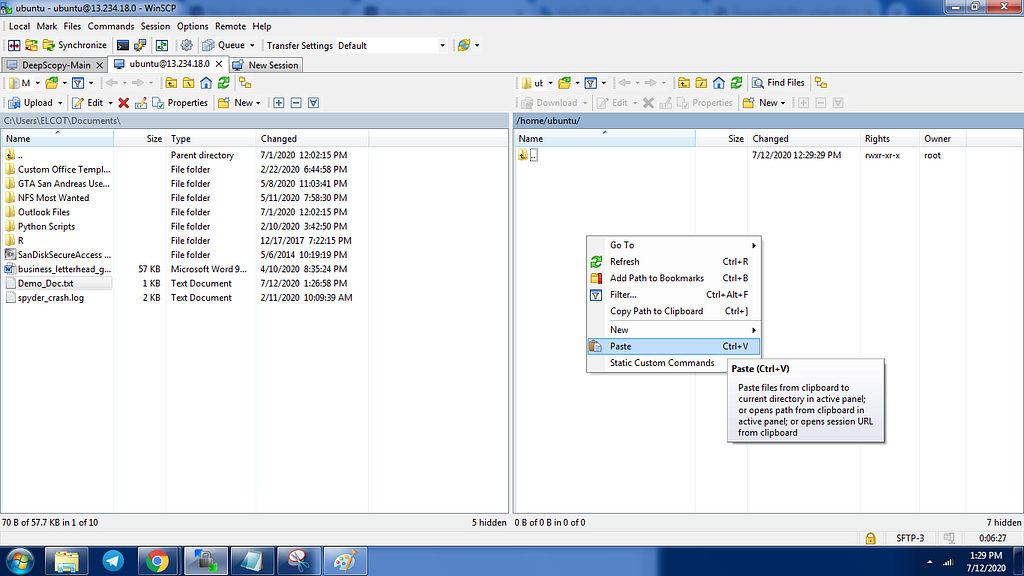
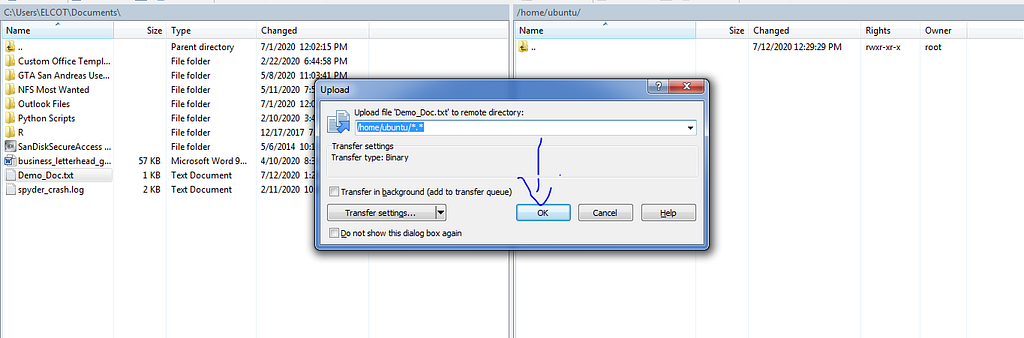
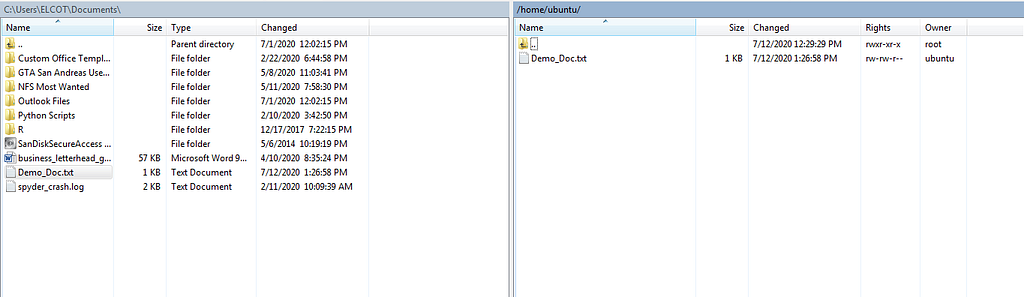
Our home directory is /home/ubuntu/, now we see there any no files created in it. So let's add some files in it and then access it via our putty.
Now I created a .txt file in the local computer and moving it into our EC2 instance.
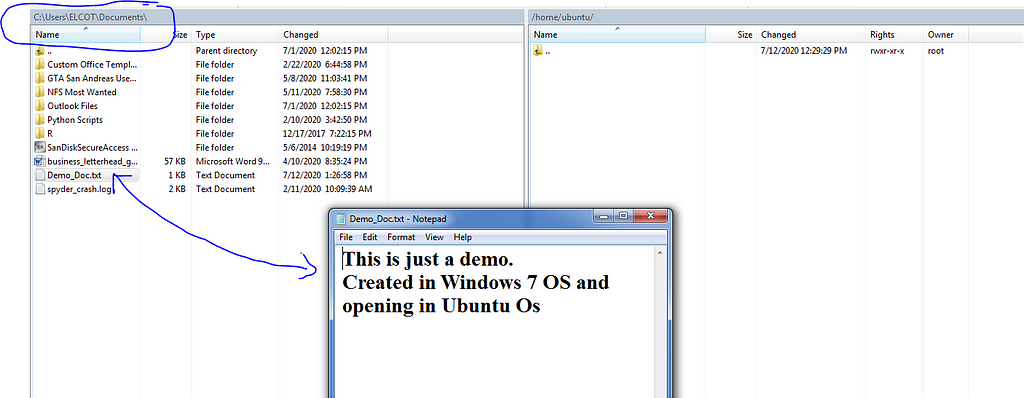
Let’s do a simple Copy and Paste.
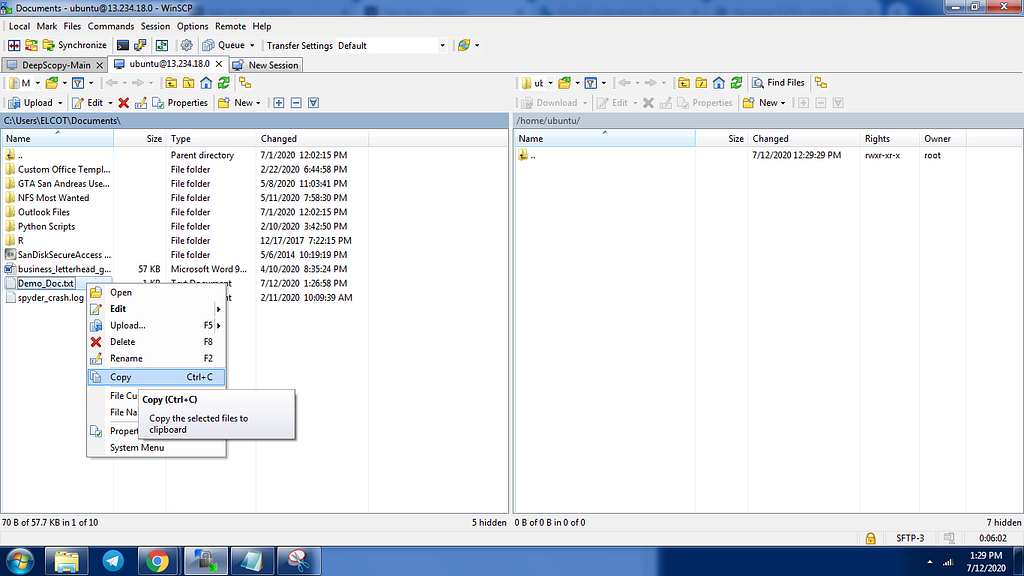
27. Now let’s access this file via our putty.
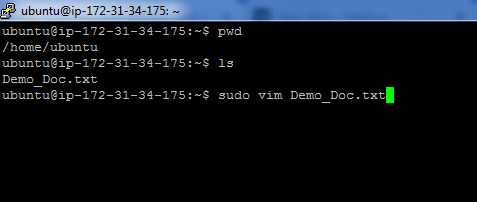

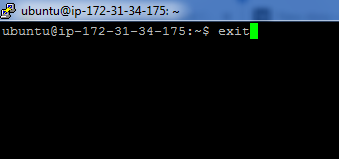
That’s it, we just moved a file into EC2 and opened it. To exit the editor, follow the commands Insert -> Esc -> type :q! -> Enter.
28. Type Exit, to safely move out of our instance.
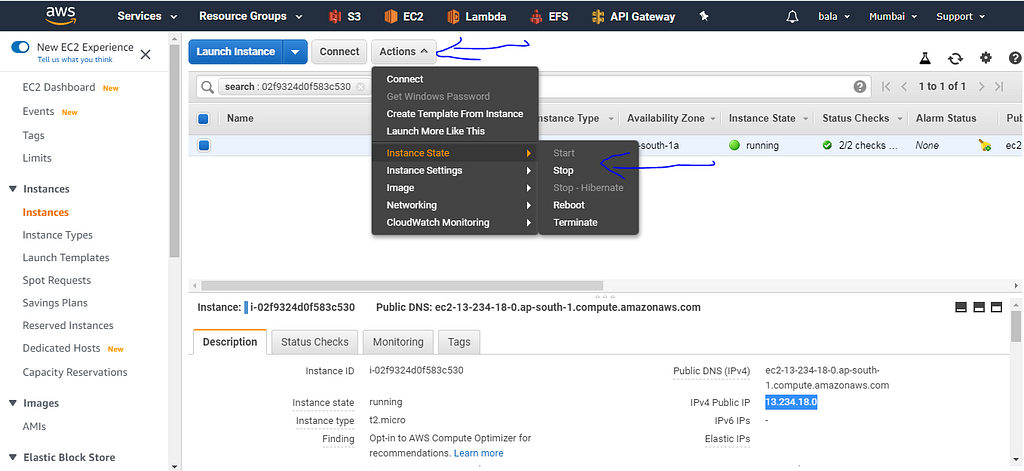
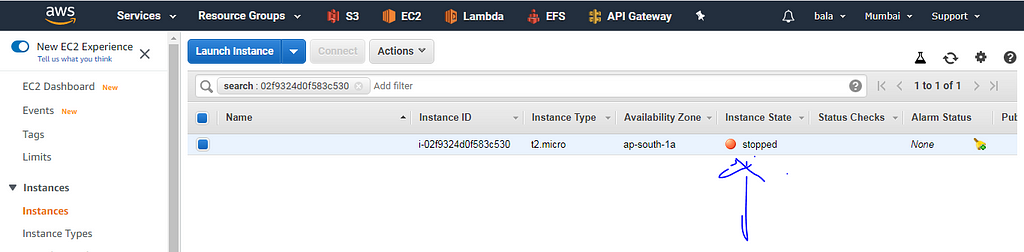
29. Finally, to avoid any additional charges, you can stop the EC2 instance when not in use and start later.
Do not terminate the instance, as it gets deleted from your console. You can terminate it if you wish you don’t need it anymore. All the storage volume will be deleted together.

30. That’s so cool, you made it till the end and this is how we create an EC2 instance in AWS. Drop your comment if you face any problems in the midway.
It is best practices to check the pricing of EC2 instances if you wish to play differently: https://aws.amazon.com/ec2/pricing/
And I will be posting articles related to Machine and Deep Learning and also their intersection with AWS Services.
Until then, see you next time.
Article By:
BALAKRISHNAKUMAR V
Co-Founder — DeepScopy
Connect with me → LinkedIn, GitHub, Twitter, Medium

`
Visit us → DeepScopy
Connect with us → Twitter, LinkedIn, Medium
Step by Step Creation of an EC2 Instance in AWS and Access it via Putty & WinSCP was originally published in Towards AI — Multidisciplinary Science Journal on Medium, where people are continuing the conversation by highlighting and responding to this story.
Published via Towards AI
Related posts


Popular posts

 for 2021")


Updates

Recent Posts


