


Deploying a Langchain Large Language Model (LLM) with Streamlit & Pinecone
Last Updated on May 10, 2023 by Editorial Team
Author(s): Mostafa Ibrahim
Originally published on Towards AI.
Deploying a full-stack Large Language model application using Streamlit, Pinecone (vector DB) & Langchain
LangChain is a library that helps developers build applications powered by large language models (LLMs). It does this by providing a framework for connecting LLMs to other sources of data, such as the internet or your personal files. This allows developers to chain together multiple commands to create more complex applications.
Pinecone is one of the most popular vector database frameworks. A vector database is a type of database that is specifically designed to store and retrieve vector data efficiently. Vector data, in this context, refers to data that is represented as a set of numerical values, or “vectors,” which can be used to describe the characteristics of an object or a phenomenon. Examples of vector data include images, audio signals, genetic sequences, and text documents.
Streamlit is an open-source Python library that makes it easy to create and share beautiful, custom web apps for machine learning and data science.
Put them all together, and you get a full-stack LLM app! Which is quite amazing and isn’t really going to take that long at all! In this tutorial, we are going to be continuing my pet LLM project, building an LLM that answers questions on Langchain. In part 1, we extracted the data, and in part 2, we used langchain to build a powerful question-answering chain. In this part, we are going to be adding our vectors to Pinecone and deploying our chain to Streamlit so that we can have a question-answering UI that works just like ChatGPT. Before we begin, you should probably create an account on both Streamlit and Pinecone!
Part 1: Adding our vectors to Pinecone
After you have signed up to Pinecone, you will need to navigate to https://app.pinecone.io/ and grab both the API keys and the Environment name. Now let’s get to the beefy parts. Let’s create a script that will read our files, create vectors and upload to Pinecone, we will call this script pinecone_vec.pyAs always, we will simply start with the imports. We will need OpenAI’s embeddings (or feel free to use any other embeddings, such as HuggingFace sentence-transformers), langchain’s DirectoryLoader, any text splitter, and Pinecone.
from langchain.embeddings.openai import OpenAIEmbeddings
from langchain.vectorstores import Pinecone
import pinecone
import os
from langchain.document_loaders import DirectoryLoader
from langchain.text_splitter import RecursiveCharacterTextSplitter
Next, we will need to export 3 environment variables on our terminal. You can also add them to a .env and use Python’s load_env(), but I am not going to do that here; we want to be quick!
export PINECONE_API_KEY="ur_key"
export PINECONE_ENV="northamerica-northeast1-gcp"
export OPENAI_API_KEY="sk...."
Afterward, we will need to load our dataset. There are multiple ways to do that, depending on the type of your dataset, so feel free to check out Langchain’s data loaders. In our example, we have a directory called data_output_filtered_content that contains txt files that represent Langchain’s documentation. After loading the data, we are going to split it into non-overlapping chunks using a RecursiveCharacterTextSplitter . You can read more about chunking strategies for Large Language models here, and you can also choose any other type of text splitter from Langchain here. According to Langchain, this is what the RecursiveCharacterTextSplitter is
This text splitter is the recommended one for generic text. It is parameterized by a list of characters. It tries to split on them in order until the chunks are small enough. The default list is
["\n\n", "\n", " ", ""]. This has the effect of trying to keep all paragraphs (and then sentences, and then words) together as long as possible, as those would generically seem to be the strongest semantically related pieces of text.
my_loader = DirectoryLoader('./data_output_filtered_content', glob='**/*.txt')
documents = my_loader.load()
text_splitter = RecursiveCharacterTextSplitter(chunk_size = 700, chunk_overlap = 0)
docs = text_splitter.split_documents(documents)
Next, we will initialize our pinecone’s environment:
# initialize pinecone
pinecone.init(
 api_key=os.environ['PINECONE_API_KEY'], # find at app.pinecone.io
 environment=os.environ['PINECONE_ENV'] # next to api key in console
)
Next, we will need to go to Pinecone and create a new index. You will need to go to Pinecone’s indexes section and click on “Create Index”. You will also need to know the number of dimensions suitable for your dataset. You can read more about the different dimensions and pod types you can choose here. If you are a complete beginner, you can choose 768 and follow the next steps, if it’s not suitable for your dataset, Pinecone will give you an error which contains the right number for your dataset.

For now, we will go with 1536 dimensions, cosine similarity (default), and an S1 pod. We will name our index “langchain-demo-1536,” and we will export it as an environment variable:
export PINECONE_INDEX_NAME="langchain-demo-1536"
Next, we will start uploading our vectors to Pinecone, with langchain, with this is a simple 1-liner:
docsearch = Pinecone.from_documents(docs, embeddings, index_name=os.environ['PINECONE_INDEX_NAME'])
And simply run:
python pincone_vec.py
This might take a while. If you want to check that it’s working, simply click on your index’s name on Pinecone and check the metrics. In my case, I ended up with around 10K vectors:

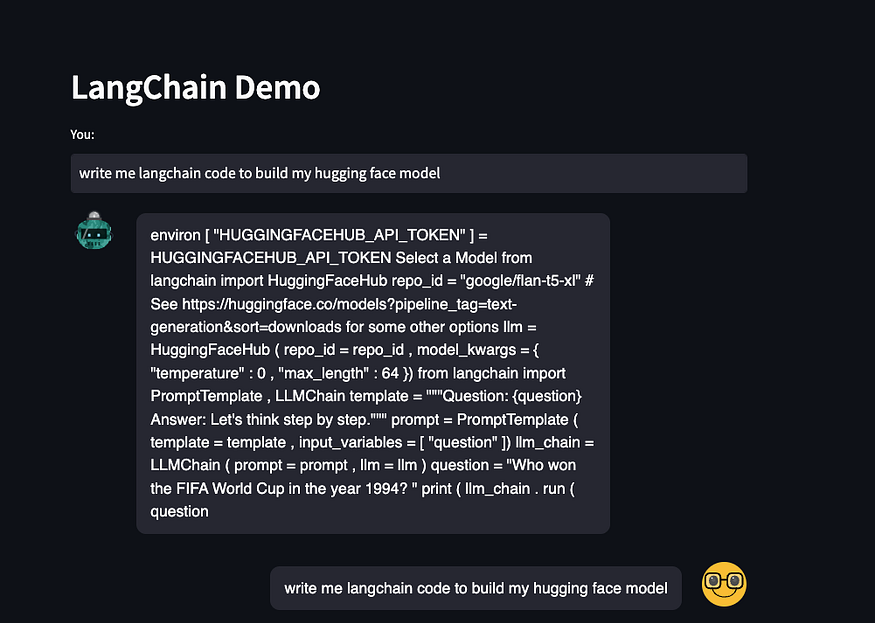
Now we can write a simple query to check that it’s working:
docsearch = Pinecone.from_existing_index(os.environ['PINECONE_INDEX_NAME'], embeddings)
query = "write me langchain code to build my hugging face model"
docs = docsearch.similarity_search(query)
from langchain.chains.qa_with_sources import load_qa_with_sources_chain
from langchain.llms import OpenAI
model = OpenAI(model_name="text-davinci-003")
sources_chain = load_qa_with_sources_chain(model, chain_type="refine")
result = sources_chain.run(input_documents=docs, question=query)
print(result)
Output:
# Build Hugging Face Model
from langchain.embeddings import HuggingFaceHubEmbeddings
from langchain.llms import OpenAI
repo_id = "google/flan-t5-xl" # See https://huggingface.co/models?pipeline_tag=text-generation&sort=downloads for some other optionsllm = HuggingFaceHubEmbeddings(
 repo_id=repo_id,
 model_kwargs={
 "temperature": 0,
 "max_length": 64
 },
 langchain_kwargs={
 "expert_mode": True
 },
 tokenizer_kwargs={
 "use_character_text_splitter": True
 }
)# Initialize OpenAI LLM
openai_llm = OpenAI(model_kwargs={
 "temperature": 0,
 "max_length": 64
})
Not too bad, we still need to work a bit on our Chain, but we will do that in another article! And that’s Pinecone done! We can now use this in the next part, which is hooking it up to Streamlit.
Part 2: Deploying our chain on Streamlit
We will first start by forking the template provided by langchain for Streamlit here (credits to Langchain for making this quite easy!). After forking the GitHub repository, you will need to clone it and make some edits.
First, navigate to requirements.txt and add pinecone-client . Next, go to main.py and add the following imports:
import pinecone
import os
from langchain.embeddings.openai import OpenAIEmbeddings
from langchain.vectorstores import Pinecone
After that, we will need to initialize our environment and load the embeddings:
embeddings = OpenAIEmbeddings()
pinecone.init(
 api_key=str(os.environ['PINECONE_API_KEY']),
 environment=str(os.environ['PINECONE_ENV'])
)index_name = str(os.environ['PINECONE_INDEX_NAME'])
Next, we will need to edit the load_chain() method:
def load_chain():
 docsearch = Pinecone.from_existing_index(index_name, embeddings)
 return docsearch
and also the user_input if statement:
if user_input:
 docs = chain.similarity_search(user_input)
 output = docs[0].page_content
 st.session_state.past.append(user_input)
 st.session_state.generated.append(output)
Note: you can use a different type of search for your chain, in this case, we will be using similarity_search it to keep things simple.
At this point, we should be good to go, let’s install Streamlit and run this app:
pip install streamlit
streamlit run main.py
If it works correctly, it should open up the app in a new window, and you will get a message that looks something like this:
You can now view your Streamlit app in your browser.
 Local URL: http://localhost:8501
 Network URL: http://192.168.1.101:8501
We can also test it:
Cool, let’s push this to GitHub.
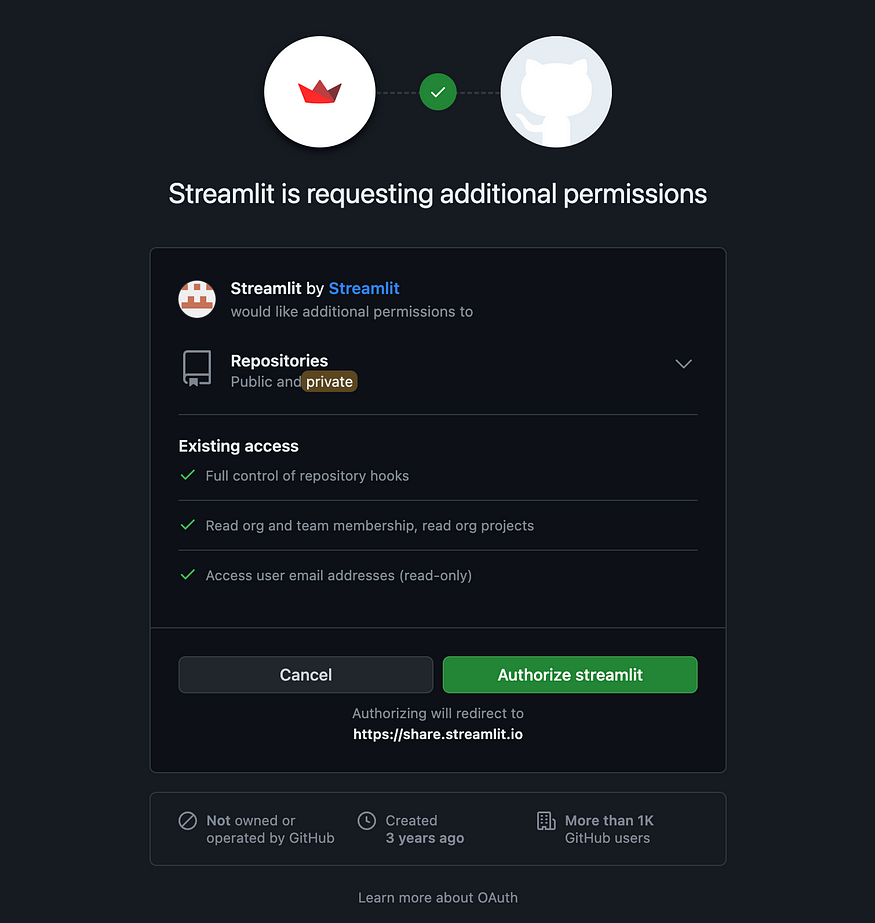
We can simply hook it up to Streamlit. Aftering signing into Streamlit, you can click on “New app” here and authorize it to access your repository on your GitHub account
Next, you will need to point it to the repo, branch, and main app file:

You will also need to click on “Advanced settings” and add the secrets that we will be using:
PINECONE_API_KEY="ur_key"
PINECONE_ENV="northamerica-northeast1-gcp"
OPENAI_API_KEY="sk...."
PINECONE_INDEX_NAME="langchain-demo-1536"
Final thoughts
And that’s it, our Streamlit app should be ready now! You can find the code used in this tutorial here and my app here. Note that this article is mainly for educational purposes to deploy a very simple Langchain app. For production usage, you will probably need to do a lot more!
Join thousands of data leaders on the AI newsletter. Join over 80,000 subscribers and keep up to date with the latest developments in AI. From research to projects and ideas. If you are building an AI startup, an AI-related product, or a service, we invite you to consider becoming a sponsor.
Published via Towards AI
Related posts


Popular posts

 for 2021")


Updates

Recent Posts


