


Deploy a Python Machine Learning Model on your iPhone
Last Updated on February 10, 2021 by Editorial Team
Author(s): Patrick Long, Ph.D.
A minimalist guide
This article describes the shortest path from training a python machine learning model to a proof of concept iOS app you can deploy on an iPhone. The goal is to provide the basic scaffolding while leaving room for further customization suited to one’s specific use case. In the spirit of simplicity, we will overlook some tasks such as model validation and building a fully polished user interface (UI). By the end of this tutorial, you will have a trained model running on iOS that you can showcase as a prototype and load to your device.
Step 1. Set up your environment
First, let’s create a python virtual environment called .core_ml_demo and then install the necessary libraries i.e. pandas scikit-learn and coremltools. From your terminal run:
Next we will install Xcode. Xcode is a development toolkit for Apple products. Note that Xcode is quite large (> 10 Gb). I’d recommend grabbing a cup of coffee or running your install overnight. –Note, this guide uses Xcode Version 12.3 (12C33) on macOS Catalina 10.15.5.
Step 2. Train a model
We’ll use scikit-learn’s Boston Housing Price toy dataset to train a linear regression model to predict home price based on property and socio-economic attributes. Since we’re aiming for simplicity, we’ll limit the feature space to 3 predictors and use house price as our target variable.
Step 3. Convert the model to Core ML
Apple provides two avenues to develop models for iOS. The first, Create ML, allows one to produce models entirely within the Apple ecosystem. The second, Core ML, allows one to integrate models from third parties into the Apple platform by converting them to the Core ML format. Since we’re interested in running a python trained model on iOS, we’ll use the latter.
We’ll convert our sklearn model to the Core ML format (.mlmodel) using python’s coremltools package before importing to Xcode. coremltools allows one to assign metadata to a model object such as authorship information and model feature and outcome descriptions.
Step 4. Start a new Xcode project
And that’s it for python. From hereon, we can complete a prototype app using only Xcode and Swift. This can be done with the setup below.
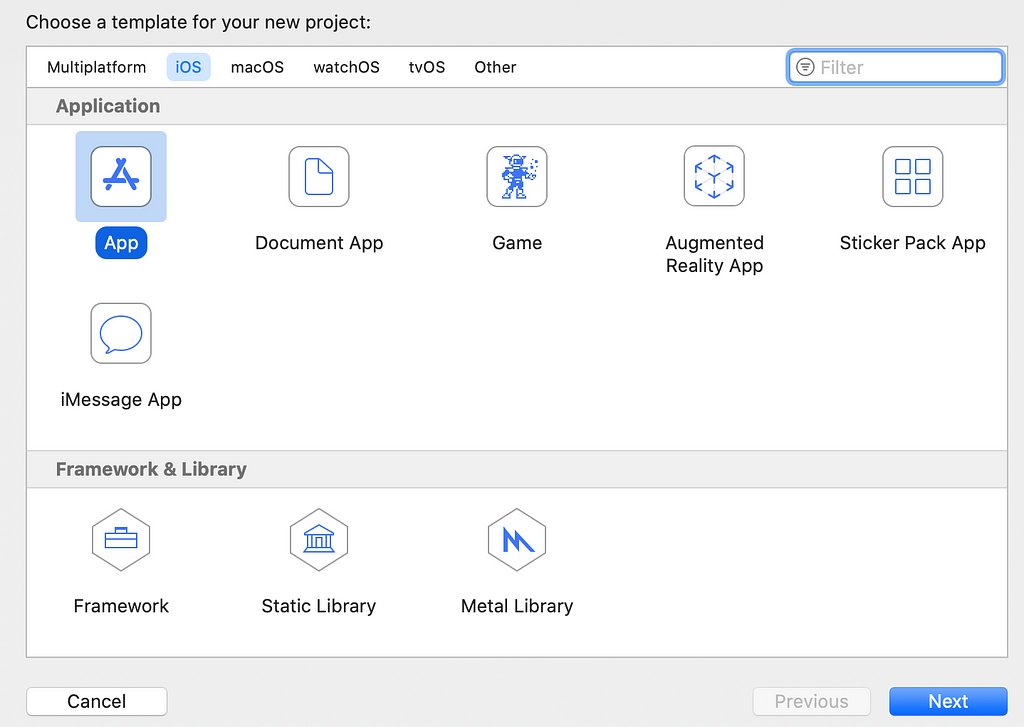
- Open up Xcode and create a new Xcode project
- Choose “iOS” as the Multiplatform type
- Select “App” as the Application type
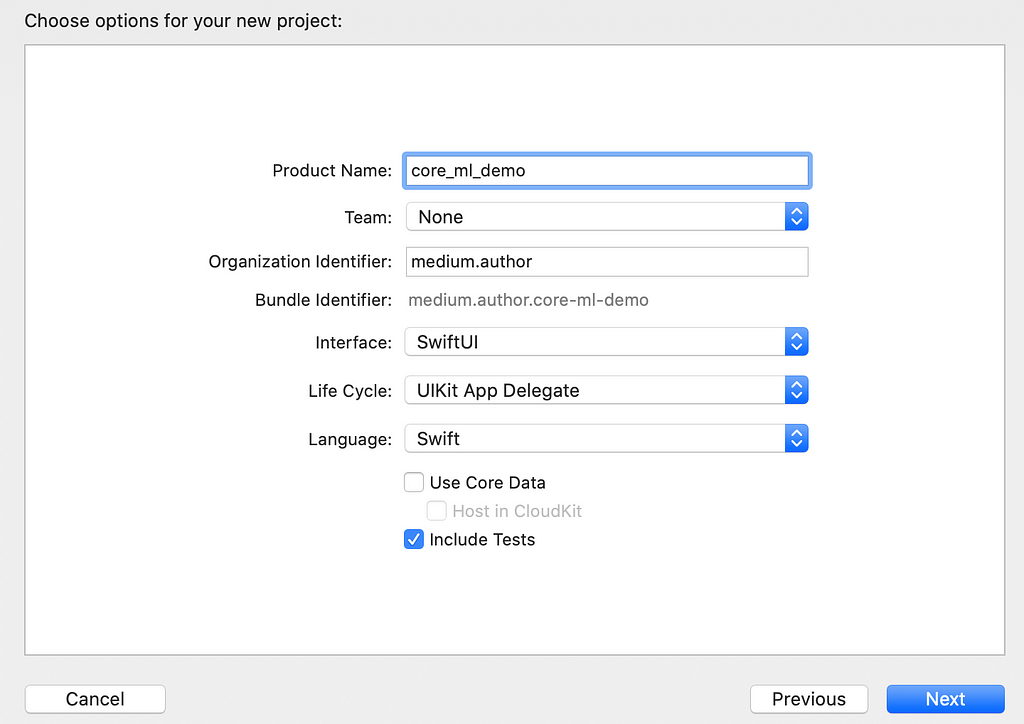
- Next, name your project and select the “SwiftUI” Interface.
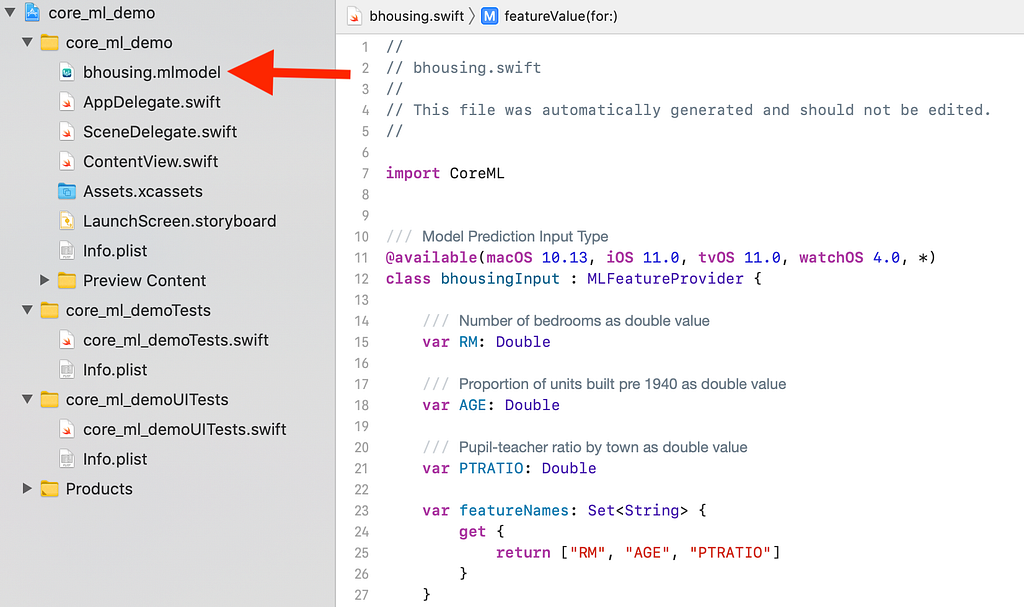
- Now simply drag and drop the .mlmodel file (saved above in step 3) into your Xcode directory. Xcode will automatically generate a Swift class for your model as shown in the editor below. If you inspect your model class, you’ll notice that it includes the details we entered when saving our python model using coremltools such as feature and target field descriptions. This is handy for model stewardship.
Step 5. Build a model UI
Next we’ll build a basic UI by modifying the ContentView.swift file in your Xcode project. The Swift code below sets up a UI that allows users to adjust house attributes and then to predict house price. There are several elements we can review here.
The NavigationView contains our essential UI. It includes:
- Stepper structs (lines 19–30) for each of our three features, which enable users to modify feature values. Steppers are basically widgets that modify the @State of our house attribute variables (lines 6–8).
- A Button on the navigation bar (lines 31–40) to call our model from within the predictPrice function (line 46). This yields an Alert message on the screen with the predicted price.
Outside of the NavigationView we have our predictPrice function (lines 46–62). The predictPrice function instantiates our Swift Core ML model class and generates a prediction according the values stored in our feature states.
And at last the fun part. We can build and run a simulation of our app in Xcode to see our model in action. In the example below, I’ve created a simulation using the iPhone 12.
Conclusion
And that’s it! Our initial prototype is complete. There’s plenty left to be done such as model validation, tests to confirm expected performance after import to iOS and a sleeker/more friendly UI. Nonetheless, I hope this serves as a useful reference for your mobile machine learning deployment endeavors.
New and improved tools continue to make mobile pursuits more widely accessible to the data science community and there are many creative opportunities waiting to be claimed in the mobile space. As mobile technology is inherently multi-media, it provides a richness of data types (e.g. audio, video, movement and location) along with unique point of use applications to expand one’s data science toolkit.
As always, I welcome any feedback or suggestions.
Thanks for reading!
Resources
CoreML
iOS Deployment
SwiftUI
Deploy a Python Machine Learning Model on your iPhone was originally published in Towards AI on Medium, where people are continuing the conversation by highlighting and responding to this story.
Published via Towards AI
Towards AI Academy
We Build Enterprise-Grade AI. We'll Teach You to Master It Too.
15 engineers. 100,000+ students. Towards AI Academy teaches what actually survives production.
Start free — no commitment:
→ 6-Day Agentic AI Engineering Email Guide — one practical lesson per day
→ Agents Architecture Cheatsheet — 3 years of architecture decisions in 6 pages
Our courses:
→ AI Engineering Certification — 90+ lessons from project selection to deployed product. The most comprehensive practical LLM course out there.
→ Agent Engineering Course — Hands on with production agent architectures, memory, routing, and eval frameworks — built from real enterprise engagements.
→ AI for Work — Understand, evaluate, and apply AI for complex work tasks.
Note: Article content contains the views of the contributing authors and not Towards AI.
Related posts
Recent Posts


")