


Pyspark MLlib | Classification using Pyspark ML
Last Updated on September 15, 2022 by Editorial Team
Author(s): Muttineni Sai Rohith
Originally published on Towards AI the World’s Leading AI and Technology News and Media Company. If you are building an AI-related product or service, we invite you to consider becoming an AI sponsor. At Towards AI, we help scale AI and technology startups. Let us help you unleash your technology to the masses.
In the previous sections, we discussed about RDD, Dataframes, and Pyspark concepts. In this article, we will discuss about Pyspark MLlib and Spark ML. Later on, we will train a classifier for Car Evaluation data, by Encoding the data, Feature extraction and Developing classifier model using various algorithms and evaluate the results.
For a detailed tutorial about Pyspark, Pyspark RDD, and DataFrame concepts, Handling missing values, refer to the link below:
Spark MLlib is a short form of spark machine-learning library. Pyspark MLlib is a wrapper over PySpark Core to do data analysis using machine-learning algorithms. It works on distributed systems and is scalable. We can find implementations of classification, clustering, linear regression, and other machine-learning algorithms in PySpark MLlib.
MLlib is Spark’s scalable machine learning library consisting of common machine learning algorithms and utilities, including classification, regression, clustering, collaborative filtering, and dimensionality reduction, as well as underlying optimization primitives.
Classification using Pyspark MLlib
As a part of this article, we will perform classification on the car evaluation dataset. This dataset consists of 6 attributes describing cars and one Target variable — car_type containing multiple Categories. The dataset used can be found here.
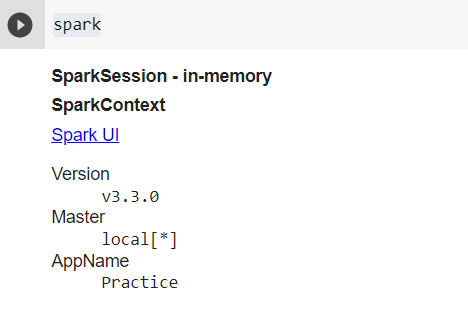
First, let’s create the sparkSession —
from pyspark.sql import SparkSession
spark = SparkSession.builder.appName("Practice").getOrCreate()
spark
Let’s load the data from the CSV file —
df_pyspark = spark.read.csv("car_data.csv",inferSchema=True, header=True)
df_pyspark.show(5)

For most machine learning algorithms, numerical data is a must — So let’s see the schema of this DataFrame.
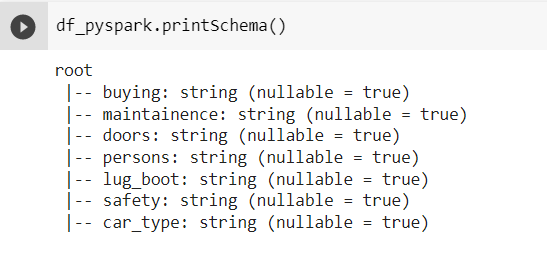
As we can see, we have String Columns. Let's encode them into Integers using Pyspark StringIndexer.
from pyspark.ml.feature import StringIndexer
categoricalColumns = ["buying","maintainence","doors","persons","lug_boot","safety","car_type"]
l = []
for categoricalCol in categoricalColumns:
stringIndexer = StringIndexer(inputCol = categoricalCol, outputCol = categoricalCol+"_encoded").fit(df_pyspark)
df_pyspark = stringIndexer.transform(df_pyspark)
df_pyspark = df_pyspark.withColumn(categoricalCol+"_encoded", df_pyspark[categoricalCol+"_encoded"].cast('int'))
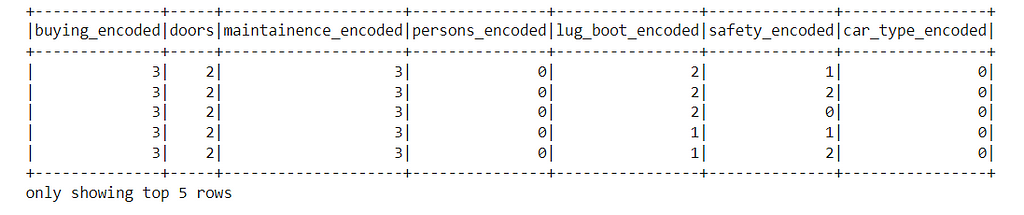
encoded_df = df_pyspark.select("buying_encoded","doors","maintainence_encoded","persons_encoded","lug_boot_encoded","safety_encoded","car_type_encoded")
encoded_df.show(5)
In the above code, we have imported StringIndexer and transformed each String Column into a Numerical column. Initially, StringIndexer returns the data in float format, so in the next step, we have Performed casting and converted float values into Numerical. Once we have created the encoded DataFrame, we select only the encoded values. The output of Encoded Dataframe is as follows —
As the data is ready, Let’s perform feature extraction using VectorAssembler from Pyspark
from pyspark.ml.feature import VectorAssembler
featureAssembler = VectorAssembler(inputCols=["buying_encoded","doors_encoded","maintainence_encoded","persons_encoded","lug_boot_encoded","safety_encoded"],outputCol="features")
output = featureAssembler.transform(encoded_df)
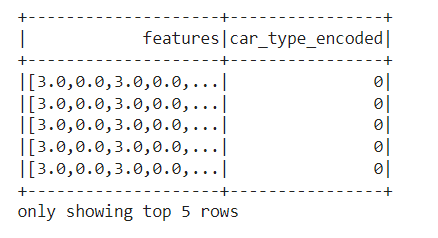
output.select("features","car_type_encoded").show(5)
In Pyspark, unlike methods used in pandas, we convert all the independent columns into one feature using VectorAssembler. The feature created is used for training. Our final DataFrame containing the required information is as below:
Let's split the data for training and testing.
train, test = output.randomSplit([0.8, 0.2], seed=17)
unlike train_test_split from scikit-learn, we perform splitting using random split available in Pyspark DataFrame

Our data is ready, so let’s prepare the model.
Logistic Regression
from pyspark.ml.classification import LogisticRegression
lr = LogisticRegression(featuresCol = 'features', labelCol = 'car_type_encoded', maxIter=10)
lrModel = lr.fit(train)
We have created a logistic regression model by importing Logistic Regression from Pyspark.ml, We gave “features” — featuresCol as independent Variable and “car_type_encoded” — labelCol as a dependent Variable.
Let’s use our model to predict the test data.
predictions = lrModel.transform(test)
predictions.show(5)
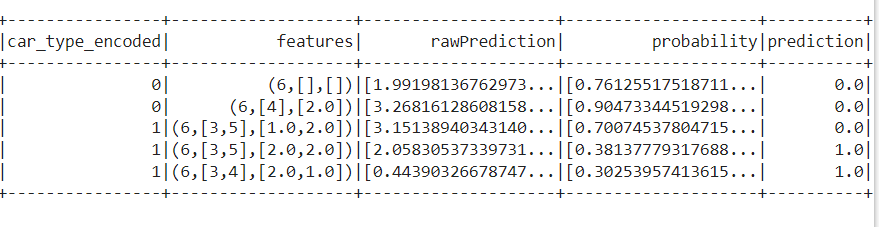
Here, I trimmed a few columns to show the priority columns. As we can see, we have predicted the car_type.
Let’s evaluate the model. Unlike metrics used traditionally, Pyspark provides the following metrics —
As we have MultiClass DataFrame, let's use MulticlassClassificationEvaluator.
from pyspark.ml.evaluation import MulticlassClassificationEvaluator
evaluator = MulticlassClassificationEvaluator()
evaluator.setLabelCol("car_type_encoded")
evaluator.setPredictionCol("prediction")
evaluator.evaluate(predictions)
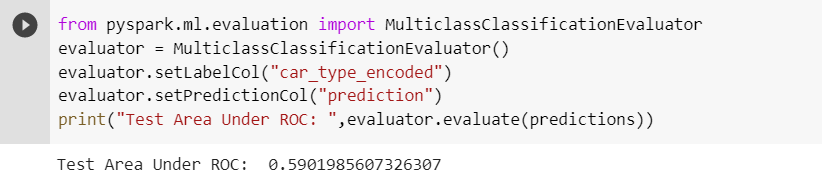
As we can see, our model performed poorly using Logistic Regression as it contains multiple classes. So Let's use the Decision Tree to improve the performance.
Decision Tree
Decision trees are widely used since they are easy to interpret, handle categorical features, extend to multi-class classification, do not require feature scaling, and are able to capture non-linearities and feature interactions.
from pyspark.ml.classification import DecisionTreeClassifier
from pyspark.ml.evaluation import MulticlassClassificationEvaluator
#Training Model
dt = DecisionTreeClassifier(featuresCol = 'features', labelCol = 'car_type_encoded', maxDepth = 3)
dtModel = dt.fit(train)
#Prediction
predictions = dtModel.transform(test)
#Evaluating the performance
evaluator = MulticlassClassificationEvaluator()
evaluator.setLabelCol("car_type_encoded")
evaluator.setPredictionCol("prediction")
print("Test Area Under ROC: ",evaluator.evaluate(predictions))
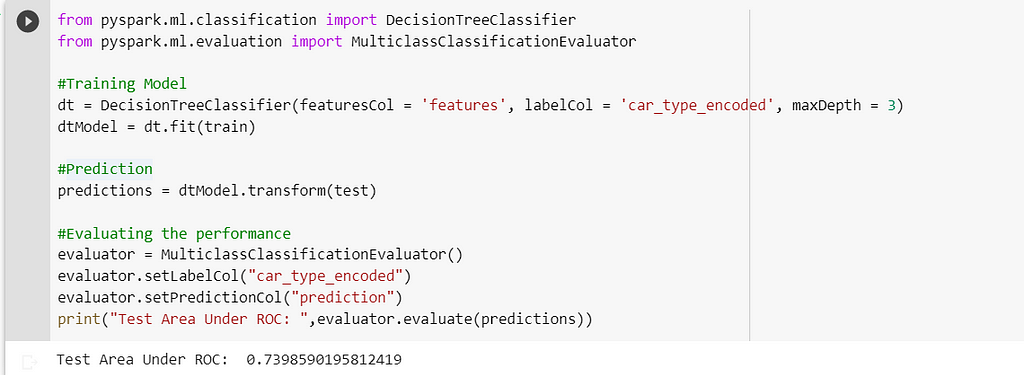
As we can, even though the performance is improved compared to the Logistic Regression model, still the performance is not that satisfactory.
So let’s use Ensemble methods like Random Forest to improve the performance.
Random Forest
from pyspark.ml.classification import RandomForestClassifier
from pyspark.ml.evaluation import MulticlassClassificationEvaluator
#Training Model
rf = RandomForestClassifier(featuresCol = 'features', labelCol = 'car_type_encoded', numTrees = 500, maxDepth = 10)
rfModel = rf.fit(train)
#Prediction
predictions = rfModel.transform(test)
#Evaluating the performance
evaluator = MulticlassClassificationEvaluator()
evaluator.setLabelCol("car_type_encoded")
evaluator.setPredictionCol("prediction")
print("Test Area Under ROC: ",evaluator.evaluate(predictions))
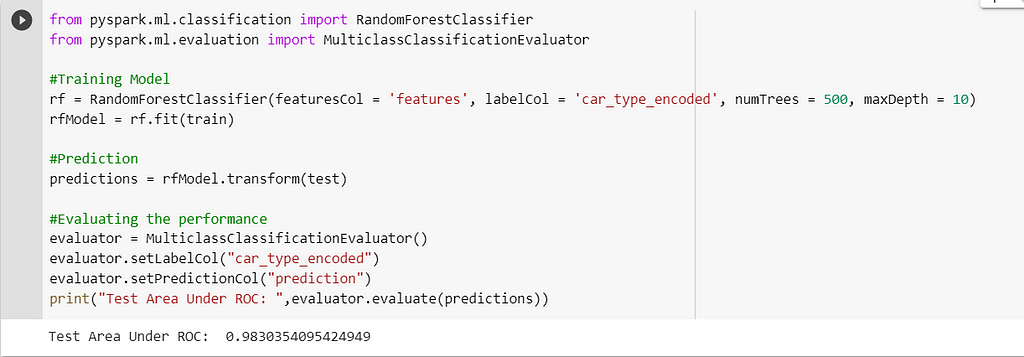
As we have used hyperparameters numTrees and maxDepth, we can see that performance of the model is improved a lot, and we got good results.
Here, we have used minimal methods and achieved the desired performance. Alternatively, we can use many algorithms and techniques that are present in pyspark Ml to build the models.
We have covered all the major concepts using Pyspark in this series of articles.
I look forward to hearing your valuable feedback or questions. Happy to assist…
Happy coding….
Pyspark MLlib | Classification using Pyspark ML was originally published in Towards AI on Medium, where people are continuing the conversation by highlighting and responding to this story.
Join thousands of data leaders on the AI newsletter. It’s free, we don’t spam, and we never share your email address. Keep up to date with the latest work in AI. From research to projects and ideas. If you are building an AI startup, an AI-related product, or a service, we invite you to consider becoming a sponsor.
Published via Towards AI
Towards AI Academy
We Build Enterprise-Grade AI. We'll Teach You to Master It Too.
15 engineers. 100,000+ students. Towards AI Academy teaches what actually survives production.
Start free — no commitment:
→ 6-Day Agentic AI Engineering Email Guide — one practical lesson per day
→ Agents Architecture Cheatsheet — 3 years of architecture decisions in 6 pages
Our courses:
→ AI Engineering Certification — 90+ lessons from project selection to deployed product. The most comprehensive practical LLM course out there.
→ Agent Engineering Course — Hands on with production agent architectures, memory, routing, and eval frameworks — built from real enterprise engagements.
→ AI for Work — Understand, evaluate, and apply AI for complex work tasks.
Note: Article content contains the views of the contributing authors and not Towards AI.
Related posts
Recent Posts


")

