


Hands-on Random Forest with Python
Last Updated on July 6, 2022 by Editorial Team
Author(s): Tirendaz Academy
Originally published on Towards AI the World’s Leading AI and Technology News and Media Company. If you are building an AI-related product or service, we invite you to consider becoming an AI sponsor. At Towards AI, we help scale AI and technology startups. Let us help you unleash your technology to the masses.
A practical guide on how to implement random forests with grid search technique using scikit-learn.
One model may make a wrong prediction. But if you combine the predictions of several models into one, you can make better predictions. This concept is called ensemble learning. Ensembles are methods that combine multiple models to build more powerful models. Ensemble methods have gained huge popularity during the last decade. There are two essential ensemble models based on decision trees: random forest and gradient boosted. In this post, I’ll talk about the following topics,
- What is a random forest?
- Some advantages and disadvantages of random forests
- How to implement a random forest with a real-world dataset?
Let’s dive in!
What is Random Forest?
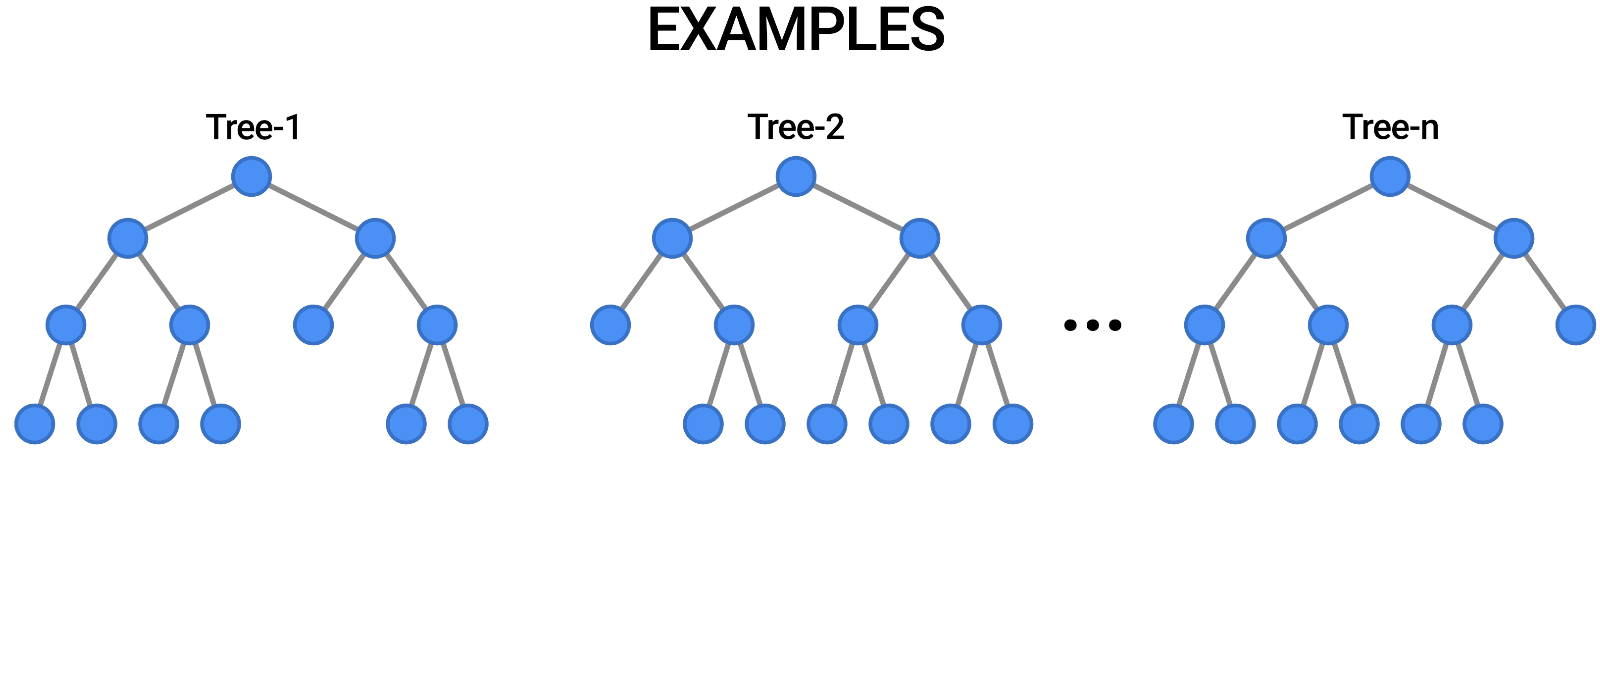
Random forest is a supervised machine learning algorithm that is used widely in classification and regression problems. You can think of a random forest as an ensemble of decision trees. The decision tree models tend to overfit the training data. You can overcome the overfitting problem using random forest.
To implement a random forest, you need to build many decision trees. The random forest consists of a collection of decision trees. Each tree in a random forest is slightly different from the others. These trees are selected a different subset of features. Note that these features are randomly selected. When making the final prediction, the predictions of all trees are combined and these predictions are averaged. Since you use many trees, you can reduce the amount of overfitting.
Some Advantages of Random Forests
Let’s take a look at some advantages of random forest.
- You can use random forests for both classification and regression tasks.
- Random forests often work well without heavy tuning of the hyperparameters.
- You don’t need to scale the data.
- Random forests may provide better accuracy than decision trees since it overcomes the overfitting problem.
Some Disadvantages of Random Forests
There are some disadvantages of random forests. Let’s take a look at these disadvantages.
- Random forests cannot be performed well on very high dimensional, and sparse data such as text data.
- Random forests are not simple to interpret since it uses deeper tree than decision trees.
So you saw some advantages and disadvantages of random forests. Now let’s go ahead and take a look at how to implement random forest with scikit learn.
How to Implement Random Forest with Scikit-Learn?
To show how to implement random forest, I’m going to use the breast cancer wisconsin datasets. Before loading the dataset, let me import pandas.
import pandas as pd
Let’s load the dataset.
df = pd.read_csv( “breast_cancer_wisconsin.csv”)

You can find the notebook and dataset here. Let’s take a look at the first five rows of the dataset.
df.head()
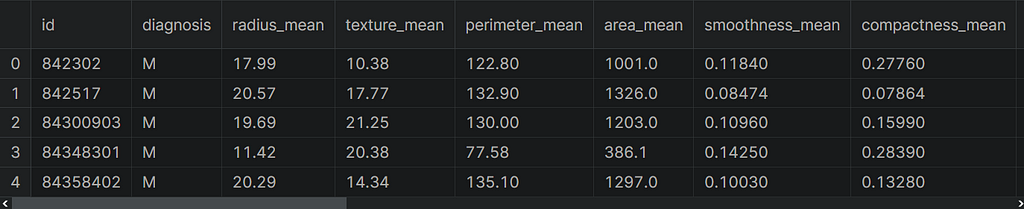
This dataset consists of samples of malignant and benign tumor cells. The first column in the dataset shows the unique ID numbers and the second column shows diagnoses, let’s say M indicates malignant and B indicates benign. The rest of the columns are our features. Let’s take a look at the shape of the dataset.
df.shape
#Output:
(569, 33)
Data Preprocessing
Data preprocessing is one of the most important stages of data analysis. Now, let’s create the input and output variables. To do this, I’m going to use the loc method. First, let me create our target variable.
y = df.loc[:,"diagnosis"].values
Let’s create our feature variable and remove unnecessary columns. To do this, I’m going to use the drop method.
X = df.drop(["diagnosis","id","Unnamed: 32"],axis=1).values
Note that our target variable has two categories, M and B. Let’s encode the target variable with a label encoder. First, I’m going to import this class.
from sklearn.preprocessing import LabelEncoder
Now, I’m going to create an object from this class.
le = LabelEncoder()
Let’s fit and transform our target variable.
y = le.fit_transform(y)
Before building the model, let’s split the dataset into training and test set. To do this, I’m going to use the train_test_split function. First, let me import this function.
from sklearn.model_selection import train_test_split
Let’s split our dataset using this function.
X_train,X_test,y_train,y_test=train_test_split(X, y,
                                               stratify=y,
                                               random_state=0)
Cool. Our datasets are ready to analyze.
Building A Random Forest Model
To use a random forest in Scikit-Learn, we need to import RandomForestClassifier from the ensemble module. First, let’s import this class.
from sklearn.ensemble import RandomForestClassifier
Now, I’m going to create an object from this class. Here, I’m only going to use default values
rf = RandomForestClassifier(random_state = 0)
Next, let’s build our model. To do this, I’m going to use the fit method with the training set.
rf.fit(X_train, y_train)
Awesome. Our model is ready to predict. Let’s evaluate our model using the training and test set.
y_train_pred = rf.predict(X_train)
y_test_pred = rf.predict(X_test)
Now, let’s take a look at the performance of our model on datasets. To do this, I’m going to use the accuracy_score function. First, let me import this function.
from sklearn.metrics import accuracy_score
After that, let’s take a look at accuracy scores for the training and test set.
rf_train = accuracy_score(y_train, y_train_pred)
rf_test = accuracy_score(y_test, y_test_pred)
Now, let’s print these scores.
print(f’Random forest train/test accuracies: {rf_train: .3f}/{rf_test:.3f}’)
#Output:
Random forest train/test accuracies:1.000/0.958
Awesome, the scores were printed. As you can see, the score on the training set is 100%, and the score on the test set is 95%. This means that the model has an overfitting problem. Note that this random forest model learned the training set so well. So, it simply memorized the outcome. But, the model cannot generalize. To overcome the overfitting problem, we control the complexity of the model.
Hyperparameter Tuning with Grid Search
For model complexity, we need to tune the model using different parameters. To do this, I’m going to use the grid search technique. Grid search is a model hyperparameter optimization technique. In scikit-learn, this technique is provided in the GridSearchCV class. Let’s import this class.
from sklearn.model_selection import GridSearchCV
Now, I’m going to create an object from RandomForestClassifier for use in grid search.
rf = RandomForestClassifier(random_state = 42)
When constructing the GridSearchCV class, you need to provide a dictionary of hyperparameters to evaluate the param_grid argument. This is a map of the model parameter name and an array of values to try. Now, let me create a parameters variable that contains the values of the parameters.
parameters = {'max_depth':[5,10,20],                           (1)
              'n_estimators':[i for i in range(10, 100, 10)],  (2)
              'min_samples_leaf2:[i for i in range(1, 10)],    (3)
              'criterion' :['gini', 'entropy'],                (4)
              'max_features': ['auto', 'sqrt', 'log2']}        (5)
(1) The maximum depth of the tree. If None, then nodes are expanded until all leaves are pure or until all leaves contain less than min_samples_split samples.
(2) To build a random forest model, you need to decide on the number of trees. Here, I’m going to create the values for the n_estimators parameter. n_estimators specify the number of trees in the forest. For this parameter, I’m used for the loop in list.
(3) The min_leaf_size parameter is used to specify the minimum number of samples in a leaf node. For this parameter, I used the loop-in list again.
(4) I used two parameters for the criterion parameter.
(5) Lastly, I set how to select the features. Note that a critical parameter in the random forest technique is max_features. You use this parameter when looking for the best split.
Thus, we specified the values of the parameters. To find the best parameters, I’m going to create an object from GridSearch.
clf = GridSearchCV(rf, parameters, n_jobs= -1)
Next, I’m going to fit our model with the training set.
clf.fit(X_train, y_train)
Finally, to see the best parameters, I’m going to use the best_params_attribute.
print(clf.best_params_)
#Output:
{'criterion': 'entropy', 'max_depth': 5, 'max_features': 'log2', 'min_samples_leaf': 3, 'n_estimators': 10}
When we execute this cell, you can see the best parameters.
Evaluating The Random Forest Model
Now, I’m going to predict the values of the training and test set. Note that we don’t need to train our model again. Because after the best parameters are found, the model is trained with these parameters. So you can directly use the clf model for prediction. Let’s predict the values with this model.
y_train_pred=clf.predict(X_train)
y_test_pred=clf.predict(X_test)
rf_train = accuracy_score(y_train, y_train_pred)
rf_test = accuracy_score(y_test, y_test_pred)
print(f’Random forest train/test accuracies: {rf_train: .3f}/{rf_test:.3f}’)
#Output:
Random forest train/test accuracies:0.993/0.965
The accuracy scores were printed according to the best parameters. The performance of the model is better on both the training and test set. Notice that the score of our model on the training set is close to the score on the test set. In addition, both accuracy scores are close to 1. So, we have found the best parameters and predicted the values of the training and the test set.
Conclusion
In this post, I talked about random forest and how to implement this technique with scikit learn. A random forest consists of multiple decision trees. This method averages the results of all the trees to output a model. So you can overcome the overfitting problem with this approach. You can perform both classification and regression tasks with this method. That’s it. Thanks for reading. I hope you enjoy it.
Please don’t forget to follow us on YouTube | GitHub | Twitter | Kaggle | LinkedIn.
If this post was helpful, please click the clap 👏 button below a few times to show me your support 👇
Hands-on Random Forest with Python was originally published in Towards AI on Medium, where people are continuing the conversation by highlighting and responding to this story.
Join thousands of data leaders on the AI newsletter. It’s free, we don’t spam, and we never share your email address. Keep up to date with the latest work in AI. From research to projects and ideas. If you are building an AI startup, an AI-related product, or a service, we invite you to consider becoming a sponsor.
Published via Towards AI
Towards AI Academy
We Build Enterprise-Grade AI. We'll Teach You to Master It Too.
15 engineers. 100,000+ students. Towards AI Academy teaches what actually survives production.
Start free — no commitment:
→ 6-Day Agentic AI Engineering Email Guide — one practical lesson per day
→ Agents Architecture Cheatsheet — 3 years of architecture decisions in 6 pages
Our courses:
→ AI Engineering Certification — 90+ lessons from project selection to deployed product. The most comprehensive practical LLM course out there.
→ Agent Engineering Course — Hands on with production agent architectures, memory, routing, and eval frameworks — built from real enterprise engagements.
→ AI for Work — Understand, evaluate, and apply AI for complex work tasks.
Note: Article content contains the views of the contributing authors and not Towards AI.
Related posts
Recent Posts


")