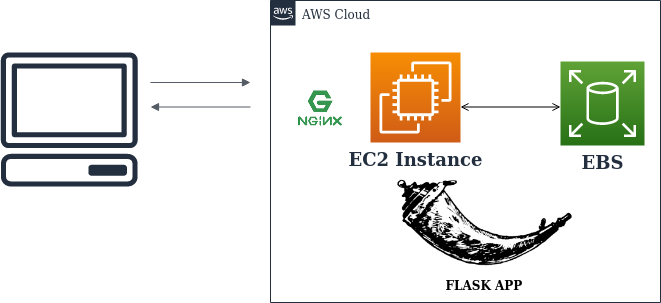
Deploying Machine Learning Models As a Service Using AWS EC2
Last Updated on July 24, 2023 by Editorial Team
Author(s): Tharun Kumar Tallapalli
Originally published on Towards AI.
Cloud Computing, Machine Learning
An Overview of Deploying ML Models as Web Applications on EC2 using Flask and Nginx
When ML Models are the only use case in our application we deploy it as a service.

Benefits of Deploying as a service on EC2
1. We can Create Custom storage and store the Data (which can’t be done while we deploy our model as Web Application using PAAS.
2. Performance (we can autoscale the instances whenever required)
3. Security (we can control who can use service by adding security groups and VPC)
In this article, we will be covering
1 . Deploying ML Model on EC2
2 . Running it as a service
Deploying ML Model on EC2
1. Launch an EC2 instance
- Select an OS Image you require (I am using ubuntu 18.04 LTS).
- Configure No. of instances for auto-scaling (I have selected 2 instances for auto-scaling)
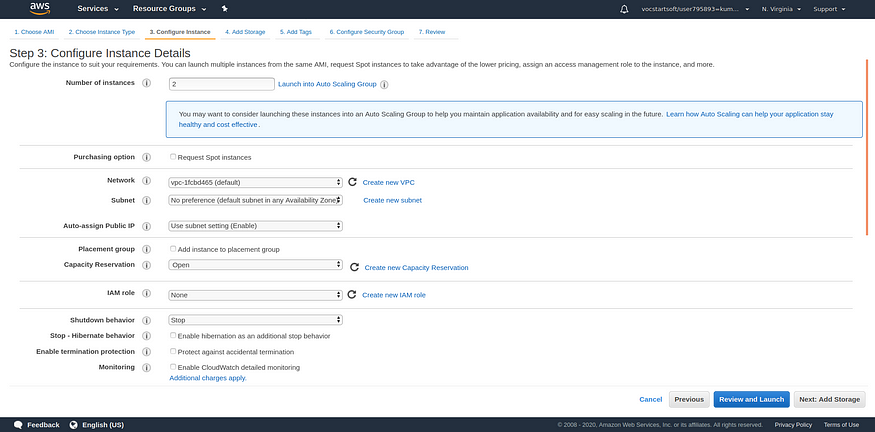
- Add desired EBS Storage capacity to EC2 (Amazon Elastic Block Store provides raw block-level storage that can be attached to Amazon EC2 instances and is used by Amazon Relational Database Service).

- Add Tags to distinguish the instance from other instances.
- Configure security groups (These can be used to restrict the access of Our Instance) . Default one will be SSH running at port 22 (this gives access to connect EC2 instance from our computer). However, we will be adding http to security groups later (to access the services from internet easily).

- Click on Review and Launch .
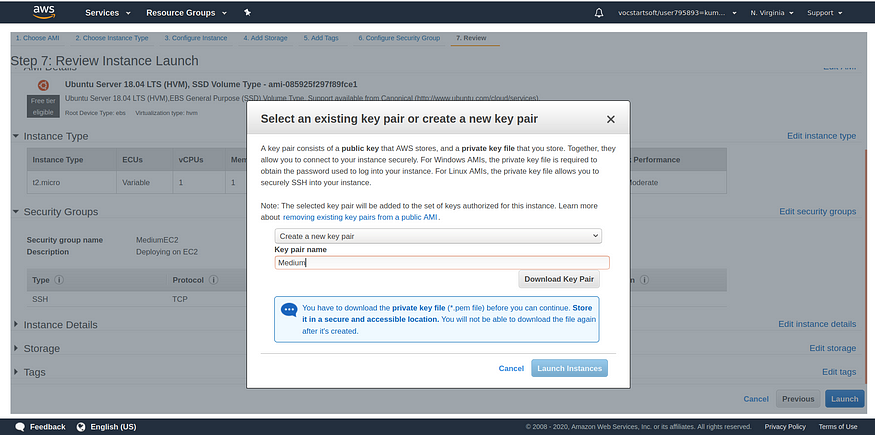
- Create a new key pair (This pem file stores the credentials to access EC2 Instance). Before launching instance download Key Pair and click launch instance.
2. Connecting To Instance
- Go to instance and click connect.
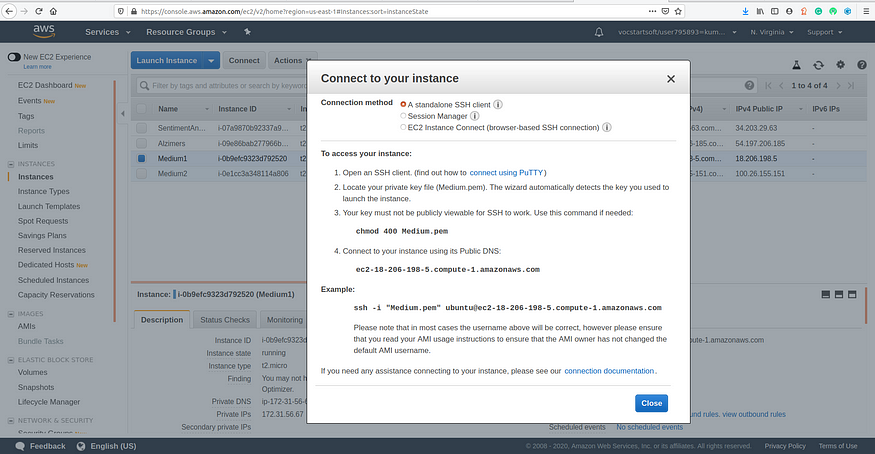
- I am using Linux OS to connect to instance (if you are using windows, create Virtalbox or install putty).
- Go to folder where you have downloaded the pem file. Open command prompt and run the below code.
chmod 400 Medium.pem
- Connect to instance using SSH.
sudo ssh -i "Medium.pem" [email protected]

- We have successfully connected to EC2 Instance. We need to install basic packages.
sudo apt-get update
sudo apt-get install python3-pip
- Here we are using nginx as server, flask as web framework, gunicorn (for Internet gateway).
sudo apt-get install nginx
sudo apt-get install gunicorn3
- Go to security groups and add http in inbound rules.(This gives access to connect to EC2 from Internet).

- Enter EC2 instance public DNS (Our instance DNS is http://ec2-18-206-198-5.compute-1.amazonaws.com/) in browser. We can see nginx server is running successfully.

- Clone the repository containing files or create files on EC2. Folder structure should look like this. Folder name is FlaskApp. Check out my Repo if you want to deploy my Model.

- Nginx runs on port 80. We need to run our flask application on other port .In this example I will be running on port 8080.
Configuring nginx server
- Go to nginx configuration files. We can see default configuration file named ‘deafult’.
cd /etc/nginx/sites-enabled/
- We need to write our own configuration file in (/etc/nginx/sites-enabled) folder to run flask app on desired port.
sudo vim FlaskApp
- Here we set the server to listen on port 8080.
server
{
listen 8080;server_name ec2-18-206-198-5.compute-1.amazonaws.com;location / {proxy_pass http://127.0.0.1:8000;}}
- Restart the nginx server.
sudo service nginx restart
- Go to Flaskapp folder in the home directory. Install all dependencies required for the application.
pip3 install -r requirements.txt
Add 8080 port in Inbound rules of EC2 instance security group.

- Now run FlaskApp using gunicorn3.
gunicorn3 app:app
- Now type port 8080 with public DNS. You can see the Web Application running.
http://ec2-18-206-198-5.compute-1.amazonaws.com:8080/
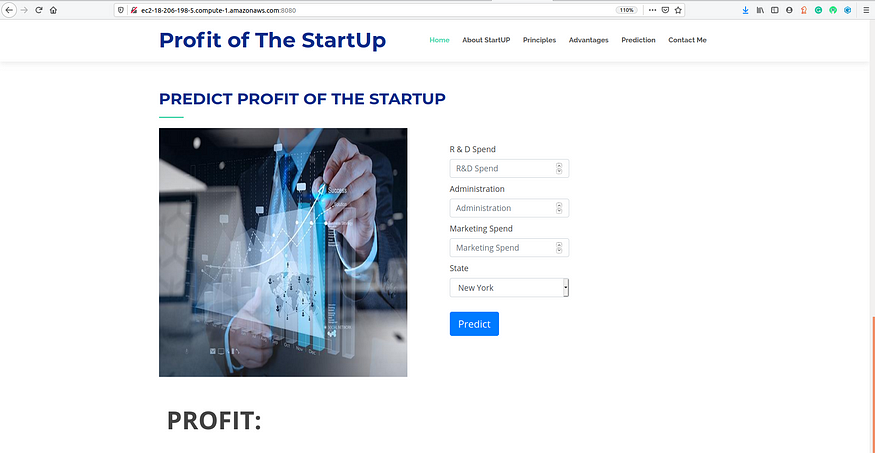
- We are now ready with our app which is up and running for the world to see! But whenever you close the SSH terminal window, the process will stop and so will your app. So what do we do?
Making it as a service
- We need to run instance as a service, so that it will run 24*7 without you having to intervene.
- TMUX is the best choice for this situation. TMUX sessions are persistent, which means that programs running in TMUX will continue to run even if you get disconnected.
- First, we stop our app using Ctrl+C and install tmux.
sudo apt-get install tmux
sudo apt-get update
- We start a new tmux session using the below command.
tmux new -s new_session
- Running our Application using gunicorn3 in this tmux session.
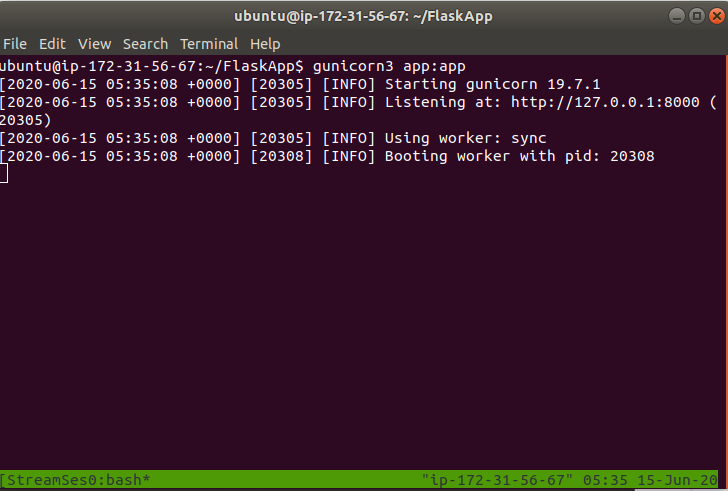
The next step is to detach our TMUX session so that it continues running in the background when you leave the SSH shell. To do this just press Ctrl+B and then D (Don’t press Ctrl while you press D).
Conclusion
Now we have successfully deployed the Machine Learning model as a Service using EC2 Instance. We can increase or decrease auto-scaling and storage capacity according to requirements. Deployed application can be seen here.
Final thoughts
I will get back to you on Deploying ML Models as Web Applications using ElasticBeanStalk.Till then, Stay Home, Stay Safe, and keep exploring!
Get in Touch
I hope you found the article insightful. I would love to hear feedback from you to improvise it and come back better! If you would like to get in touch, connect with me on LinkedIn. Thanks for reading!
References
[1] Linuxize : https://linuxize.com/post/getting-started-with-tmux/
Join thousands of data leaders on the AI newsletter. Join over 80,000 subscribers and keep up to date with the latest developments in AI. From research to projects and ideas. If you are building an AI startup, an AI-related product, or a service, we invite you to consider becoming a sponsor.
Published via Towards AI


