


Complete Git Tutorial for Beginners with Examples
Last Updated on December 25, 2022 by Editorial Team
Author(s): Muttineni Sai Rohith
Originally published on Towards AI the World’s Leading AI and Technology News and Media Company. If you are building an AI-related product or service, we invite you to consider becoming an AI sponsor. At Towards AI, we help scale AI and technology startups. Let us help you unleash your technology to the masses.
Git is a version control system that lets us track the changes we make to our files over time. With Git we can revert to various states of our files. We can make a copy of our files and make changes to that copy and then merge these changes to the original copy.
We can install git using this official website.
Configuring git:
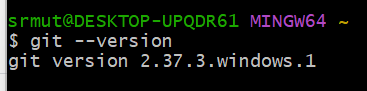
To verify git installation, we can open git bash and type the git — version command. This shows the latest version of git installed on our PC.
git --version
The first thing we have to do is to set our username and email address. Git uses this information to identify who made changes to specific files. To set our username and email id, we can use the below commands –
git config --global user.name “Our_username”
git config --global user.email “Our_email”

This will configure our Git environment. To check whether the configuration is succeeded, we can still check our configuration in the local machine using this command —
git config -l
We can also store credentials in the cache, Just to avoid giving them each time using the below command –
git config --global credential.helper cache
Cloning existing git repo to local –
We can clone the existing git repo into the local machine using the command –
git clone https://ourrepo

Creating and Initializing a new project in Git
Create a new folder or navigate to the folder where you want to create your first project. I have used git bash to create a folder test_calculator using the below commands —
mkdir test_calculator
cd test_calculator
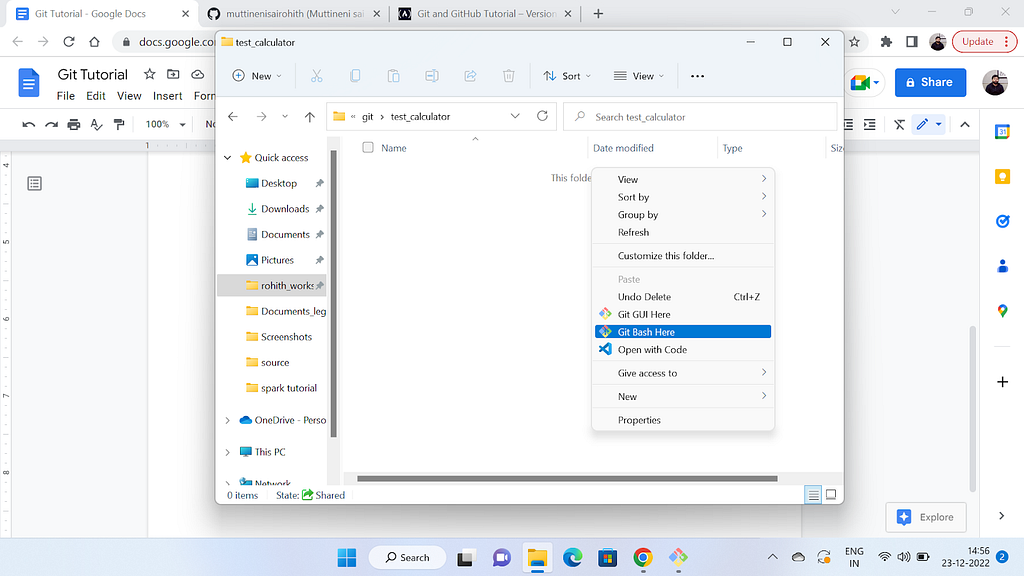
Alternatively, you can Open the folder you like through File Explorer, Right click on it and select Git Bash Here
Now once the folder is ready, we need to initialize the project, For this, we need to run the git init command. This will tell git to start watching our files, for every change that occurs.

Now let’s add a small block of code to our Folder.
I am writing a small python program calculator.py for that, which contains a function, that will take two numbers, a and b as arguments and return the result.
def add(a, b):
    return a+b

a = int(input())
b = int(input())
print(add(a, b))
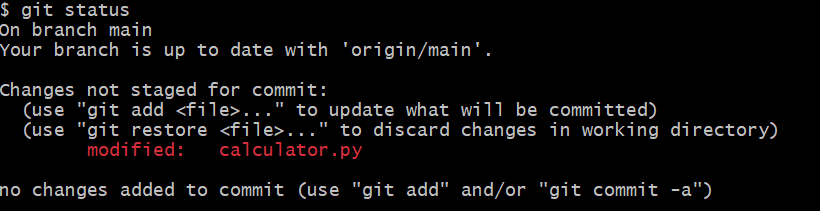
Now that we have added our changes to the folder, let’s check whether git has tracked our changes. This can be done using the git status command.
git status
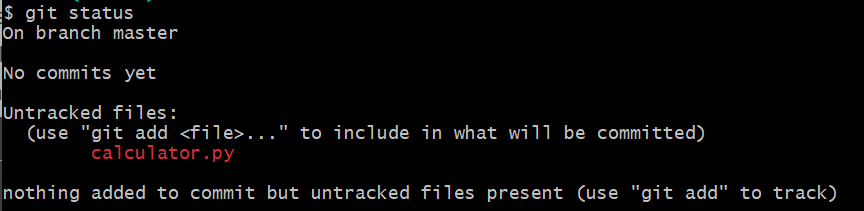
We can see our branch name, if there are any past commits to our branch done us, And then any updated/untracked files that are not synced with the git.
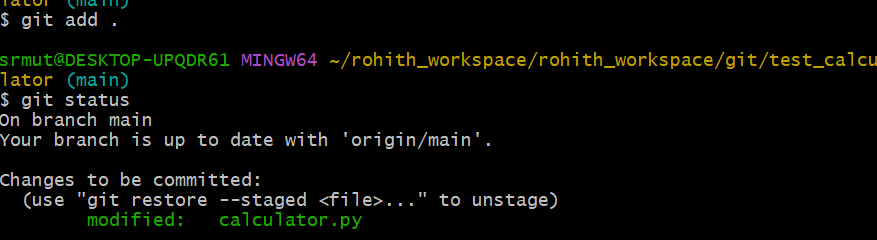
To add the updated changes or untracked files, we need to use the command —
git add .
This will add all the untracked changes.

Now after performing git add . ; We can see that our change is tracked with the git. And we can see the changes that are yet to be committed.
To commit our changes, we can use this command git commit -m “first commit” command.
git commit -m “first commit”
-m is the shorthand for the message and the text inside the parentheses is the commit message.

Now Our code is ready and committed. Now let’s push our code to the repo.
For that to happen, let’s create a Repo in GitHub. This can be done by logging in to GitHub and clicking on Repos -> new -> Enter Repo Name and click on create. This is my Repo link — https://github.com/muttinenisairohith/test_calculator.git
Later we need to create a connection between our local repo and the remote repo in Github. For that, we can use this command –
git remote add origin https://github.com/muttinenisairohith/test_calculator.git
As we have our remote connection ready now. By default, git will point to the Master branch, but instead of the master branch, I want to push my changes to the main branch. For that, we can use the command —
git branch -b main
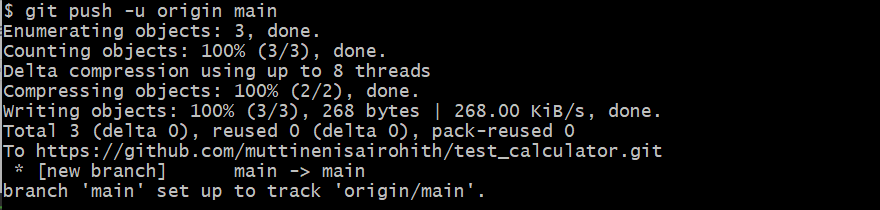
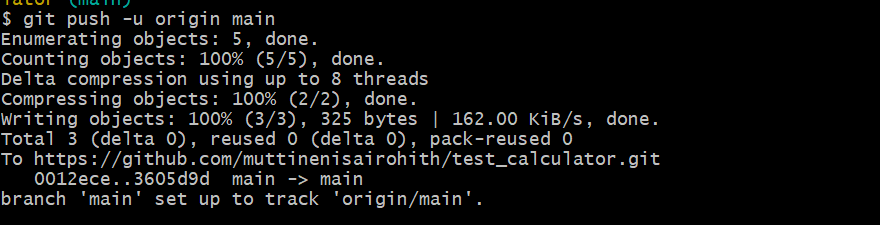
Now We have our repo and branch ready, Let’s push our modified code to our Branch in the Repo Created. For this, we can use the following command –
git push -u origin main
This will push our changes to the main branch, and if it is our first time, it will ask us to Login into Git. We can log in to git using our email id and password.
Git vs GitHub
Generally, people think Git and Github are similar, But they are not. As said, Git is a version control system that tracks our changes to the repo and provides us various functionalities like time traveling etc., Whereas Github is an Online hosting service for Git Repositories. Similar to Azure DevOps Services, bitbucket, etc., Github helps us to store our repo in their platform and allow other developers to contribute at the same time from any location.
As we have pushed our first git project to Github, Moving further, Let’s understand the stages of a file being tracked by Git.
Committed State —
A file is in the committed state when all the changes made to the file have been saved in the local repo. Files in the committed stage are files ready to be pushed to the remote repo (on GitHub)
Modified state —
A file in the modified state has some changes made to it, but it’s not yet saved. This means that the state of the file has been altered from its previous state in the committed state
Staged state —
A file in the staged state means it is ready to be committed. In this state, all necessary changes have been made, so the next step is to move the file to the commit state.
Now Moving Further let’s add a functionality subtraction to our code and save that again –
def add(a, b):
return a+b
def sub(a, b):
return a-b
a = int(input())
b = int(input())
print(add(a, b))
print(sub(a, b))
As we have made some changes, let’s now see the git status –
So as we can see, Our file is in the modified state now as we didn’t save it to our local repo using git add.
Now let’s save this using the git add command.
Our Code is now saved, and now this is in the staged state, which means it is ready to be committed. Let’s commit our changes to our branch –

And Later push it to our Repo
Some Important commands —
Renaming files in git:
git mv oldfile newfile
Using this command, we can rename the file in our local repo and, stage the changes, then add and commit the changes.
Removing tracked files in git:
git rm filename
Using this command, we can delete the file and stage the changes, then add and commit the changes.
Git commit — amend:
git commit --amend
It allows us to modify and add changes to the most recent commit. Fixing up a local commit with amend is great, and you can push it to a shared repository after you’ve fixed it. But you should avoid amending commits that have already been made public.
Git remote
Using git remote, we can add a remote repository to our local repository using the command –
git add remote https://repo_here
We can see all the remote repositories for our local repository using the command –
git remote -v
We can get more info about the remote repository using the command –
git remote show origin

We have more topics to cover, but I think it is becoming lengthy, so let’s break our next topics into two sub-articles. You can find the links below.
All about GitHub Branches —
All About Git Branches… And Git pull vs fetch
GitHub Rebase, Merge, Stash, Revert and Reset —
I hope this is helpful, as it will help me going forward with all the topics about Git in one place.
Happy Learning….. Stay Tuned….
Complete Git Tutorial for Beginners with Examples was originally published in Towards AI on Medium, where people are continuing the conversation by highlighting and responding to this story.
Join thousands of data leaders on the AI newsletter. It’s free, we don’t spam, and we never share your email address. Keep up to date with the latest work in AI. From research to projects and ideas. If you are building an AI startup, an AI-related product, or a service, we invite you to consider becoming a sponsor.
Published via Towards AI
Towards AI Academy
We Build Enterprise-Grade AI. We'll Teach You to Master It Too.
15 engineers. 100,000+ students. Towards AI Academy teaches what actually survives production.
Start free — no commitment:
→ 6-Day Agentic AI Engineering Email Guide — one practical lesson per day
→ Agents Architecture Cheatsheet — 3 years of architecture decisions in 6 pages
Our courses:
→ AI Engineering Certification — 90+ lessons from project selection to deployed product. The most comprehensive practical LLM course out there.
→ Agent Engineering Course — Hands on with production agent architectures, memory, routing, and eval frameworks — built from real enterprise engagements.
→ AI for Work — Understand, evaluate, and apply AI for complex work tasks.
Note: Article content contains the views of the contributing authors and not Towards AI.
Related posts
Recent Posts


")

