Name: Towards AI Legal Name: Towards AI, Inc. Description: Towards AI is the world's leading artificial intelligence (AI) and technology publication. Read by thought-leaders and decision-makers around the world. Phone Number: +1-650-246-9381 Email: pub@towardsai.net
228 Park Avenue South New York, NY 10003 United States
Website: Publisher: https://towardsai.net/#publisher Diversity Policy: https://towardsai.net/about Ethics Policy: https://towardsai.net/about Masthead: https://towardsai.net/about
Name: Towards AI Legal Name: Towards AI, Inc. Description: Towards AI is the world's leading artificial intelligence (AI) and technology publication. Founders: Roberto Iriondo, , Job Title: Co-founder and Advisor Works for: Towards AI, Inc. Follow Roberto: X, LinkedIn, GitHub, Google Scholar, Towards AI Profile, Medium, ML@CMU, FreeCodeCamp, Crunchbase, Bloomberg, Roberto Iriondo, Generative AI Lab, Generative AI Lab Denis Piffaretti, Job Title: Co-founder Works for: Towards AI, Inc. Louie Peters, Job Title: Co-founder Works for: Towards AI, Inc. Louis-François Bouchard, Job Title: Co-founder Works for: Towards AI, Inc. Cover:
Towards AI Cover
Logo:
Towards AI Logo
Areas Served: Worldwide Alternate Name: Towards AI, Inc. Alternate Name: Towards AI Co. Alternate Name: towards ai Alternate Name: towardsai Alternate Name: towards.ai Alternate Name: tai Alternate Name: toward ai Alternate Name: toward.ai Alternate Name: Towards AI, Inc. Alternate Name: towardsai.net Alternate Name: pub.towardsai.net
5 stars – based on 497 reviews

Frequently Used, Contextual References

TODO: Remember to copy unique IDs whenever it needs used. i.e., URL: 304b2e42315e

Resources

Take our 85+ lesson From Beginner to Advanced LLM Developer Certification: From choosing a project to deploying a working product this is the most comprehensive and practical LLM course out there!

Publication

Build and Deploy Custom Docker Images for Object Recognition
Latest   Machine Learning

Build and Deploy Custom Docker Images for Object Recognition

Last Updated on March 21, 2023 by Editorial Team

Author(s): Hasib Zunair

Originally published on Towards AI.

Learn how to build and deploy a full-stack machine learning (ML) image recognition application from scratch to classify different objects.
Source: Image by Ian Taylor at Unsplash.

Motivation

Several components are involved in building and deploying full-stack ML applications. For example, you have ML frameworks like PyTorch to build your model, FastAPI for making API endpoints, and Gradio for a frontend user interface (UI). Not surprisingly, it is often the case that using all of these tools together work locally on your machine (¯\_(ツ)_/¯), but is not reproducible in others. This is largely due to different versions of libraries, version mismatching of other dependencies, and different operating systems (OS) on those machines.

To address this problem and ensure replicability and reproducibility across different machines, Docker comes to the rescue. It can be used to create and run specific applications in isolation and also connect different applications/services. This is directly related to MLOps since you move towards serving ML models to end users.

The article is organized as follows:

  1. Goals
  2. Basic Concepts
  3. Building backend with PyTorch and FastAPI
  4. Building frontend with Gradio
  5. Launch the app in two lines

All code used in this post is available on GitHub.

Goals

This article shows you how to build and deploy a full stack machine learning image recognition application from scratch that is able to recognize different objects from your own images, not docker images!

After your application is set up and running locally, you’ll see how to containerize it and finally deploy the docker images (i.e., running containers). A custom docker image is built for the machine learning model and the RESTful API that serves as the backend. And another for the frontend with a web UI that accepts input images calls the API endpoint to make a prediction and shows results.

Source: Photo by author. Image Recognition Waiter in action. Serving you predictions for your images, bon appetit!

Basic Concepts

Image recognition

Image recognition is the fundamental task in computer vision of recognizing what object(s) is present in an image. This is also known as Image Classification, which has applications stretching from autonomous vehicles to medical imaging.

FastAPI

FastAPI is a modern web framework used for building RESTful APIs with Python. It is fast, easy to understand, and requires minimal code and potentially fewer bugs. While FastAPI can be used for web development, you’ll see how to use it specifically to build APIs.

Gradio

Gradio is used to create and share ML applications. It is a quick way to build proof-of-concept (POC) ML apps with a user-friendly web interface for anyone to use it.

Docker

Docker is for building isolated applications. The core idea behind docker is to build an app that contains the written source code as well as the specifications (e.g., libraries, versions, and OS) to run it. These are used to build a docker image, that can later be stored in Docker Hub for sharing with others. From the docker image, you can run the application in a docker container where the environment of this container is defined by the specifications when creating the docker image.

An image is a snapshot of an environment, and a container runs the software.

Let’s get to the building now!

Building backend with PyTorch and FastAPI

The backend consists of two components: a PyTorch machine learning model and a RESTful API.

Machine Learning model: The pretrained model can predict 1000 different objects. You can find the list of 1000 objects here. Of course, it would work the same if you had trained your own model, let’s say to detect dogs or cats! Specifically, the model is a convolutional neural network (CNN) known as ResNet-18 [1] that is trained on the ImageNet [2] dataset. You can easily load this model in PyTorch using:

import torch
model = torch.hub.load(‘pytorch/vision:v0.10.0’, ‘resnet18’, pretrained=True)

For making predictions on your own input images, you would need to preprocess the image to the desired size as well as normalize the input according to how the ResNet-18 model was trained. This is done by:

def preprocess(input_image):
 preprocess = transforms.Compose([
 transforms.Resize(256),
 transforms.CenterCrop(224),
 transforms.ToTensor(),
 transforms.Normalize(mean=[0.485, 0.456, 0.406], std=[0.229, 0.224, 0.225]),
 ])
 input_tensor = preprocess(input_image)
 input_batch = input_tensor.unsqueeze(0) # create a mini-batch as expected by the model
 return input_batch

Once the input image is preprocessed, it is ready for the model to make a prediction. The predictfunction defined below takes in an image and the ResNet-18 model as input. The model then makes a prediction and returns the top five labels (i.e., object/class names) as well as the probability scores.

def predict(input_image, model):
 # Move the input and model to GPU for speed if available
 if torch.cuda.is_available():
 input_image = input_image.to('cuda')
 model.to('cuda')

with torch.no_grad():
output = model(input_image)
# The output has unnormalized scores. To get probabilities, you can run a softmax on it.
probabilities = torch.nn.functional.softmax(output[0], dim=0)

results = {“success”: False}
results[“predictions”] = []
# Read the categories
with open(“imagenet_classes.txt”, “r”) as f:
categories = [s.strip() for s in f.readlines()]
# Show top categories per image
top5_prob, top5_catid = torch.topk(probabilities, 5)
for i in range(top5_prob.size(0)):
r = {“label”: categories[top5_catid[i]], “probability”: float(top5_prob[i].item())}
results[“predictions”].append(r)
results[“success”] = True
return results

Now, you have the model setup. The next component on the backend involves building an API endpoint around this prediction function.

RESTful API: To create an API endpoint, the prediction function is served using FastAPI. This involves loading the model (i.e., downloading and instantiating the model file) and finally creating a function that accepts POST requests. This is as simple as:

@app.post("/api/predict")
async def predict_image(image: bytes = File(...)):
 # Read image
 image = read_image(image)
 # Preprocess image
 image = preprocess(image)
 # Predict
 predictions = predict(image, model)
 return predictions

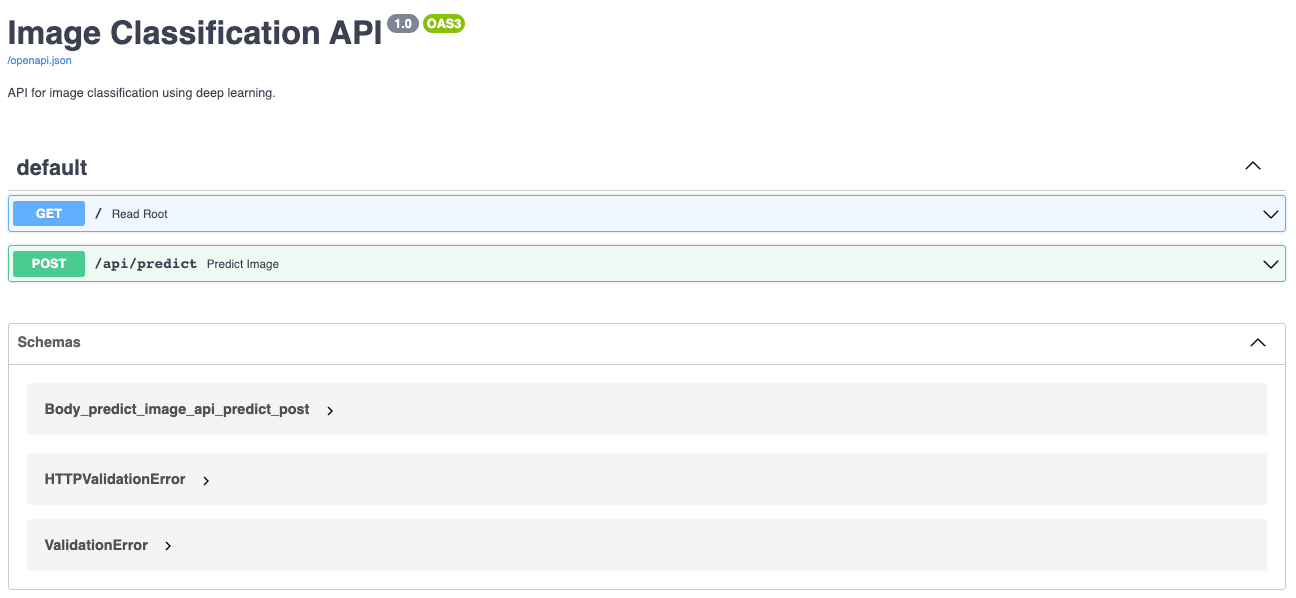
When the server is running, you can send POST requests with an image to the API endpoint, and it will return the top five labels and probability scores. You can also find the documentation page at `http://127.0.0.1:8000/docs` that looks like this:

Source: Image by author. Swagger documentation page for API endpoint.

You’ve got the backend running, which accepts images as inputs and outputs the predicted labels/objects. It’s time to dockerize the entire backend.

Dockerize the backend: To run this API endpoint inside of a docker container, a docker image needs to be created. This requires requirement.txt and a Dockerfile. First, requirement.txt is set up to define all modules needed for the app to work.

torch
torchvision
Pillow
gunicorn
fastapi==0.61.1
uvicorn==0.11.8
python-multipart
requests==2.24.0

Second, a Dockerfile is created to set up the necessary dependencies. This is what it looks like:

# Use an official Python runtime as a parent image
FROM python:3.6-slim

# Copy the requirements file into the image
COPY ./requirements.txt /app/requirements.txt

# Set the working directory to /app
WORKDIR /app

# Install any needed packages specified in requirements.txt
RUN pip install -r requirements.txt

# Copy every content from the local folder to the image
COPY . .

# Run server
CMD [“uvicorn”, “main:app”, “–host=0.0.0.0”, “–port=80”]

Now that requirement.txt &Dockerfile are setup, you can build an image using this specification. Then, you can run an instance of this image in a docker container using:

# build
docker build -t classification_model_serving .
# run
docker run -p 8000:80 --name cls-serve classification_model_serving

The model is deployed as an API endpoint through a docker container in your local machine. To make a request, run:

curl -X POST -F image=@test1.jpeg "http://0.0.0.0:8000/api/predict"

If everything is working correctly, you will see an output like:

{
 "success": true, 
 "predictions": 
 [
 {
 "label": "king penguin", 
 "probability": 0.999931812286377
 }, 
 {
 "label": "guenon", 
 "probability": 9.768833479029126e-06
 }, 
 {
 "label": "megalith", 
 "probability": 8.01052556198556e-06
 }, 
 {
 "label": "cliff", 
 "probability": 7.119778274500277e-06
 }, 
 {
 "label": "toucan", 
 "probability": 6.5011186052288394e-06
 }
 ]
}

The backend is now dockerized. You can send a request to the API endpoint with an image, and it returns the labels and probability scores. Let’s now see how you can build the front end.

Make sure the backend docker container is running when you first run the frontend docker container in the next section.

Building frontend with Gradio

The task of the frontend is to accept input images from the user, make a call to the API endpoint (which is our backend that is already running) with the image that returns predictions, and finally show the results to the user. The inference function i) loads the image (whether it is uploaded by the user or an example) ii) makes a POST request to the API endpoint iii) formats the results for visualization, and it looks like this:

def inference(image_path):
 # Load the input image and construct the payload for the request
 image = open(image_path, "rb").read()
 payload = {"image": image}

# Submit the request
r = requests.post(REST_API_URL, files=payload).json()

# Ensure the request was sucessful, format output for visualization
output = {}
if r[“success”]:
# Loop over the predictions and display them
for (i, result) in enumerate(r[“predictions”]):
output[result[“label”]] = result[“probability”]
print(“{}. {}: {:.4f}”.format(i + 1, result[“label”],
result[“probability”]))
else:
print(“Request failed”)
return output

And the layout of the web UI is defined by:

title = "Image Recognition Demo"
description = "This is a prototype application which demonstrates how artifical intelligence based systems can recognize what object(s) is present in an image. This fundamental task in computer vision known as `Image Classification` has applications stretching from autonomous vehicles to medical imaging. To use it, simply upload your image, or click one of the examples images to load them, which I took at <a href='https://espacepourlavie.ca/en/biodome' target='_blank'>Montréal Biodôme</a>! Read more at the links below."
article = "<p style='text-align: center'><a href='https://arxiv.org/abs/1512.03385' target='_blank'>Deep Residual Learning for Image Recognition</a> | <a href='https://github.com/pytorch/vision/blob/main/torchvision/models/resnet.py' target='_blank'>Github Repo</a></p>"

# Run inference
frontend = gr.Interface(inference,
inputs,
outputs,
examples=[“test1.jpeg”, “test2.jpeg”],
title=title,
description=description,
article=article,
analytics_enabled=False)

# Launch app and set PORT
frontend.launch(server_name=”0.0.0.0″, server_port=7860)

When the web UI is running, it will look like:

Source: Photo by author. Layout of the frontend web interface. Photo by author.

Dockerize the frontend: Now, you’d want to also run the frontend application inside of another docker container.

Why? Because we can. Kidding hahah!

This is because let’s say you want to use the API endpoint for different use cases such as in a mobile phone or a desktop application etc. It is nice to keep these separate so that, if for some reason, the frontend web UI fails, the backend will not fail with it and vice versa. Note that there will be scenarios where you’d want them to run in the same container.

Similar to the backend, you will need to make another requirement.txt that has modules needed for the frontend to work.

gradio
requests

And, another Dockerfile to set up the necessary dependencies.

# Use an official Python runtime as a parent image
FROM python:3.9-slim

# Copy the requirements file into the image
COPY ./requirements.txt /app/requirements.txt

# Set the working directory to /app
WORKDIR /app

# Install any needed packages specified in requirements.txt
RUN pip install -r requirements.txt

# Copy every content from the local folder to the image
COPY . .

# Run server, deafult gradio url is http://127.0.0.1:7860
CMD [ “python3”, “-u”, “/app/main.py” ]

Next, you can build and run the container using:

# build
docker build -t frontend_serving .
# run container
docker run -p 7860:7860 --add-host host.docker.internal:host-gateway --name frnt-serve frontend_serving

The frontend application is live in http://0.0.0.0:7860/ on your local machine. That’s it. Now you can play with the app and give it your own images and see what it says.

Launch the application in two lines

If you simply want to play with the application, I’ve made the docker images public on Docker Hub, and you can run the app with 2 lines of code. First, to copy the command. Second, press enter!

git clone https://github.com/hasibzunair/imagercg-waiter
cd imagercg-waiter/backend # this line does not count!
sh deploy.sh

The app is live in http://0.0.0.0:7860/ on your local machine. Or, if you simply want to play with the app from your browser, go here.

Conclusion

In this post, you learned how to build and run a full-stack ML application using PyTorch, FastAPI, and Gradio while ensuring replicability and reproducibility using Docker. You built custom docker images for the front and backend, and created a communication link between them using an API endpoint. Finally, as a user, you upload your images to the app that calls the API endpoint to make a prediction and then show the results.

I did this project after completing Docker for the Absolute Beginner — Hands On — DevOps. What have you built after finishing an online course or learning a new skill? Share in the comments!

About the author

Aloha! I am a Ph.D. candidate at Concordia University in Montreal, Canada, working on computer vision problems. I also work part-time at Décathlon, where I help build data-driven tools to transform sports images and videos into actionable intelligence. If you’re interested to learn more about me, please visit my webpage here.

References

[1] He, K., et al. “Deep residual learning for image recognition”. In CVPR, 2016.

[2] Deng, Jia, et al. “ImageNet: A large-scale hierarchical image database,” In CVPR, 2009.

Join thousands of data leaders in the AI newsletter. Join over 80,000 subscribers and keep up to date with the latest developments in AI. From research to projects and ideas. If you are building an AI startup, an AI-related product, or a service, we invite you to consider becoming a sponsor.

Published via Towards AI

Feedback ↓

Sign Up for the Course
`; } else { console.error('Element with id="subscribe" not found within the page with class "home".'); } } }); // Remove duplicate text from articles /* Backup: 09/11/24 function removeDuplicateText() { const elements = document.querySelectorAll('h1, h2, h3, h4, h5, strong'); // Select the desired elements const seenTexts = new Set(); // A set to keep track of seen texts const tagCounters = {}; // Object to track instances of each tag elements.forEach(el => { const tagName = el.tagName.toLowerCase(); // Get the tag name (e.g., 'h1', 'h2', etc.) // Initialize a counter for each tag if not already done if (!tagCounters[tagName]) { tagCounters[tagName] = 0; } // Only process the first 10 elements of each tag type if (tagCounters[tagName] >= 2) { return; // Skip if the number of elements exceeds 10 } const text = el.textContent.trim(); // Get the text content const words = text.split(/\s+/); // Split the text into words if (words.length >= 4) { // Ensure at least 4 words const significantPart = words.slice(0, 5).join(' '); // Get first 5 words for matching // Check if the text (not the tag) has been seen before if (seenTexts.has(significantPart)) { // console.log('Duplicate found, removing:', el); // Log duplicate el.remove(); // Remove duplicate element } else { seenTexts.add(significantPart); // Add the text to the set } } tagCounters[tagName]++; // Increment the counter for this tag }); } removeDuplicateText(); */ // Remove duplicate text from articles function removeDuplicateText() { const elements = document.querySelectorAll('h1, h2, h3, h4, h5, strong'); // Select the desired elements const seenTexts = new Set(); // A set to keep track of seen texts const tagCounters = {}; // Object to track instances of each tag // List of classes to be excluded const excludedClasses = ['medium-author', 'post-widget-title']; elements.forEach(el => { // Skip elements with any of the excluded classes if (excludedClasses.some(cls => el.classList.contains(cls))) { return; // Skip this element if it has any of the excluded classes } const tagName = el.tagName.toLowerCase(); // Get the tag name (e.g., 'h1', 'h2', etc.) // Initialize a counter for each tag if not already done if (!tagCounters[tagName]) { tagCounters[tagName] = 0; } // Only process the first 10 elements of each tag type if (tagCounters[tagName] >= 10) { return; // Skip if the number of elements exceeds 10 } const text = el.textContent.trim(); // Get the text content const words = text.split(/\s+/); // Split the text into words if (words.length >= 4) { // Ensure at least 4 words const significantPart = words.slice(0, 5).join(' '); // Get first 5 words for matching // Check if the text (not the tag) has been seen before if (seenTexts.has(significantPart)) { // console.log('Duplicate found, removing:', el); // Log duplicate el.remove(); // Remove duplicate element } else { seenTexts.add(significantPart); // Add the text to the set } } tagCounters[tagName]++; // Increment the counter for this tag }); } removeDuplicateText(); //Remove unnecessary text in blog excerpts document.querySelectorAll('.blog p').forEach(function(paragraph) { // Replace the unwanted text pattern for each paragraph paragraph.innerHTML = paragraph.innerHTML .replace(/Author\(s\): [\w\s]+ Originally published on Towards AI\.?/g, '') // Removes 'Author(s): XYZ Originally published on Towards AI' .replace(/This member-only story is on us\. Upgrade to access all of Medium\./g, ''); // Removes 'This member-only story...' }); //Load ionic icons and cache them if ('localStorage' in window && window['localStorage'] !== null) { const cssLink = 'https://code.ionicframework.com/ionicons/2.0.1/css/ionicons.min.css'; const storedCss = localStorage.getItem('ionicons'); if (storedCss) { loadCSS(storedCss); } else { fetch(cssLink).then(response => response.text()).then(css => { localStorage.setItem('ionicons', css); loadCSS(css); }); } } function loadCSS(css) { const style = document.createElement('style'); style.innerHTML = css; document.head.appendChild(style); } //Remove elements from imported content automatically function removeStrongFromHeadings() { const elements = document.querySelectorAll('h1, h2, h3, h4, h5, h6, span'); elements.forEach(el => { const strongTags = el.querySelectorAll('strong'); strongTags.forEach(strongTag => { while (strongTag.firstChild) { strongTag.parentNode.insertBefore(strongTag.firstChild, strongTag); } strongTag.remove(); }); }); } removeStrongFromHeadings(); "use strict"; window.onload = () => { /* //This is an object for each category of subjects and in that there are kewords and link to the keywods let keywordsAndLinks = { //you can add more categories and define their keywords and add a link ds: { keywords: [ //you can add more keywords here they are detected and replaced with achor tag automatically 'data science', 'Data science', 'Data Science', 'data Science', 'DATA SCIENCE', ], //we will replace the linktext with the keyword later on in the code //you can easily change links for each category here //(include class="ml-link" and linktext) link: 'linktext', }, ml: { keywords: [ //Add more keywords 'machine learning', 'Machine learning', 'Machine Learning', 'machine Learning', 'MACHINE LEARNING', ], //Change your article link (include class="ml-link" and linktext) link: 'linktext', }, ai: { keywords: [ 'artificial intelligence', 'Artificial intelligence', 'Artificial Intelligence', 'artificial Intelligence', 'ARTIFICIAL INTELLIGENCE', ], //Change your article link (include class="ml-link" and linktext) link: 'linktext', }, nl: { keywords: [ 'NLP', 'nlp', 'natural language processing', 'Natural Language Processing', 'NATURAL LANGUAGE PROCESSING', ], //Change your article link (include class="ml-link" and linktext) link: 'linktext', }, des: { keywords: [ 'data engineering services', 'Data Engineering Services', 'DATA ENGINEERING SERVICES', ], //Change your article link (include class="ml-link" and linktext) link: 'linktext', }, td: { keywords: [ 'training data', 'Training Data', 'training Data', 'TRAINING DATA', ], //Change your article link (include class="ml-link" and linktext) link: 'linktext', }, ias: { keywords: [ 'image annotation services', 'Image annotation services', 'image Annotation services', 'image annotation Services', 'Image Annotation Services', 'IMAGE ANNOTATION SERVICES', ], //Change your article link (include class="ml-link" and linktext) link: 'linktext', }, l: { keywords: [ 'labeling', 'labelling', ], //Change your article link (include class="ml-link" and linktext) link: 'linktext', }, pbp: { keywords: [ 'previous blog posts', 'previous blog post', 'latest', ], //Change your article link (include class="ml-link" and linktext) link: 'linktext', }, mlc: { keywords: [ 'machine learning course', 'machine learning class', ], //Change your article link (include class="ml-link" and linktext) link: 'linktext', }, }; //Articles to skip let articleIdsToSkip = ['post-2651', 'post-3414', 'post-3540']; //keyword with its related achortag is recieved here along with article id function searchAndReplace(keyword, anchorTag, articleId) { //selects the h3 h4 and p tags that are inside of the article let content = document.querySelector(`#${articleId} .entry-content`); //replaces the "linktext" in achor tag with the keyword that will be searched and replaced let newLink = anchorTag.replace('linktext', keyword); //regular expression to search keyword var re = new RegExp('(' + keyword + ')', 'g'); //this replaces the keywords in h3 h4 and p tags content with achor tag content.innerHTML = content.innerHTML.replace(re, newLink); } function articleFilter(keyword, anchorTag) { //gets all the articles var articles = document.querySelectorAll('article'); //if its zero or less then there are no articles if (articles.length > 0) { for (let x = 0; x < articles.length; x++) { //articles to skip is an array in which there are ids of articles which should not get effected //if the current article's id is also in that array then do not call search and replace with its data if (!articleIdsToSkip.includes(articles[x].id)) { //search and replace is called on articles which should get effected searchAndReplace(keyword, anchorTag, articles[x].id, key); } else { console.log( `Cannot replace the keywords in article with id ${articles[x].id}` ); } } } else { console.log('No articles found.'); } } let key; //not part of script, added for (key in keywordsAndLinks) { //key is the object in keywords and links object i.e ds, ml, ai for (let i = 0; i < keywordsAndLinks[key].keywords.length; i++) { //keywordsAndLinks[key].keywords is the array of keywords for key (ds, ml, ai) //keywordsAndLinks[key].keywords[i] is the keyword and keywordsAndLinks[key].link is the link //keyword and link is sent to searchreplace where it is then replaced using regular expression and replace function articleFilter( keywordsAndLinks[key].keywords[i], keywordsAndLinks[key].link ); } } function cleanLinks() { // (making smal functions is for DRY) this function gets the links and only keeps the first 2 and from the rest removes the anchor tag and replaces it with its text function removeLinks(links) { if (links.length > 1) { for (let i = 2; i < links.length; i++) { links[i].outerHTML = links[i].textContent; } } } //arrays which will contain all the achor tags found with the class (ds-link, ml-link, ailink) in each article inserted using search and replace let dslinks; let mllinks; let ailinks; let nllinks; let deslinks; let tdlinks; let iaslinks; let llinks; let pbplinks; let mlclinks; const content = document.querySelectorAll('article'); //all articles content.forEach((c) => { //to skip the articles with specific ids if (!articleIdsToSkip.includes(c.id)) { //getting all the anchor tags in each article one by one dslinks = document.querySelectorAll(`#${c.id} .entry-content a.ds-link`); mllinks = document.querySelectorAll(`#${c.id} .entry-content a.ml-link`); ailinks = document.querySelectorAll(`#${c.id} .entry-content a.ai-link`); nllinks = document.querySelectorAll(`#${c.id} .entry-content a.ntrl-link`); deslinks = document.querySelectorAll(`#${c.id} .entry-content a.des-link`); tdlinks = document.querySelectorAll(`#${c.id} .entry-content a.td-link`); iaslinks = document.querySelectorAll(`#${c.id} .entry-content a.ias-link`); mlclinks = document.querySelectorAll(`#${c.id} .entry-content a.mlc-link`); llinks = document.querySelectorAll(`#${c.id} .entry-content a.l-link`); pbplinks = document.querySelectorAll(`#${c.id} .entry-content a.pbp-link`); //sending the anchor tags list of each article one by one to remove extra anchor tags removeLinks(dslinks); removeLinks(mllinks); removeLinks(ailinks); removeLinks(nllinks); removeLinks(deslinks); removeLinks(tdlinks); removeLinks(iaslinks); removeLinks(mlclinks); removeLinks(llinks); removeLinks(pbplinks); } }); } //To remove extra achor tags of each category (ds, ml, ai) and only have 2 of each category per article cleanLinks(); */ //Recommended Articles var ctaLinks = [ /* ' ' + '

Subscribe to our AI newsletter!

' + */ '

Take our 85+ lesson From Beginner to Advanced LLM Developer Certification: From choosing a project to deploying a working product this is the most comprehensive and practical LLM course out there!

'+ '

Towards AI has published Building LLMs for Production—our 470+ page guide to mastering LLMs with practical projects and expert insights!

' + '
' + '' + '' + '

Note: Content contains the views of the contributing authors and not Towards AI.
Disclosure: This website may contain sponsored content and affiliate links.

' + 'Discover Your Dream AI Career at Towards AI Jobs' + '

Towards AI has built a jobs board tailored specifically to Machine Learning and Data Science Jobs and Skills. Our software searches for live AI jobs each hour, labels and categorises them and makes them easily searchable. Explore over 10,000 live jobs today with Towards AI Jobs!

' + '
' + '

🔥 Recommended Articles 🔥

' + 'Why Become an LLM Developer? Launching Towards AI’s New One-Stop Conversion Course'+ 'Testing Launchpad.sh: A Container-based GPU Cloud for Inference and Fine-tuning'+ 'The Top 13 AI-Powered CRM Platforms
' + 'Top 11 AI Call Center Software for 2024
' + 'Learn Prompting 101—Prompt Engineering Course
' + 'Explore Leading Cloud Providers for GPU-Powered LLM Training
' + 'Best AI Communities for Artificial Intelligence Enthusiasts
' + 'Best Workstations for Deep Learning
' + 'Best Laptops for Deep Learning
' + 'Best Machine Learning Books
' + 'Machine Learning Algorithms
' + 'Neural Networks Tutorial
' + 'Best Public Datasets for Machine Learning
' + 'Neural Network Types
' + 'NLP Tutorial
' + 'Best Data Science Books
' + 'Monte Carlo Simulation Tutorial
' + 'Recommender System Tutorial
' + 'Linear Algebra for Deep Learning Tutorial
' + 'Google Colab Introduction
' + 'Decision Trees in Machine Learning
' + 'Principal Component Analysis (PCA) Tutorial
' + 'Linear Regression from Zero to Hero
'+ '

', /* + '

Join thousands of data leaders on the AI newsletter. It’s free, we don’t spam, and we never share your email address. Keep up to date with the latest work in AI. From research to projects and ideas. If you are building an AI startup, an AI-related product, or a service, we invite you to consider becoming a sponsor.

',*/ ]; var replaceText = { '': '', '': '', '
': '
' + ctaLinks + '
', }; Object.keys(replaceText).forEach((txtorig) => { //txtorig is the key in replacetext object const txtnew = replaceText[txtorig]; //txtnew is the value of the key in replacetext object let entryFooter = document.querySelector('article .entry-footer'); if (document.querySelectorAll('.single-post').length > 0) { //console.log('Article found.'); const text = entryFooter.innerHTML; entryFooter.innerHTML = text.replace(txtorig, txtnew); } else { // console.log('Article not found.'); //removing comment 09/04/24 } }); var css = document.createElement('style'); css.type = 'text/css'; css.innerHTML = '.post-tags { display:none !important } .article-cta a { font-size: 18px; }'; document.body.appendChild(css); //Extra //This function adds some accessibility needs to the site. function addAlly() { // In this function JQuery is replaced with vanilla javascript functions const imgCont = document.querySelector('.uw-imgcont'); imgCont.setAttribute('aria-label', 'AI news, latest developments'); imgCont.title = 'AI news, latest developments'; imgCont.rel = 'noopener'; document.querySelector('.page-mobile-menu-logo a').title = 'Towards AI Home'; document.querySelector('a.social-link').rel = 'noopener'; document.querySelector('a.uw-text').rel = 'noopener'; document.querySelector('a.uw-w-branding').rel = 'noopener'; document.querySelector('.blog h2.heading').innerHTML = 'Publication'; const popupSearch = document.querySelector$('a.btn-open-popup-search'); popupSearch.setAttribute('role', 'button'); popupSearch.title = 'Search'; const searchClose = document.querySelector('a.popup-search-close'); searchClose.setAttribute('role', 'button'); searchClose.title = 'Close search page'; // document // .querySelector('a.btn-open-popup-search') // .setAttribute( // 'href', // 'https://medium.com/towards-artificial-intelligence/search' // ); } // Add external attributes to 302 sticky and editorial links function extLink() { // Sticky 302 links, this fuction opens the link we send to Medium on a new tab and adds a "noopener" rel to them var stickyLinks = document.querySelectorAll('.grid-item.sticky a'); for (var i = 0; i < stickyLinks.length; i++) { /* stickyLinks[i].setAttribute('target', '_blank'); stickyLinks[i].setAttribute('rel', 'noopener'); */ } // Editorial 302 links, same here var editLinks = document.querySelectorAll( '.grid-item.category-editorial a' ); for (var i = 0; i < editLinks.length; i++) { editLinks[i].setAttribute('target', '_blank'); editLinks[i].setAttribute('rel', 'noopener'); } } // Add current year to copyright notices document.getElementById( 'js-current-year' ).textContent = new Date().getFullYear(); // Call functions after page load extLink(); //addAlly(); setTimeout(function() { //addAlly(); //ideally we should only need to run it once ↑ }, 5000); }; function closeCookieDialog (){ document.getElementById("cookie-consent").style.display = "none"; return false; } setTimeout ( function () { closeCookieDialog(); }, 15000); console.log(`%c 🚀🚀🚀 ███ █████ ███████ █████████ ███████████ █████████████ ███████████████ ███████ ███████ ███████ ┌───────────────────────────────────────────────────────────────────┐ │ │ │ Towards AI is looking for contributors! │ │ Join us in creating awesome AI content. │ │ Let's build the future of AI together → │ │ https://towardsai.net/contribute │ │ │ └───────────────────────────────────────────────────────────────────┘ `, `background: ; color: #00adff; font-size: large`); //Remove latest category across site document.querySelectorAll('a[rel="category tag"]').forEach(function(el) { if (el.textContent.trim() === 'Latest') { // Remove the two consecutive spaces (  ) if (el.nextSibling && el.nextSibling.nodeValue.includes('\u00A0\u00A0')) { el.nextSibling.nodeValue = ''; // Remove the spaces } el.style.display = 'none'; // Hide the element } }); // Add cross-domain measurement, anonymize IPs 'use strict'; //var ga = gtag; ga('config', 'G-9D3HKKFV1Q', 'auto', { /*'allowLinker': true,*/ 'anonymize_ip': true/*, 'linker': { 'domains': [ 'medium.com/towards-artificial-intelligence', 'datasets.towardsai.net', 'rss.towardsai.net', 'feed.towardsai.net', 'contribute.towardsai.net', 'members.towardsai.net', 'pub.towardsai.net', 'news.towardsai.net' ] } */ }); ga('send', 'pageview'); -->