


Car and Pool Detector Using Monk AI
Last Updated on January 7, 2023 by Editorial Team
Last Updated on August 29, 2020 by Editorial Team
Author(s): Omkar Tupe
Computer Vision
About the project
This project is focused on detecting cars and pools from satellite images using CornerNet[1]. Performing object detection, by coding from scratch, can be difficult and tedious for someone not very well acquainted with the field. With Monk AI this can be done in a seemingly easier way. Using Monk AI [2], one can accomplish various computer vision tasks like object detection with very few lines of code. This project can help gain a better understanding of the MonkAI toolkit. Through this blog, I will share some insights about MonkAI, and how it can be used to simplify the process of object detection and build other computer vision applications.
Tutorial available on GitHub.
Features of Monk AI
- A low code programming environment.
- Using MonkAI one can access PyTorch, MXNet, Keras, TensorFlow, etc. with a common syntax.
- For Competition and Hackathon participants: The hassle-free setup makes prototyping faster and easier
The Dataset
For this project, Satellite images are used for training the model to detect cars and pools. Annotations are stored in VOC format. The dataset has 3748 train images and 2703 test images. The dataset is available on Kaggle.
CornerNet
CornerNet, a new approach to object detection where one can detect an object bounding box as a pair of key points, the top-left corner, and the bottom-right corner, using a single convolution neural network. By detecting objects as paired key points, it is possible to eliminate the need for designing a set of anchor boxes that were previously used commonly in single-stage detectors.
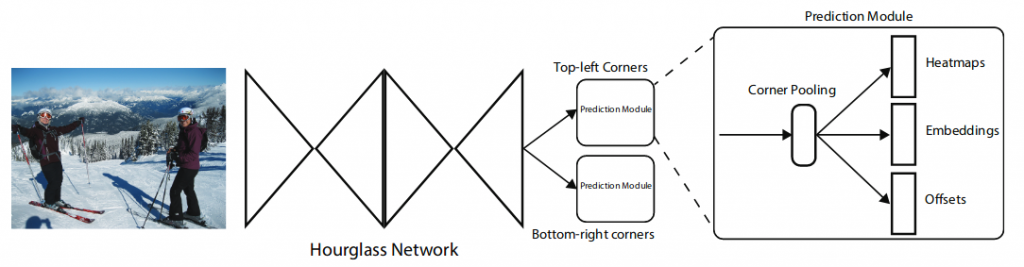
Table of contents
- Installation instructions
- Use an already trained model
- Train a custom detector
— Annotations conversion (VOC to COCO via MONK)
— Training
4. Inference model
1. Installation instructions
Here we are using Google Colab for training as it provides CUDA GPU. But one can use a local device or Kaggle notebook. Now we will setup MonkAI toolkit and dependencies on the colab.
2. Use an already trained model
Monk helps to understand the detection results using a pre-trained model to demonstrate our application.
Downloading the pre-trained model.
Unzip the folder
The obj_satellite_car_pool_trained folder will have the pre-trained model file and some test images.
Setting up a detector
From a given folder, we are using a weight file (obj_satellite_car_pool_trained/CornerNet_Saccade_final-1000.pkl)
From the unzipped folder, we are using some images for inference purposes.
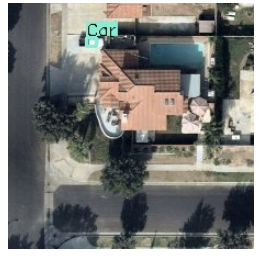
Inference-1
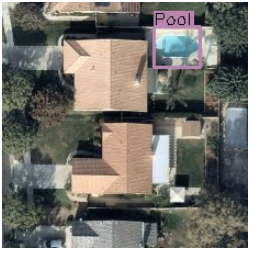
Inference-2
3. Train a custom detector
We are using a dataset from Kaggle so we have to install Kaggle API on colab.
Please follow the steps below to download and use Kaggle data within Google Colab[4]:
- Go to your account, Scroll to API section and Click Expire API Token to remove previous tokens
- Click on Create New API Token — It will download the kaggle.json file on your machine.
- Go to your Google Colab project file and run the following commands:
Time to download your dataset
Go to the dataset you want to download on Kaggle and copy the API command which Kaggle provides. That should look like the following:
To train a model using Cornernet-Saccade, the annotation should be in the COCO format, but we have the annotation in VOC format. Hence, we need to convert VOC format to COCO format via MONK format. You can find detailed code about this on Github
VOC format(Dataset directory structure)
Monk format
COCO format(Desired annotations)
Annotation Conversion
You can find detailed code about this on Github
Training
Using Monk AI we can build concurrent pipeline, we can do model selection and it is easy to set hyperparameters
- Importing dependencies
- Set detector path
- Set dataset and annotation path
- Select model (here we are using CornerNet_Saccade)
- Set hyperparameters(learning rate as 0.00025,total iterations 10000)
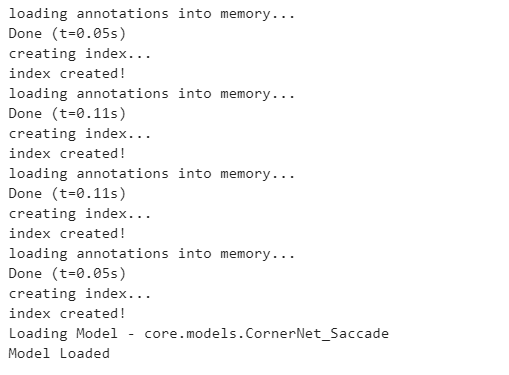
6. Now complete setup for training. Here we are loading annotations in memory followed by index creation and loading model.
7. Now we will start our training as
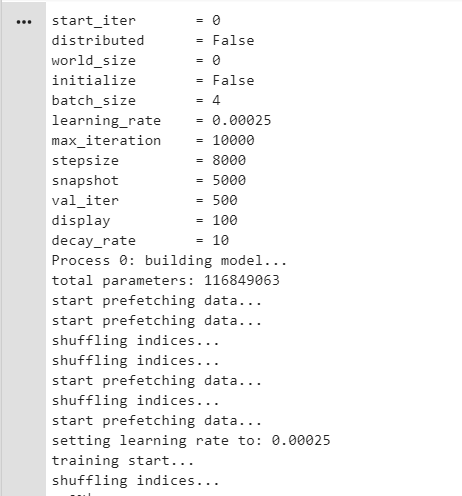
Now here we can see all hyperparameters settings. The total number of available parameters for training is 116849063. It is always best practice that we should shuffle data during each iteration so we are shuffling dataset’s indices.
Weights file will be stored in ‘cache/nnet/CornerNet_Saccade/’ as intermediate as well as the final file.
4.Inference
It will be similar to the pre-trained model but now we will use our own trained model so the model path will be different.
- Set detector path
- Define classes.
3. Set the trained model path.
4. Provide some test images for testing.
Test image-1

Test image-2
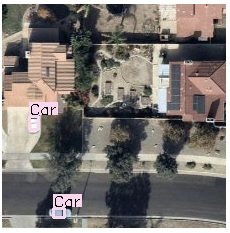
From multiple trial and error threshold is set as 0.3
For threshold value, less than 0.3 multiple detector boxes are observed and for threshold value greater than 0.3 it is difficult for a detector to detect car.
As we used satellite images the size of the car is much less than the pool in terms of pixels. More features are available for pools
Conclusion
To conclude, our task was done in very few lines of code. We have demonstrated only one pipeline in this article, but Monk AI has a total of seven such pipelines from GluonCV to YOLOv3. All in all, Monk AI is a great library that makes working with such computer vision tasks pretty easy.
All the code shown in this article resides in this colab notebook.
You can find many more examples of detection and segmentation in the application model zoo.
Thanks for Reading! I hope you find this article informative & useful. Do share your feedback in the comments section!
References
- CornerNet-https://arxiv.org/abs/1808.01244
- Monk AI- https://github.com/Tessellate-Imaging/Monk_Object_Detection
- Kaggle dataset- https://www.kaggle.com/kbhartiya83/swimming-pool-and-car-detection
- Downloading Kaggle dataset on Google colab- https://www.kaggle.com/general/74235
Car and Pool Detector Using Monk AI was originally published in Towards AI — Multidisciplinary Science Journal on Medium, where people are continuing the conversation by highlighting and responding to this story.
Published via Towards AI
Towards AI Academy
We Build Enterprise-Grade AI. We'll Teach You to Master It Too.
15 engineers. 100,000+ students. Towards AI Academy teaches what actually survives production.
Start free — no commitment:
→ 6-Day Agentic AI Engineering Email Guide — one practical lesson per day
→ Agents Architecture Cheatsheet — 3 years of architecture decisions in 6 pages
Our courses:
→ AI Engineering Certification — 90+ lessons from project selection to deployed product. The most comprehensive practical LLM course out there.
→ Agent Engineering Course — Hands on with production agent architectures, memory, routing, and eval frameworks — built from real enterprise engagements.
→ AI for Work — Understand, evaluate, and apply AI for complex work tasks.
Note: Article content contains the views of the contributing authors and not Towards AI.
Related posts

![Top 15 Computer Vision Datasets [2026]](https://miro.medium.com/v2/resize:fit:700/1*e9tj4kRR7dH_IV8topwfdw.png "Top 15 Computer Vision Datasets [2026]")

")
Recent Posts


")

