Logo:
Logo:  Areas Served:
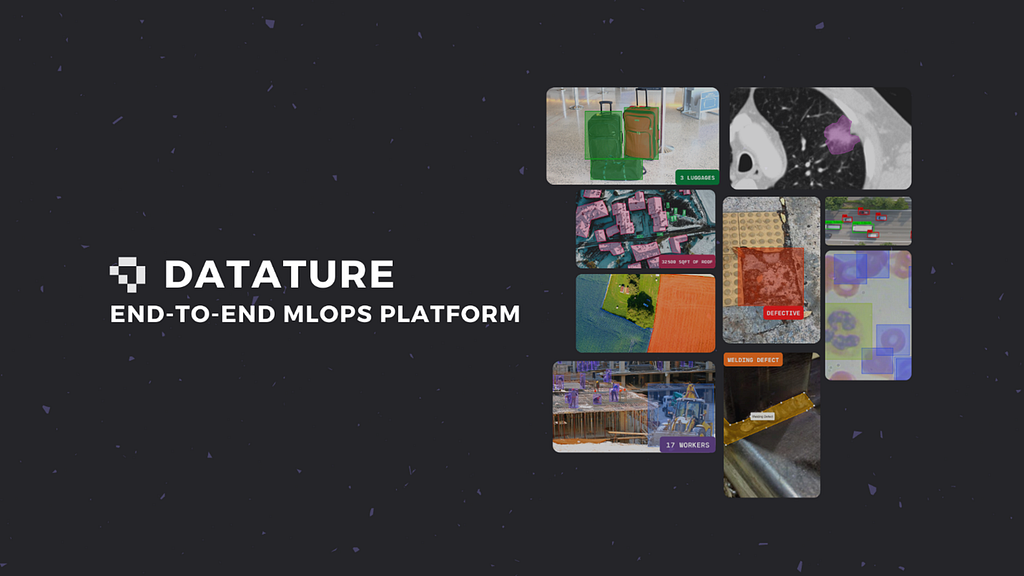
Creating an object detection model the streamlined way
Last Updated on September 19, 2021 by Editorial Team
Author(s): Michelangiolo Mazzeschi
Computer Vision
An in-depth guide on how to create a chess object detection model. Training data is available at my repo.
No-code interfaces are revolutionizing the way ML engineers are working on the most difficult tasks that Machine Learning technology has to offer. One of the toughest coding tasks I have ever encountered is coding the necessary structures to solve computer vision problems, like classification or object detection. The interface I am going to use to perform an object detection experiment throughout this article is called Datature (available at this link).
In this article, I will use a pre-labeled set of images of a chessboard to create my object detection model. Each chess piece in the image has been given the proper label.
Object detection
Object detection is one of the possible tasks of computer vision. An object detection model is able to find objects in an image and then assign them the correct label. Still, it is one of the hardest solutions to build by using code, no matter the libraries that we are using.
Hard-coding the solution
The first issue in hard-coding this solution is that the code itself is quite hard, especially the pre-processing phase for images. Images have to be imported in the correct form, then preprocessed and augmented, and finally fed into a neural network model for training. It takes hours to set up a convolutional neural network, the model used for computer vision tasks, for a given task.
The most frustrating issue in using the latest and more advanced models for image detection is that there are so many things that can go wrong. I recall that my first time using a ResNet for object detection I could not install the previous version of a buggy library because it was conflicting with the latest TensorFlow version.
The latest problem of using code for computer vision is the requirements in computing power. Simply, free notebooks versions or your own computer (even with a very powerful GPU) do not have enough computing power to train a challenging object detection model (with a training set of 200 images) within a single day. This makes it a literal nightmare, and the only solution at your disposal is using a virtual machine, instead.
Nexus
In search of alternatives to run my own object detection algorithms, I found nexus. A no-code platform that allows you to easily set up your computer vision algorithm. The platform has been built to be integrated with your MLOps process, therefore, once your model has been trained, it can be exported as an artifact for deployment using containerization services like Kubernetes.
As outlined in the problems with using hard-coding for computer vision solutions, the platform allows a huge degree of personalization for your algorithms, including several options for preprocessing, and provides you also with the necessary computing power for intensive workloads.
The free tier provides you with 500 minutes of free computing power, which is enough to run several models, especially if you want to experiment with object detection. My model containing 230 images took 14 minutes to train.
MLOps: Make or Break your ML team
MLOps is a workflow that has been adopted by the industry for the creation and development of Machine Learning models. The advantage of using a platform to follow this process is that we can easily create a pipeline that is integrated with other Cloud tools and is flexible enough to sustain quick changes in the future. This may not sound important when you’re handling the model alone, but imagine working with multiple models across multiple teams — each with their own “best practices”. That is when things get messy.
A very commonly adopted adaptation of the MLOps cycle is called CD4ML (continuous delivery for Machine Learning), a framework that has the objective to maximize the efficiency of MLOps.
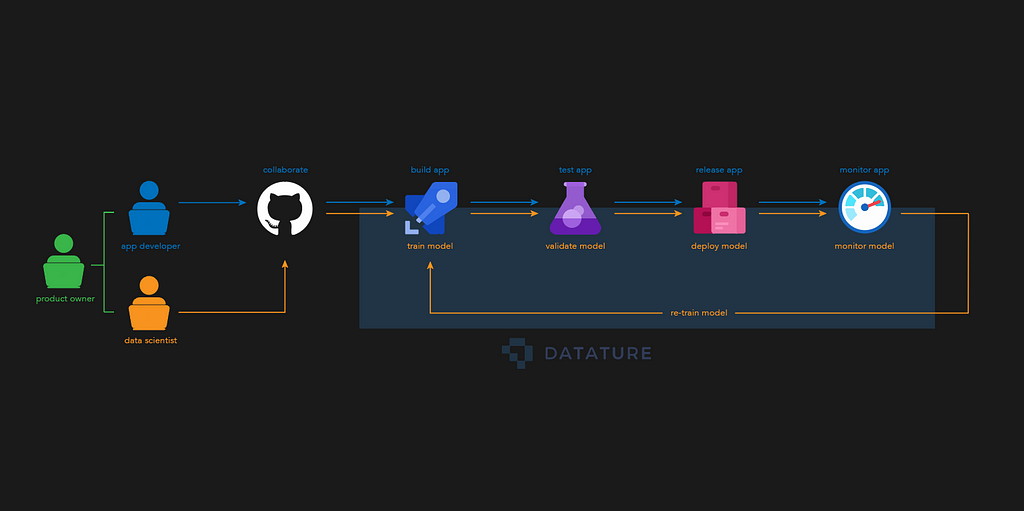
This is the equivalent of the CD4ML pipeline using the Nexus Platform.
Creating an object detection model
I will now give you the necessary instructions to build your own object detection model using the Nexus Platform.

Project Management
Once you’re logged into Nexus, you will be able to create your first project. The platform allows you to have multiple projects which may be helpful if you are managing many different datasets and have specific team members working on them (it’s also a good way to experiment with different parameters when you are training the model).

Files
In my repo you will find a folder with all the files I have been using for this experiment:
Uploading images
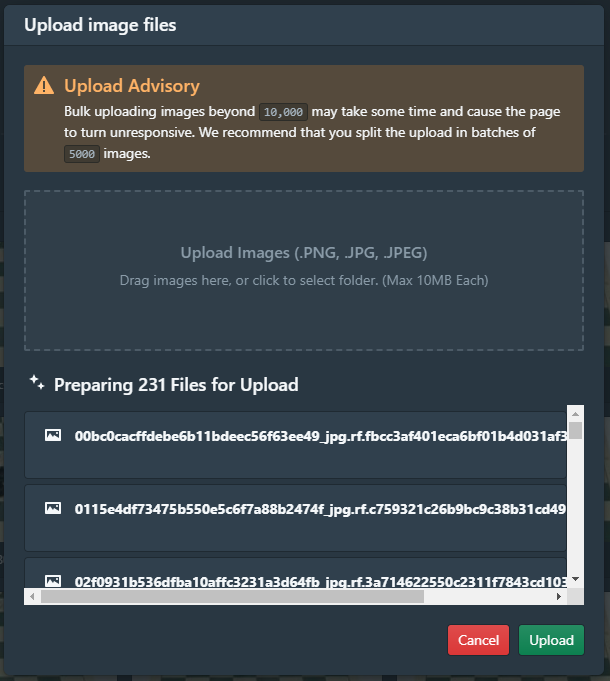
The process of uploading images into the platform is quite straightforward. In my case, I will select the 231 images contained in the training folder. The entire process may require a few minutes to complete. The platform will allow me to split the image set into training and test sets with a split proportion of my choice (by default is .3 for the test set).
Uploading labels
So far, I have been able to upload images on the platform, but I have not labeled them. If the images remain unlabeled, it is impossible to train a supervised learning algorithm, as it both requires features and labels to run successfully.
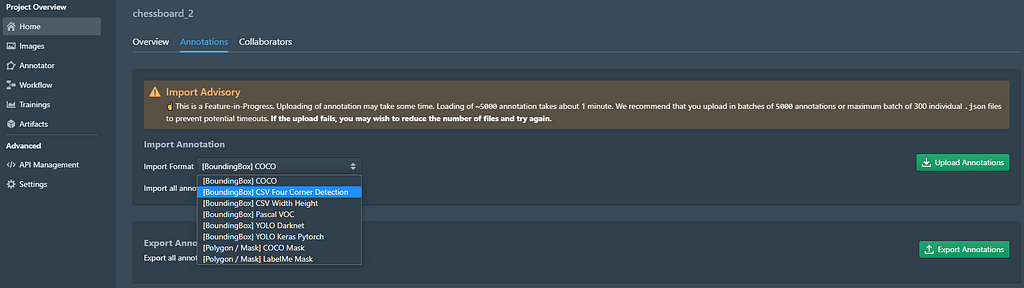
For this dataset, the labels will be stored in a CSV file containing the name of the corresponding image. This is a common format for image processing, the platform, in fact, will allow you to import the labels of several object masks each one indicating a chess piece, and can also be exported if required.
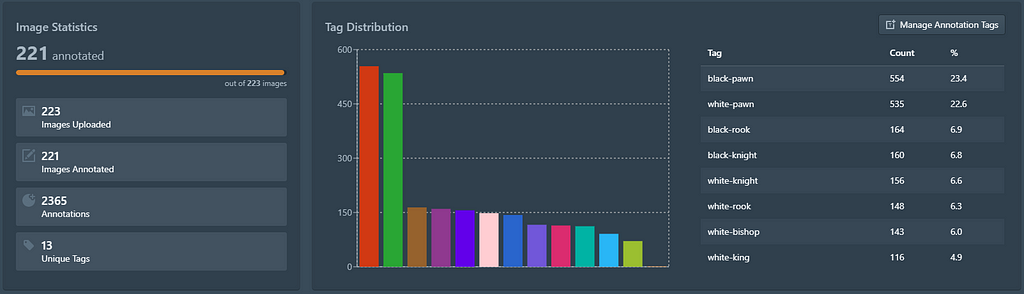
Once the labels have been imported, we have at our disposition a simple Exploratory Data Analysis (a value count operation) that gives us insights into the distribution of labels in the dataset. We can see that only 2 images do not contain any labels, hence we will go ahead and label them.
If we want to validate the model on data that it has never seen before, be careful in uploading the validation set, as the platform will not make a distinction from your training images (model validation is done on Portal, which I write about below).
In-built Annotator
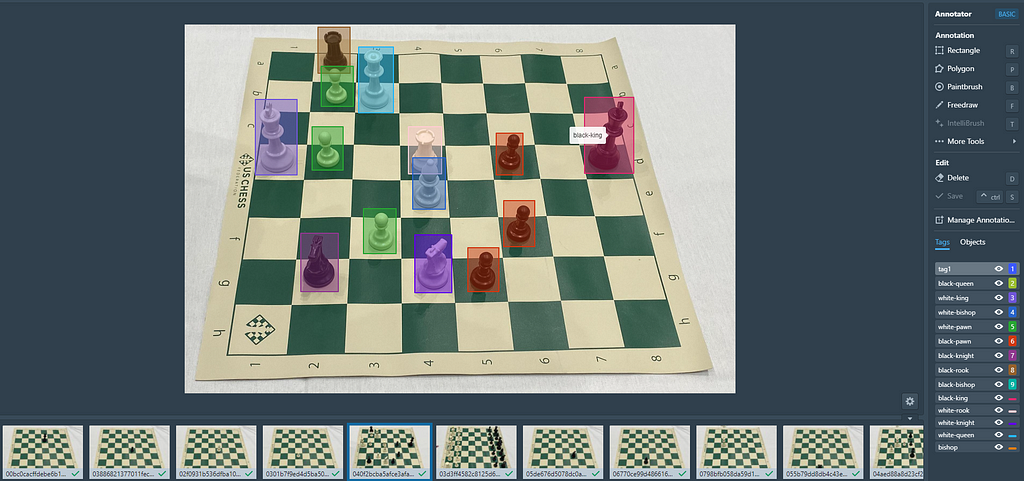
If we wish to explore each image in detail, the annotator section allows us to check all the relevant labels in each image and change labels if required. They have a variety of tools but since I am just training an object detection model, a bounding box will do.
Training the model
The training phase is what makes this platform interesting. As specified, the amount of effort that is required to set up the entire training process is minimal. It will save you from 1 to 5 hours (especially if its your first time coding a complex CNN) of work. The platform streamlines the model-building process by removing complex code to just a matter of clicks while still allowing you the flexibility of selecting pre-processing and augmentation methods.
There is an outstanding quantity of preprocessing methods that you can choose from. Usually, the process of augmenting images is required when the training dataset is quite small, or it has little variance. The objective is to make your model more flexible to possible variations found in real-world images.
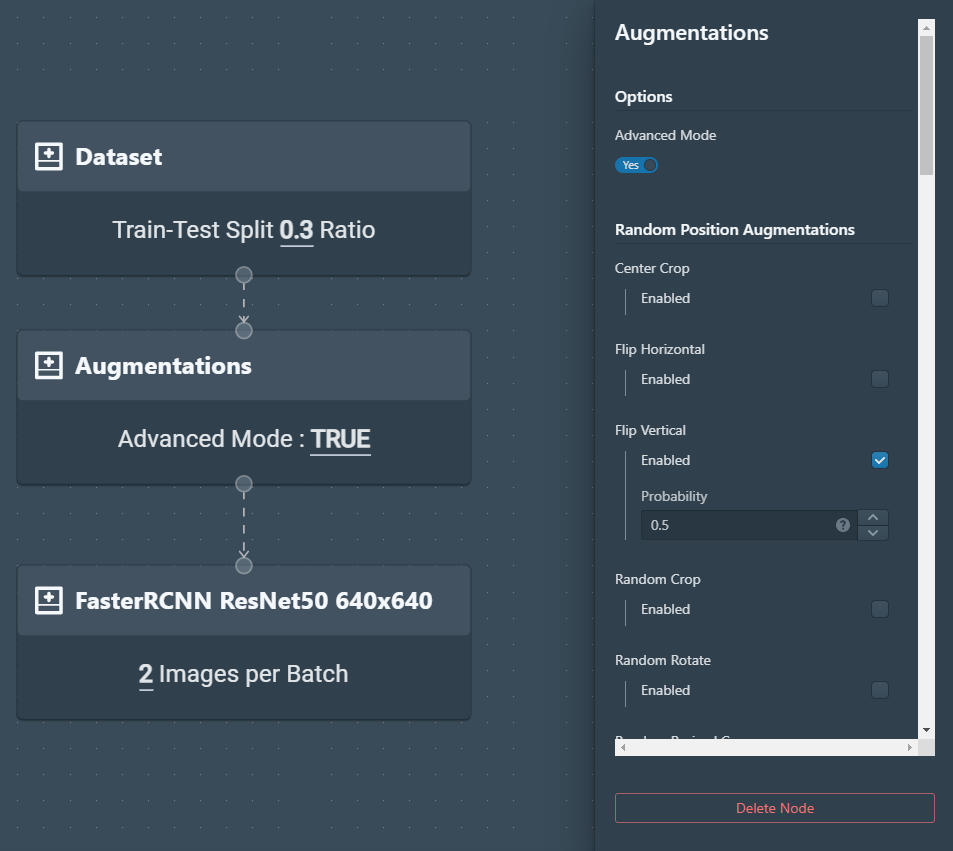
In my case, I will choose a simple data augmentation technique, assigning a probability of .5 to each image for a vertical flip that can be previewed. These augmentations are then done on the fly when the model trains.
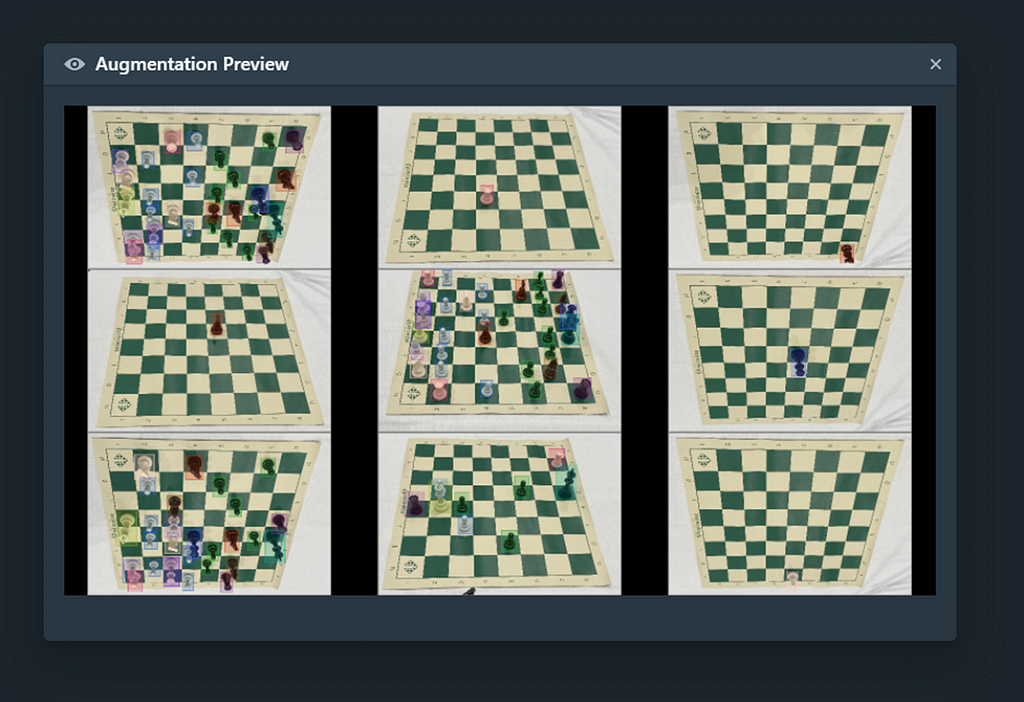
Once my workflow has been properly set, I will be able to preview my augmentations and select the necessary hyperparameters such as the number of epochs/batch size and even the checkpoint strategy (I picked the lowest validation loss for this model).
After a quick check of the parameters, I will initiate the training. Notice that while using code, unless you can connect it to an existing virtual machine, you will need to wait up to 24 hours for an object detection model to be properly trained. The platform allows me to train it in less than 15 minutes, using its GPU.
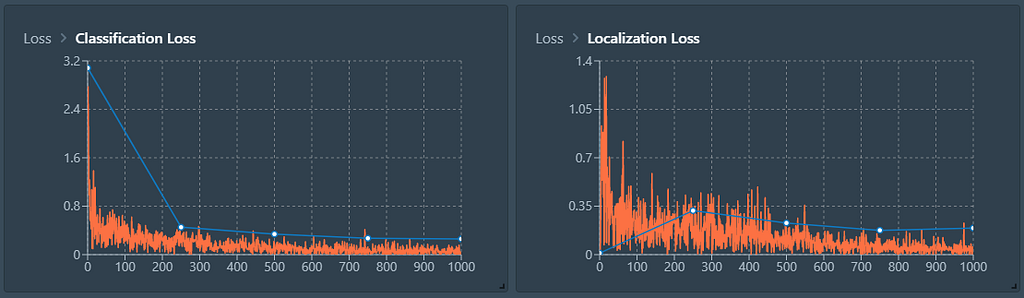
Model Performance
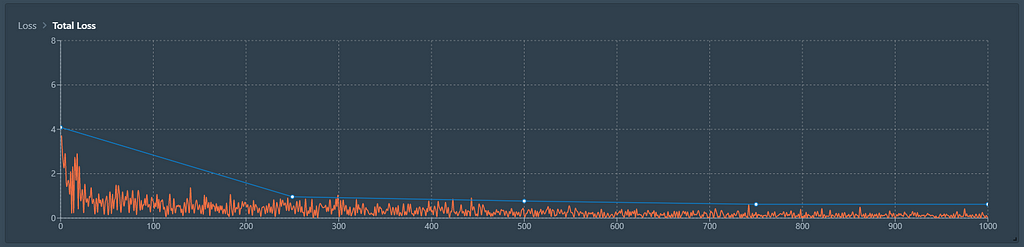
As we can see from the function, it appears that the accuracy of the model keeps slowly increasing with the number of epochs. 1000 Epochs seems a very reasonable number, given that, in comparison, the loss of the model over epoch 400 has almost been cut in half.
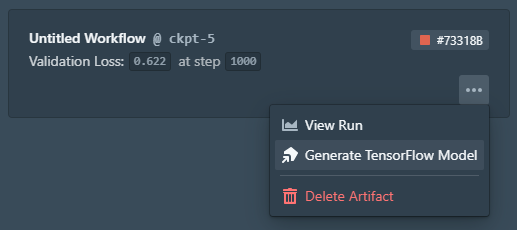
We can always access those stats through our trained model, which now appears in a dedicated section for easy reference across team members.
Exporting the artifact
Once a model has been properly trained, what I have in my hand is called an artifact. The model has to be integrated within the pipelines that form the entire MLOps process so that it can be easily used in production after proper validation. For example, we might want to use Kubernetes as the next step in the MLOps process.
Validating the model
The cool thing about Datature is that it doesn’t just stop at model training, many teams think model training and annotating is the full story, but that’s only half. I used their open-source platform (Portal) to validate how the model is making predictions.
All I had to do was load my model and images into Portal and the model will make inferences based on the position and the types of chess pieces on the board. And there we go! We’ve just trained a Chess Detection model in a seamless manner.
What about Instance Segmentation?
One of the few thoughts I have was how would this translate into an instance segmentation project. Firstly, the annotations would have to be updated individually as segmentation/polygons — but this is an extremely time-consuming task. Luckily, I was part of Datature’s IntelliBrush Early Access and was toying with it during my experimentations.
The premise of IntelliBrush is that the user just needs to select regions that are “inside”, i.e, clicking on the body of a human, or animal — and a polygon will automatically be generated to bound it. More interestingly, a user is also able to select regions that are “outside” of the region of interest to fine-tune the polygonal selection of the object. This is especially helpful in annotating objects that are tightly packed together, where overlaps of differing objects tend to happen.
If you believe that IntelliBrush will help your annotation workflow, do consider trying it out!
Creating an object detection model the streamlined way was originally published in Towards AI on Medium, where people are continuing the conversation by highlighting and responding to this story.
Published via Towards AI
Related posts
Popular posts

 for 2021")


Updates

Recent Posts