


Author(s): Ankur Manikandan
Computer Vision, Machine Learning

Overfitting models to training data is a familiar problem data scientists and machine learning researchers face regularly. Various techniques are available to reduce over-fitting; in this article, we will focus on Data Augmentation.
Breakdown:
1. What is data augmentation?
2. When to perform data augmentation?
3. Data augmentation using ImageDataGenerator
What is data augmentation?
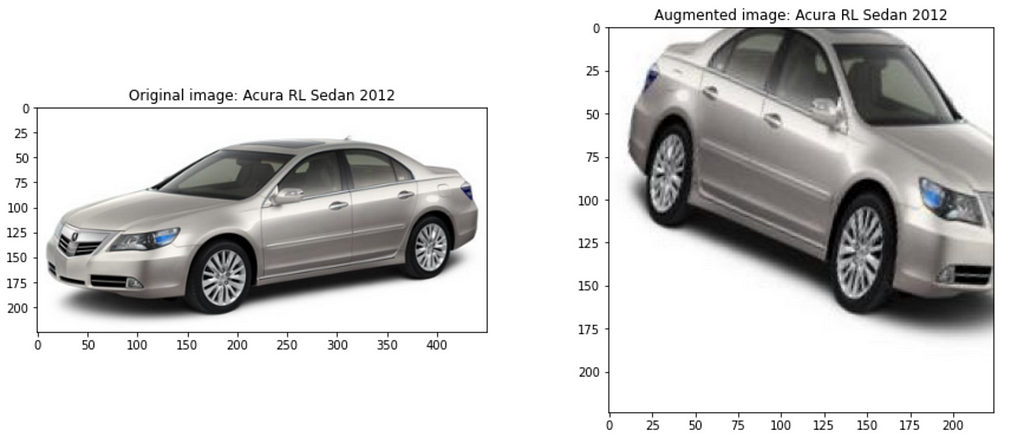
Data augmentation is a technique that leverages transformations or oversampling to artificially inflate the original dataset. [1] Examples of image transformations are image rotation, altering image brightness, flipping an image horizontally or vertically, etc.
When to perform data augmentation?
Deep Learning has helped us achieve state-of-the-art performance on computer vision tasks. Nevertheless, they are susceptible to overfitting. Let’s go through a simple example —
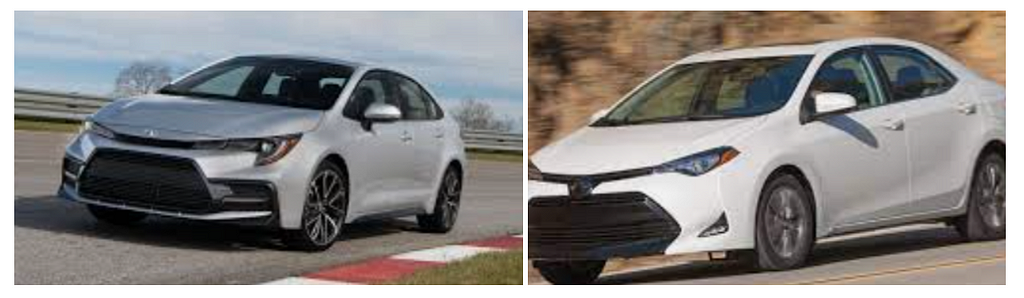
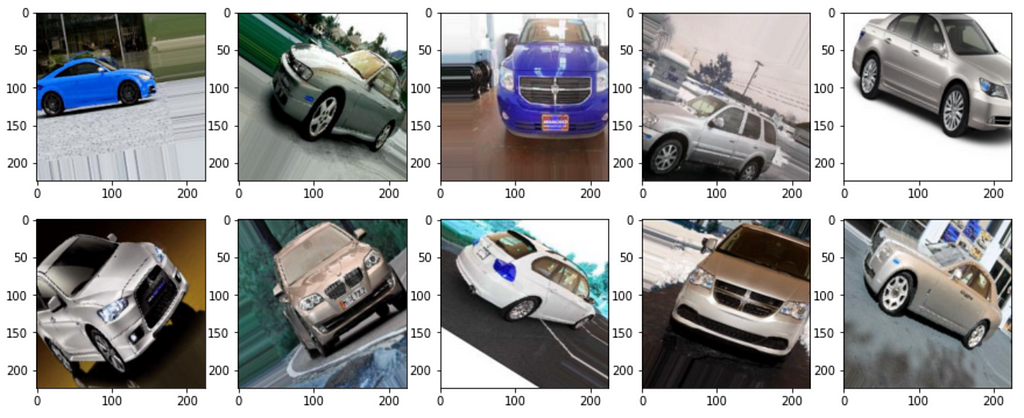
Say you want to build a neural network to identify Toyota Corollas. You have collected training data, and your images are very similar to the ones shown below.

You want to test your model in the wild. Say you come across the following image.

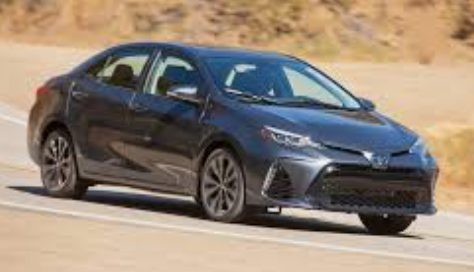
Notice the car is facing the opposite direction compared to your training images. Given such an image, your model may fail to identify the car is a Toyota Corolla. When you have a training dataset with images that look very similar to each other, your model will fail to learn relevant features and will be unable to generalize to images it sees in the real-world. To avoid this problem, we can apply data augmentation techniques to alleviate over-fitting and enhance the model’s generalizability.
It is essential not to get carried away with data augmentation and apply transformations that are outside the context of the real world.

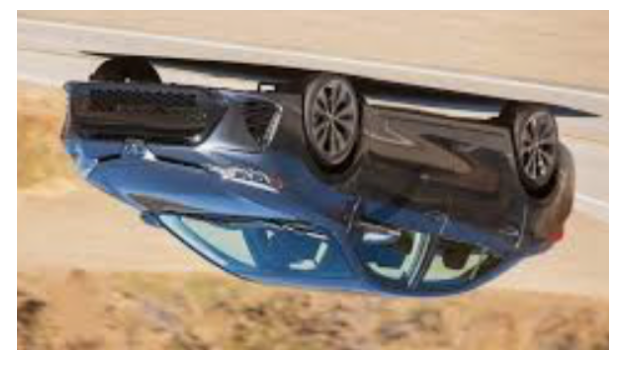
Apply transformations that are within the context of the problem you are attempting to solve.
Data augmentation using ImageDataGenerator
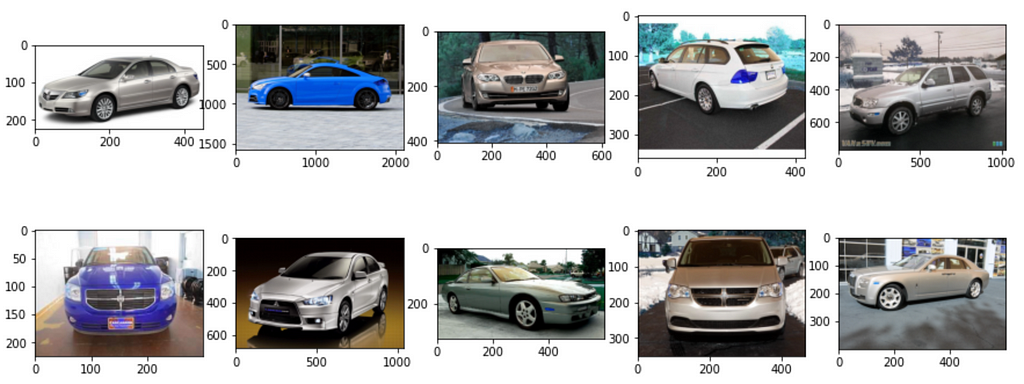
We will use the Stanford Car Dataset for this tutorial. You can follow the code via Google Colab.
The dataset is large. For this tutorial, we will sample a few images to understand data augmentation.

Next, we will define the parameters of the image generator.
DATA_AUG_BATCH_SIZE = 2  # batch size for data augmentation
img_size = (224, 224)  # input image size to model
# Number of steps to perform data augmentation
n_steps_data_aug = np.ceil(df_sample.shape[0]/DATA_AUG_BATCH_SIZE).astype(int)
- We define a batch size for the image generator. This is analogous to batches in model training.
- img_size is the image size required by the model. If you are using transfer learning specific models have their own specifications for the input size of the images to the model.
- n_steps_data_aug is analogous to epochs in model training. In this tutorial, we generate a new image corresponding to every sampled image. Iterating the generator n_steps_data_aug times generates the required number of images.
# Image data generator. Transformations to be applied
datagen = ImageDataGenerator(rescale=1./255,
rotation_range=40,
width_shift_range=0.2,
height_shift_range=0.2,
zoom_range=0.2,
horizontal_flip=True,
brightness_range=[0.4, 1.0],
fill_mode='nearest')
- rescale multiplies each pixel value with the rescale factor. It helps with faster convergence.
- rotation_range rotates the image randomly with maximum rotation angle, 40.
- width_shift shifts the image by the fraction of the total image width, if float provided.
- height_shift shifts the image by the fraction of the total image height, if float provided.
- zoom_range zooms into the image. A random number is chosen in the range, [1-zoom_range, 1+zoom_range].
- horizontal_flip randomly flips images, horizontally.
- brightness_range alters the brightness of the image. A random number is picked in the range provided.
- fill_mode fills the empty space in an image using various techniques selected by the user. Empty spaces occur when images are shifted along their width or height.
If you would like to learn more about the transformations and other options, visit TensorFlow Core v2.4.1 — ImageDataGenerator.
There are a few ways to pass the images to the data generator.
- flow: You pass image data and label data as arrays.
- flow_from_dataframe: You pass a dataframe and a path to the directory that contains the images. The dataframe has two columns, one column contains the file path relative to the directory path, and the second column contains the labels.
- flow_from_directory: You pass the directory path that contains the images categorized by subdirectories. Each subdirectory corresponds to a label — an example of a file path structure, imgs/dogs/img01.png, imgs/cats/img01.png. There are two classes, dogs and cats.
We will use flow_from_dataframe to feed the images to the data generator. Below you can see how the dataframe is structured. In the Google Colab notebook, you can look at the code to see how I create this dataframe.

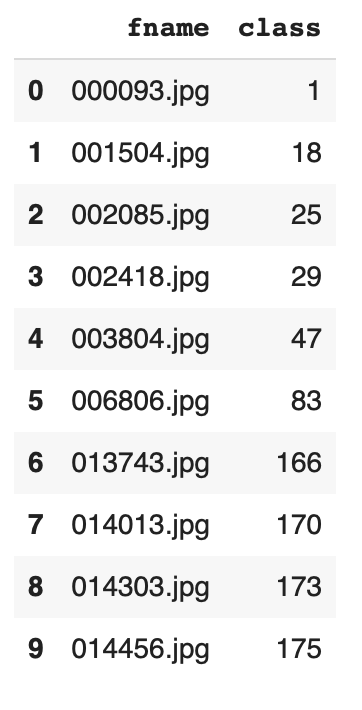
# Feed images to the data generator
aug_gen = datagen.flow_from_dataframe(dataframe=df_sample, directory=img_path, save_to_dir=aug_img_path, save_prefix='aug', save_format='jpeg', x_col="fname", y_col="class", batch_size=DATA_AUG_BATCH_SIZE, seed=SEED, shuffle=False, class_mode="categorical", target_size=img_size)
Output:
Found 10 validated image filenames belonging to 10 classes.
The above code feeds the images to the data generator. df_sample is the dataframe I have shown above. If you would like to save the images to a directory, provide a path to save_to_dir. ImageDataGenerator saves the generated images with file names defined by a pattern:prefix_idx_randn
- prefix: prefix provided by user
- idx: index of data point in the dataframe fed to generator
- randn: random number
# Generated file names
['aug_1_5664789.jpeg',  'aug_7_631054.jpeg',  'aug_5_6028627.jpeg',  'aug_4_8351445.jpeg',  'aug_0_9784633.jpeg',  'aug_6_5123896.jpeg',  'aug_2_3921660.jpeg',  'aug_3_7757856.jpeg',  'aug_8_8252162.jpeg',  'aug_9_5698539.jpeg']
Generate new images.
# Run the data generator
for i in range(n_steps_data_aug):
    next(aug_gen)
# Number of augmented images created
aug_file_nm = os.listdir(aug_img_path)
number_files = len(aug_file_nm)
print("Number of new images generated: {}".format(number_files))
Output:
Number of new images generated: 10
We use n_steps_data_aug to control how many times to run the data generator. Earlier in the article, I mentioned that we want to generate one new image for every sampled image.

Some of the images may not resemble real-world data, so be very careful when applying transformations to images.
Lastly, if you would like to associate the appropriate classes to the generated images, you can split the generated file name, extract the index and determine the label. The code to determine the appropriate label is available in the Google Colab notebook.

I hope this article has been helpful and has provided you with a high-level understanding of Tensorflow’s ImageDataGenerator. If you would like to dive deeper into data augmentation, here are a few resources:
- TensorFlow Core v2.4.1 — ImageDataGenerator
- How to Configure Image Data Augmentation in Keras
- Tensorflow’s experimental preprocessing layers
References
[1] Shorten, C., Khoshgoftaar, T.M. A survey on Image Data Augmentation for Deep Learning. J Big Data 6, 60 (2019). https://doi.org/10.1186/s40537-019-0197-0
[2] TensorFlow Core v2.4.1 — ImageDataGenerator

An Introduction To Data Augmentation for Images, Using Tensorflow’s ImageDataGenerator was originally published in Towards AI on Medium, where people are continuing the conversation by highlighting and responding to this story.
Published via Towards AI