Logo:
Logo:  Areas Served:
 ![Vertex AI pipelines for beginners using custom Docker images [Part 2]](https://cdn-images-1.medium.com/max/1024/1*3Wl3i9POPdBA20zbgtQeXw.jpeg)
Vertex AI pipelines for beginners using custom Docker images [Part 2]
Last Updated on January 6, 2023 by Editorial Team
Last Updated on March 2, 2022 by Editorial Team
Author(s): Bildea Ana
Originally published on Towards AI the World’s Leading AI and Technology News and Media Company. If you are building an AI-related product or service, we invite you to consider becoming an AI sponsor. At Towards AI, we help scale AI and technology startups. Let us help you unleash your technology to the masses.
Machine Learning, MLOPS
Vertex AI pipelines for beginners using custom Docker images [Part 2]
A step by step tutorial on how to configure your custom Docker image
Motivation
In my previous post, I have discussed the process of how to implement custom pipelines in Vertex AI using Kubeflow components. To make it straightforward we have discussed a common use case called “Predict the wine quality”.
In this post, I will address mostly the creation of docker images. The goal is to explain how to configure your custom docker images from scratch. We will proceed with the steps to create a Docker image, followed by how to publish an image, and how to use the image in a pipeline component.
Background terms
Before moving further, let’s clarify a few terms that we are going to use.
So what is docker? Docker is simply an open containerization platform that packages your application and all its dependencies in a container. It simplifies the process of developing and running applications. It helps you to control and run your application easily from one environment to another.
Cloud Build is the official Google Cloud Platform (GCP) image, builder. It is a fully-managed CI/CD platform that enables you to automate your builds.
Artifact Registry is a package manager fully automated and integrated with most CI/CD tools.
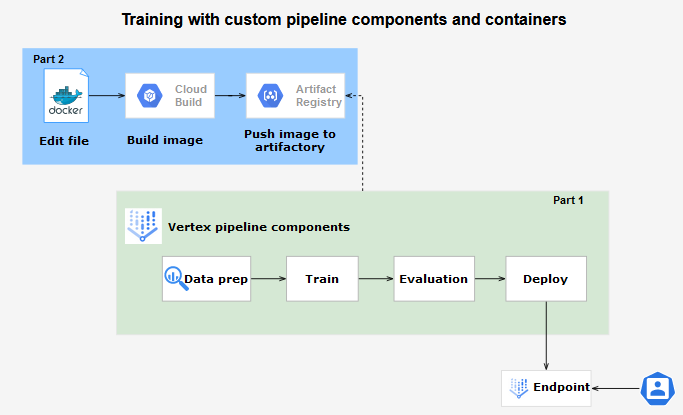
Architecture overview Part 2 (focus on the blue box)
The Docker image creation starts with the Dockefile creation. After the Dockerfile is ready, we build the image invoking the Dockefile using the GCP Cloud Build and consequently push it to Artifact Registry. The image can be used by a pipeline component once the image is available on the Artifact Registry.
Environment set up
Requirements:
- Vertex AI Workbench
- Python 3
- Kubeflow pipeline components
- Docker
To install the Kubeflow components, the ai-platform, and import the needed libraries please refer to the section environment set-up in my previous post.
Creation of a Docker image for training
1. DockerFile
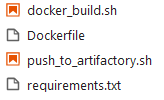
Create a docker-train directory on your Workbench to save the Dockefile and all the needed scripts. In the end, it should look like this:
Each docker image creation needs a Dockerfile (a text document) that contains the list of instructions to build. In fact, in the Dockerfile each instruction creates a new layer on top of the previous one.
It is important to recall several important instructions:
- FROM: defines the base image to be used by the container.
- WORKDIR: specifies the working directory of a container.
- COPY: copies files/directories from the host to the docker container.
- RUN: enables command execution in the container.
A DockerFile starts always with FROM command followed commonly by a set of instructions. For instance, in our case, WORKDIR specifies the directory we are going to use for our application. We can copy or not files from the local file to the docker directory with the COPY instruction. In our case, we copy the local requirements.txt file to the app directory. We use RUN instruction to start the installation of the Python libraries mentioned in the requirements.txt file.
For our example, our requirements.txt contains Pandas, NumPy, and scikit-learn libraries.
pandas==1.3.3
numpy==1.19.5
scikit-learn==0.24.2
2. Docker build
Once your Dockerfile is ready, we need to build it. Check that in your local docker-train directory you have the Dockefile and the requirements.txt. Add the docker_build.sh as in the example below. The script itself contains the generic parameters of the GCP environment, the name of the image, and the command to build the image. To generate the docker image locally you need to build it by typing ./docker_build.sh in your Workbench console. Note that to be able to track the image on GCP I recommend tagging the image with the Project_ID, and the Region.
3. Push the image to Artifact Registry
First, we need to create a repository for our application in the Artifact Registry. We have to mention the format of the repository, docker in our case, and the region. Be aware that the gcloud needs to be registered to Docker registries. Therefore we use gcloud auth configure-docker command to be sure that gcloud has the proper credentials. Finally, we push the local docker image to the created repository in the Artifact Registry using the docker-push command.
Remind to change the PROJECT_ID in all files with your GCP project id.
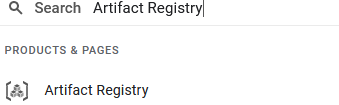
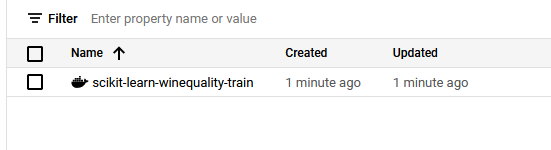
Don't forget to go to the GCP Artifact Registry to check that your image is available. Go to the search tab on GCP :
Click on the Artifact Registry :
If so, we can use it as a base image in the train component as follows:
Creation of a Docker image for deployment
We can simply use the previously created docker image. Otherwise, we have to repeat the above steps by modifying the name of the image from train to predict in all the scripts (i.e. IMAGE = scikit-learn-winequality-predict:latest). Eventually, add new libraries in the requirements.txt file. After the image is available on the Artifact Registry, add the URL on your deploy component and rerun the deploy component and the pipeline. Please remind to refer to the notebook I have used.
To test the real-time prediction, list all the deployed models. Recall that each pipeline and model is timestamped. List the endpoint id of the last deployed model and make a prediction giving the instance vector. The default prediction supports instance vector format : [list of features to be predicted].
To resume
We have learned how to create a Docker image on our local Workbench Vertex AI and how to use it in our custom Vertex AI pipeline.
All the resources are available on my GitHub. In my next post, I will show you how to deploy a custom prediction service using Flask.
DevOps was originally published in Towards AI on Medium, where people are continuing the conversation by highlighting and responding to this story.
Join thousands of data leaders on the AI newsletter. It’s free, we don’t spam, and we never share your email address. Keep up to date with the latest work in AI. From research to projects and ideas. If you are building an AI startup, an AI-related product, or a service, we invite you to consider becoming a sponsor.
Published via Towards AI
Related posts
Popular posts

 for 2021")


Updates

Recent Posts